As an Amazon Associate, I earn from qualifying purchases at no extra cost to you.
Keurig Frother Not Working: Here’s How to Easily Fix It!
The Keurig frother is loved by coffee enthusiasts and frothy beverage lovers everywhere. It’s designed to make a creamy froth for delicious specialty drinks. Like any kitchen appliance, Keurig frothers can have issues. One common frustration is when they stop working properly.
If your Keurig frother doesn’t froth milk well, it can ruin your morning or coffee time. To fix a broken frother and enjoy frothy drinks again, it’s important to understand the causes and troubleshoot the issue.
In this guide, we will explore issues and solutions when your Keurig frother isn’t working. We will discuss milk type, temperature, maintenance, and cleaning for your Keurig frother to help you achieve the perfect froth every time. This guide helps you quickly fix frother issues, whether you’re a barista or a coffee lover.
Why is My Keurig Frother Not Working? A Step-By-Step Troubleshooting Guide
If your Keurig frother isn’t working, you’re not alone. Keurig users often face this problem. Luckily, there are ways to fix your frother. In this guide, we’ll help you troubleshoot and resolve common issues with step-by-step instructions.
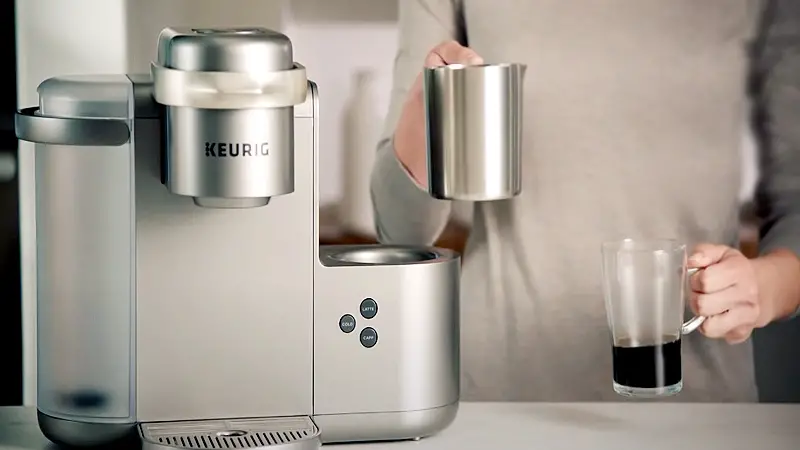
1. Check Power Connection
Before troubleshooting further, make sure to check the power connection of your Keurig frother. A loose power connection can cause a non-functional frother, making you confused and frustrated. To fix the issue, follow these steps:
- Check the outlet: Make sure your Keurig frother is plugged into a working outlet. The power cord may not be securely connected if it gets bumped or moved accidentally. Push the plug into the outlet gently for a secure fit.
- Battery Check (if needed): Check if the batteries in your Keurig frother are inserted correctly and fully charged. Batteries weaken over time, causing less frothing. Try new batteries.
- Check the cord: Check the power cord for any visible damage, like frayed wires or exposed conductors. Replace a faulty cord for safety. A damaged cord can affect the frother’s functionality and pose electrical hazards.
- Power switch: Check if your frother’s switch or button is turned on. Users may accidentally turn off the frother, thinking it’s not working.
To fix a broken Keurig frother, start by checking the power. Check the power connection first to solve frothing problems. If needed, troubleshoot further.
2. Inspect Frother Components
The Keurig frother has different parts like the whisk, lid, and pitcher that are important for it to work correctly. Components must be clean and undamaged. Here’s a detailed guide to troubleshooting:
Whisk Inspection
Inspect the frother’s whisk closely. It creates froth in your drinks. Check for wear, like bent or damaged whisk wires. Small whisk damage can affect frothing. If you have problems with the whisk, get a new one that works with your Keurig frother.
Inspecting the Lid
The frother’s lid prevents spills and maintains a consistent temperature while frothing. Check the lid for any damage that could affect its function. Also, check if the lid seals properly to prevent leaks while using.
Pitcher Evaluation
The Keurig frother pitcher is where the magic happens. It’s important to keep this component in good shape. Check the pitcher for wear or damage. Clean the interior regularly to remove milk residues. Look for discoloration or staining, which could mean it needs a better cleaning or replacement.
Deep Clean
Clean your pitcher thoroughly, regardless of its condition. Residue in the pitcher can affect frothing and taste. To clean the pitcher, remove it from the frother and wash it with warm, soapy water. Focus on corners and crevices where residue builds up. Rinse pitcher well to remove soap.
Regularly maintaining and caring for your Keurig frother will make it last longer and give you better frothing results. By inspecting and cleaning these elements, you improve frother performance.
3. Clean the Frother Well
To fix a malfunctioning Keurig frother, start by cleaning it thoroughly. Residue can build up in the frother over time, affecting its performance and the quality of your frothed drinks. To clean your frother and make it work better, follow these steps:
Take apart the frother
Disconnect the frother from its power source, especially if it’s electric. Safety is crucial when using electronic appliances. After unplugging, remove the whisk and lid to disassemble the frother. This lets you clean all the components.
Wash the whisk and lid
The whisk and lid are important parts of your Keurig frother. Use warm, soapy water to clean them well. Be thorough. Check for milk residue or buildup on the whisk. Use a soft brush or cloth to gently clean these areas, making sure they are residue-free. Rinse the whisk and lid well with running water to remove soap. This step prepares your frother for frothing.
Clean the pitcher
The Keurig frother pitcher is where the magic happens. It holds the milk or liquid you want to froth. Clean the pitcher thoroughly with warm, soapy water. Remove all milk residue, especially in corners and crevices where buildup happens. Use a bottle brush or toothbrush for tight spots. Rinse the pitcher with water to remove the soap residue. A clean pitcher improves frothing and keeps your drinks pure and flavorful.
Clean the frother
Mineral deposits can build up on the frother’s heating element over time, especially in hard water areas. Deposits can block heat transfer and reduce frothing performance. To solve this problem, do the following steps:
- Mix water and white vinegar in the pitcher. White vinegar breaks down mineral buildup effectively.
- Run a frothing cycle with a vinegar-water mixture, no milk. This process removes mineral deposits on the heating element.
- After descaling, rinse the frother with water. This step is important to remove any leftover vinegar residue that could affect the taste of your frothy drinks.
- Regular descaling can extend the life of your Keurig frother and keep it working well. Check the user manual for instructions on how often to descale your frother, based on your water hardness.
Follow these steps to clean your Keurig frother and keep it in good condition. A clean frother ensures consistent frothed beverages every time.
4. Check Frother Temperature Settings
Keurig frothers have adjustable temperature settings. Adjusting the frother’s temperature settings can greatly affect the quality and texture of your frothed drinks. If your frother isn’t giving you the desired results, check the temperature settings to make sure they match your preferences. Here’s how:
Find the Temperature Controls
Learn how to use the temperature controls on your Keurig frother. The controls may vary by model, but they are usually easy to find and use.
View Current Setting
Check the frother’s temperature setting before making adjustments. This will help you understand the current frother configuration.
Temperature Settings Explained
Keurig frothers have temperature options: low, medium, and high, or specific values. These settings control the frothing temperature of your milk or beverage.
Make Necessary Adjustments
Adjust the frother’s temperature setting if it’s not to your liking. To get a hotter froth, raise the temperature setting. For a milder froth, choose a lower temperature. Different beverages like lattes and cappuccinos need different temperature settings for frothing.
Test the Frother
Test the frother’s performance with your chosen temperature setting after making adjustments. Add milk or your preferred beverage to the pitcher, then froth. Watch the milk temperature when it’s frothed. If it meets your expectations, you’ve optimized the temperature settings. Keep making adjustments until you get the result you want.
Temperature Tips
Remember, the perfect temperature for your drink depends on what you’re making and your preference. A latte may need a cooler temperature than a cappuccino. Try different settings to find the perfect balance for your favorite drinks.
Adjusting the temperature settings on your Keurig frother allows you to customize your frothed beverages to your liking, serving them at the perfect temperature for your enjoyment.
5. Milk Quality is Important
Not all milk is the same in frothing. The milk you use affects how your frothed drinks taste and feel. Knowing about different milk types is important for getting the perfect froth. Why milk quality matters and how to maximize it.
Types of Milk
Keurig frothers can froth different types of milk. Options include whole milk, 2% milk, skim milk, and dairy-free alternatives like almond milk, soy milk, and oat milk. Each milk type affects frothing differently.
Fat
Milk fat affects frothing. Whole milk makes a creamier froth. Choose whole milk for a rich froth. Skim milk may create a lighter froth.
Protein Makeup
Milk proteins, like casein and whey, help create froth. These proteins stabilize and maintain the froth’s texture. Almond milk and soy milk have different proteins, which can affect frothing. You may need to experiment to get the froth you want.
Lactose-free Choices
If you can’t have lactose or don’t want dairy, there are many non-dairy milk options. Almond, soy, and oat milk are popular choices. These options have different flavors and frothiness. Almond milk makes a nutty froth, while soy milk creates a creamy froth.
Testing
Experimenting is necessary to achieve the perfect froth with your choice of milk. Froth your milk with the Keurig frother and see how it tastes and feels. If you don’t like it, try changing other things like temperature or frothing methods.
Freshness is Important
Freshness is important no matter what type of milk you choose. Cold milk froths best. Use fresh milk. Using bad milk can result in poor frothing and a bad taste.
Non-dairy Milk Options
When using dairy-free milk, know its unique properties. Certain dairy-free milk may need more frothing time or different temperature settings for best results. Reading product labels for frothing recommendations can help.
6. Froth Fresh Milk
Fresh milk is important for froth. Fresh milk is important for texture, consistency, and flavor in frothed beverages. Why fresh milk matters and how to froth with the freshest milk available.
Chilly and Crisp
Cold, fresh milk froths best. Cold temperature and fresh milk are key for creamy froth. Keep milk in the fridge until ready to use.
Check the Expiry Date
Check the milk carton expiration date before using. Expired milk can ruin frothing and taste bad. Drink milk before it expires.
Don’t Use Pre-frothed Milk
Reheating frothed milk reduces its quality and ability to froth. Use fresh milk for each frothing cycle. Don’t reheat frothed milk, it can turn out bad.
Store Milk
Store milk properly to keep it fresh. Store milk in a sealed container to keep it fresh and safe. Keep it in the coldest part of your fridge, usually near the back.
Milk Quality
Choose good quality milk. Good milk from trusted producers froths better. If you love frothing, try artisanal or organic milk.
Try Different Brands
Milk brands can have different frothing results due to processing and sourcing differences. Try different milk brands for better froth.
7. Frothing Technique
The Keurig frother makes frothing easier, but sometimes the problem is not the device itself, but how you froth. To get the perfect froth, pay attention to details and use the right approach. To improve your frothing technique, follow these guidelines:
Submersion
First, make sure you put the frother’s whisk in the milk or liquid properly. Fully immerse the whisk and cover the bottom of the pitcher. Incomplete submersion can cause uneven frothing and texture.
Hold It at a Right Angle
The frother angle is important. Hold the frother at a slight angle with the whisk submerged. Hold the frother less vertically to prevent splattering and improve frothing. The right angle helps the whisk froth milk efficiently.
Up and Down Motion
Froth by moving the frother up and down slowly. Avoid sudden movements, as they can disrupt frothing and cause inconsistent results. Whisk smoothly for even froth.
Frothing Takes Time
Be patient for perfect froth. Give the frother enough time to work. Rushing can lead to poor results. The froth density may take a minute or two, depending on the amount of milk and the frothing technique.
Try and Practice
Frothing is both an art and a science. Don’t worry if you don’t get perfect results immediately. Try different techniques, like changing speed and depth, until you find the method that always gives you the froth you want. Practice improves skill, so keep refining your frothing technique.
Improve your frothing technique and pay attention to these details for better frothed beverages.
8. Check for Clogs or Blockages
Keurig frothers can get clogged like other kitchen appliances. Obstructions can disrupt frothing and affect performance. To keep your frother working well, regularly check for clogs and clear any blockages. Here’s a simple process to fix this issue:
Be Safe
Before starting, make sure the frother is unplugged. Safety is important when working with electrical appliances.
Check the Steam Wand
Inspect the frother’s steam wand and openings where steam and milk flow. Check for any blockages in the frother, like dried milk or foreign particles. Obstructions can block steam and milk flow, affecting frothing.
Use a Small Brush or Pin
To clear clogs, use a thin brush or pin gently. Insert the brush or pin into the steam wand or openings to remove debris or dried milk. Use gentle force to avoid damaging the frother.
Close All Openings
Check all openings and pathways for obstructions. This includes the steam wand and any steam and milk channels. Clear any blockages to restore steam and milk flow.
Reassemble and Test
Reassemble the frother after clearing blockages and test it to make sure the problem is fixed. Run a frothing cycle without milk to test steam flow and froth creation. If the frother works well and makes consistent froth, you’ve fixed the problem.
Maintenance
To avoid clogs and blockages, regularly maintain your system. Rinse the steam wand and relevant components after each use to remove milk residues. Clean more thoroughly on a regular basis to avoid the buildup of tough residues.
Regularly check for clogs and clear them to keep your Keurig frother working well and enjoy smooth drinks.
9. Reset Frother
If you’ve tried everything mentioned above and your Keurig frother still isn’t working, you might need to do a factory reset. This option is useful for frothers with electronic controls. A factory reset can fix software problems. To factory reset your Keurig frother, follow these steps:
Check the Manual
Refer to the manual for your Keurig frother. The manual should have clear instructions for performing a factory reset on your model. Follow the manufacturer’s guidelines for reset procedures as different models may vary.
Turn Off
Before resetting, make sure the frother is turned off and unplugged. This step is important to prevent electrical accidents when using the appliance.
Reset Instructions
Follow the user manual to perform a factory reset. Usually, this involves pressing or holding certain buttons for a specific amount of time. Follow the manual’s sequence precisely.
Please Wait for Confirmation
Wait for confirmation from the frother after resetting. The frother will show lights, beeps, or a message on the display to indicate this, depending on your model. The confirmation signal shows the reset is done.
Test the Frother
After resetting, test the frother by running a frothing cycle without milk. Test the frother to see if it’s working properly. If the problem continues, contact Keurig customer support for help.
A factory reset can fix software issues and reset your Keurig frother to default settings. If the problem continues after resetting, it may be a hardware issue that needs professional help.
10. Contact Keurig Support
If you’ve tried everything mentioned earlier and your Keurig frother still doesn’t work, contact Keurig customer support. They help with troubleshooting, diagnosing issues, and giving tailored guidance for your model and situation. Contact Keurig customer support:
Go to Keurig’s official website. Find the “Contact Us” or “Customer Support” section. Here’s how to contact Keurig’s customer support team.
Maintenance Tips to Prevent Your Frother from Malfunctioning?
Regular maintenance is important for your Keurig frother to work well and last longer. Here are some tips to maintain your frother:
Cleaning
Clean your Keurig frother after each use to prevent malfunctions and ensure smooth frothing. After frothing, clean the pitcher, whisk, and lid. Wash these parts by hand with warm, soapy water. Use a soft brush or cloth to carefully clean any leftover milk or buildup, focusing on corners and crevices where residue can hide. Rinse each part well with water to remove soap residue that can affect the taste of your frothed drinks.
Deep Cleaning
Regular cleaning is important for your Keurig frother, but periodic deep cleaning is also necessary for optimal functionality. During deep cleaning, it’s important to address mineral deposits on the heating element, especially if you have hard water. Mix equal parts water and white vinegar. Run a frothing cycle without milk using this mixture. Vinegar dissolves mineral buildup. After descaling, rinse the frother with water to remove vinegar residue and ensure efficient operation.
Regularly check the steam wand and other openings for clogs or blockages. Obstructions can disrupt steam and milk flow, affecting frothing. Use a thin brush or pin to clear obstructions. This step is important for keeping your Keurig frother working well.
Storage
Proper storage affects the lifespan and performance of your Keurig frother. Store the frother in a dry, cool place when not in use. Moisture can damage internal components over time. Also, avoid exposing the frother to sunlight. UV rays can make things break down faster. Store your Keurig frother properly to make it last longer.
Routine Check
To keep your Keurig frother in good condition, regularly check all its parts. It includes the whisk, lid, and pitcher. Regularly check these parts for wear, damage, or excessive deterioration. If you find cracks, broken parts, or significant wear, replace them. Keeping these components in good condition ensures that your frother works well and gives you high-quality frothy drinks.
Manufacturer’s Recommendations
Consult the user manual for your Keurig frother model to ensure proper maintenance. The recommendations and guidelines from the manufacturer are specific to your frother’s features and specifications. The manual will help you with maintenance, specific details, and considerations for your Keurig frother. Follow these tips to extend the life and improve the performance of your frother, so you can always enjoy delicious frothy drinks.
Frequently Asked Questions
Does milk type impact Keurig’s frother performance?
The milk you use affects your Keurig frother’s performance. Use fresh, cold milk with a moderate fat content like whole or 2% milk for best frothing results. These milks have enough fat for a creamy froth. Skim milk and non-dairy alternatives froth less due to lower fat content. Choosing the right milk is crucial for a good froth with your Keurig frother.
Is it normal for my Keurig frother to take a while to froth milk?
It’s normal for your Keurig frother to take a minute or two to froth milk. Frothing time varies based on the frother model and milk amount. Be patient when using a frother. Rushing may lead to poor froth quality. Let the frother finish and get a creamy froth for your drinks.
Should I froth a lot of milk at once in my Keurig frother?
Avoid frothing too much milk at once in your Keurig frother. Overcrowding the pitcher can affect frothing and result in uneven or poor froth quality. Froth less milk at a time for better results. This method helps the frother agitate and froth the milk perfectly.
Does limescale affect Keurig’s frother performance?
Hard water can affect your Keurig frother due to limescale buildup. Mineral deposits can build up in the frothing system, causing clogs in tubes and nozzles. Buildup can block steam and milk flow, leading to bad frothing. To fix this, make sure to descale your frother regularly as instructed in the manual. Descaling removes mineral deposits for better frothing.
Do I need to clean the frothing whisk of my Keurig frother after each use?
Cleaning the whisk after each use is highly recommended, but not mandatory. Milk residue can build up on the frothing whisk, making it less effective at frothing milk. To prevent buildup and maintain good frothing performance, rinse with warm, soapy water after each use and dry well.
Can expired milk harm my Keurig frother?
Expired or spoiled milk won’t harm your Keurig frother, but it will affect the froth’s quality. Expired milk can affect the taste and texture of frothed milk. Use fresh milk for the best frothing with your Keurig frother.
Is it safe to use a damaged Keurig frother?
Do not use a damaged or defective Keurig frother. Stop using the frother if you see cracks, broken parts, or any other problems. Using a damaged frother can be dangerous and cause more damage. Contact Keurig customer support for help with repairs or a replacement unit.
Do I need to change the frothing settings on my Keurig frother for different types of milk?
Yes, Keurig frothers have adjustable settings for different types of milk. Check the frother’s user manual for instructions on adjusting these settings. Different types of milk, like dairy and non-dairy alternatives, may need slight changes in temperature or time to froth properly. Customize settings for perfect milk frothing.
Can temperature affect my Keurig frother’s performance?
Extreme temperatures can affect your Keurig frother’s performance. Use cold milk for consistent frothing. Using extremely cold or hot milk in a frother can affect the frothing process and result in lower-quality froth. To froth milk well, keep the temperature consistent.
Does my Keurig frother have a warranty? Should I get it repaired or replaced?
Keurig frothers have warranties for defects and issues. If your frother is still under warranty and you’ve tried everything but it’s not working, check the warranty terms in your user manual. Contact Keurig’s customer support for warranty assistance with repairs or replacements. They can help with the warranty process and advise on resolving the frother issue. Always unplug the frother before doing any maintenance or contacting support to prioritize safety.
Final Words
Fixing a broken Keurig frother is important for enjoying frothy drinks and specialty coffees. This guide has covered factors that can cause frother malfunctions, including milk type, temperature, maintenance, and cleaning. By following the provided troubleshooting steps, users can often fix their frother and make it work again.
To get good froth, use fresh ingredients, clean properly, and follow manufacturer recommendations. By knowing your Keurig frother well and how to handle common issues, you can make coffee shop-like drinks at home. With knowledge and care, you can enjoy creamy froth in your coffee again.


