As an Amazon Associate, I earn from qualifying purchases at no extra cost to you.
How to Descale a Keurig Without Solution: Easy and Natural Methods
If you’re a coffee lover, you know the importance of keeping your Keurig in top shape. Over time, mineral deposits and other gunk build up inside, causing your machine to work less efficiently. But don’t worry, you don’t need to rush to the store for a special descaling solution. In this guide, I’ll show you how to descale your Keurig without buying anything fancy. It’s easy, affordable, and effective!
Why Descaling Your Keurig Is Important
Descaling your Keurig isn’t just a suggestion, it’s something you should do regularly to keep your coffee maker running smoothly. But why is descaling so important? Let’s break it down.
What Is Descaling?
Descaling is the process of removing mineral deposits, often called limescale or calcium build-up, from your Keurig machine. This happens because the water you use to brew your coffee contains minerals that can leave deposits behind. Over time, this build-up can clog your machine, affect the taste of your coffee, and even shorten the lifespan of your Keurig.
Why It Matters
Your Keurig relies on water to make delicious coffee, and if that water isn’t flowing properly because of mineral build-up, the machine can’t do its job. It can also affect the brewing temperature, which can make your coffee taste off. Plus, if your Keurig starts to overheat or get blocked, it could even break down completely.
By descaling, you’re removing all those pesky mineral deposits that can cause problems. This means your coffee maker will run more efficiently, your coffee will taste better, and you won’t have to worry about potential breakdowns.
How Often Should You Descale?
As a general rule, you should descale your Keurig every 3 to 6 months, depending on how hard your water is and how frequently you use your machine. If you live in an area with very hard water, you may need to do it more often. Some models even have a reminder feature to let you know when it’s time to descale, but if not, pay attention to signs like slower brewing times or a funky taste in your coffee.
Now, you know why descaling is important. But what if you don’t want to buy a special descaling solution? No worries, because there are simple and natural ways to clean your Keurig without spending extra money!
Step-by-Step Guide to Descale Your Keurig Without Solution
Descaling doesn’t have to be complicated, and you don’t need any fancy chemicals to get the job done. You can use common household items, and I’ll guide you through each step. Let’s get started!
What You’ll Need
Before we dive into the process, gather these items:
- White vinegar (it’s a great natural cleaner)
- Water
- A clean dish towel or rag
- A mug (to catch the solution)
That’s it! Simple ingredients for an effective cleaning session. Let’s go ahead and get your Keurig sparkling clean.
Step 1: Empty the Keurig and Remove the Pod
First things first, unplug your Keurig and empty the water reservoir. You don’t want any leftover water getting in the way of the cleaning process. Next, take out any coffee pods that might still be in the machine. You’re not brewing any coffee today, so just leave the pod holder empty.
Step 2: Prepare the Vinegar Solution
Now it’s time to prepare your cleaning solution. Mix equal parts white vinegar and water. For example, if your Keurig’s water reservoir holds 10 ounces of water, use 5 ounces of vinegar and 5 ounces of water. This mixture is strong enough to break down mineral deposits without being too harsh on your machine.
If your water reservoir is larger, just adjust the ratio. But don’t worry about being exact – the point is to have a solution that’s mostly vinegar with a little water to dilute it.
Step 3: Fill the Reservoir
Pour the vinegar-water mixture into the water reservoir, making sure it’s filled up to the “max” line. This will give you enough solution to run a full cycle through your machine.
Step 4: Run a Brew Cycle (Without a Pod!)
Now, plug your Keurig back in and press the brew button. But don’t put any coffee pods inside! Let the machine brew the vinegar solution just like it would if you were brewing a cup of coffee.
You might want to set a mug under the spout to catch the liquid. Keep an eye on the process, and once the Keurig finishes its cycle, dispose of the liquid in the mug.
Step 5: Let It Sit and Soak
Once your Keurig has brewed the vinegar solution, let it sit for about 30 minutes. This allows the vinegar to break down any mineral build-up in the machine’s internal parts. You may want to run a few more cycles if you think your Keurig has a lot of build-up.
Step 6: Rinse and Repeat
After the soak, it’s time to rinse out the vinegar. Fill the reservoir with clean water and run a few brew cycles (without any coffee pods) to flush out the vinegar solution. You should repeat this process until the water coming out of the machine is free of vinegar smell.
Step 7: Clean the Exterior
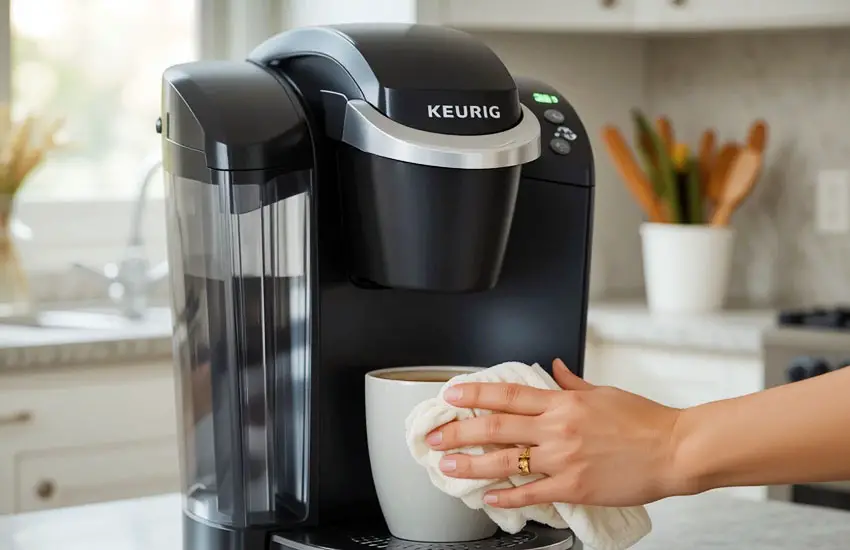
While the Keurig is running its cycles, use this time to clean the outside of the machine. Wipe down the surface with a clean, damp cloth. Don’t forget to clean the drip tray and pod holder as well! These can accumulate coffee grounds or spills, so give them a good wash.
Step 8: Enjoy Your Clean Keurig!
Once you’ve finished rinsing, your Keurig should be all set and ready for use. It should brew more efficiently, and your coffee should taste fresher and cleaner!
Descaling without solution is simple, effective, and it doesn’t require any fancy products. You’ve just used what you already have at home to keep your Keurig running like new.
Natural Alternatives to Keurig Descaling Solution
While white vinegar is a tried-and-true option for descaling your Keurig, there are a few other natural alternatives you can use. Each option has its pros and cons, but the key takeaway here is that you don’t have to buy expensive descaling solutions when you can use what’s in your kitchen.
1. Citric Acid
Citric acid is another great, natural option for descaling. It’s a weak acid that can break down mineral build-up much like vinegar. You can find citric acid in powdered form at many grocery stores or online.
To use citric acid:
- Dissolve about 1-2 tablespoons of citric acid in a cup of water.
- Add the solution to your Keurig’s water reservoir.
- Run the brew cycle just like you would with vinegar, and follow the same steps for rinsing.
Citric acid is odorless and generally works faster than vinegar, so it’s a solid choice if you’re looking for a quicker method.
2. Baking Soda and Water
Baking soda is another common household item that can help with descaling. While it’s not as powerful as vinegar or citric acid, it can still be useful for a light cleaning or regular maintenance.
To use baking soda:
- Dissolve a tablespoon of baking soda in a cup of warm water.
- Add it to your Keurig’s water reservoir.
- Run the brew cycle, and repeat the rinse process until the water runs clean.
Baking soda is great for regular, lighter descaling, but if you’re dealing with heavy mineral build-up, it might not be enough to do the trick.
3. Lemon Juice
If you don’t have vinegar or citric acid on hand, lemon juice can also help break down mineral deposits. The acidity of lemon juice works similarly to vinegar, making it an effective natural alternative.
To use lemon juice:
- Mix 1/4 cup of lemon juice with a cup of water.
- Pour it into the Keurig’s water reservoir.
- Run the brew cycle and rinse thoroughly afterward.
Lemon juice smells better than vinegar, so if you don’t like the vinegar smell, this could be a great option for you.
Why Choose Natural Alternatives?
Using natural alternatives is great because they’re affordable, easy to find, and often safer for the environment. Plus, they’re free from harsh chemicals, so you don’t have to worry about any residual substances lingering in your machine. Whether you choose vinegar, citric acid, baking soda, or lemon juice, these options can keep your Keurig running smoothly without breaking the bank.
Tips for Maintaining Your Keurig After Descaling
Now that your Keurig is nice and clean, how do you keep it in good condition? Regular maintenance is key to ensuring your machine runs smoothly for years to come. Here are a few simple tips to help keep your Keurig in tip-top shape.
1. Use Filtered Water
One of the easiest ways to prevent mineral build-up is by using filtered water. Tap water often contains minerals that lead to limescale buildup. By using filtered or bottled water, you reduce the chances of mineral deposits accumulating inside your machine.
2. Regularly Clean the Exterior and Parts
Descaling isn’t the only cleaning task you should worry about. Regularly clean the exterior of your Keurig, the drip tray, the pod holder, and the water reservoir. These parts can get dirty from spilled coffee, dust, and residue, so give them a wipe-down every week or so.
3. Don’t Leave Water in the Reservoir
After each use, empty the water reservoir to avoid stagnant water sitting in the machine. If you leave water in the reservoir for too long, it can attract bacteria and mold. Make sure to dry out the reservoir thoroughly before storing it.
4. Brew Regularly
It’s also a good idea to use your Keurig regularly. If you leave it unused for long periods, the machine can become clogged or build up mildew. Even brewing a cup of water every few days can help keep things running smoothly.
5. Keep the Needle Clean
The Keurig needle (where the hot water comes out) can get clogged with coffee grounds, which can affect your brewing. To clean the needle, use a paper clip or a small brush to remove any buildup. Check the needle every once in a while to make sure it’s clear.
I hope you found this guide helpful in learning how to descale your Keurig without using expensive solutions! Descaling your machine is an essential part of coffee maker maintenance, and with simple household items like vinegar, citric acid, or baking soda, you can easily keep your Keurig working like new. Remember to clean your machine regularly and follow the tips to extend its life. Happy brewing!
Frequently Asked Questions
Is it necessary to descale my Keurig?
Yes, descaling is essential for keeping your Keurig running smoothly. It removes mineral build-up, improves performance, and enhances the taste of your coffee.
Can I use a store-bought descaling solution instead of vinegar?
Yes, you can use a store-bought descaling solution, but natural alternatives like vinegar, citric acid, and lemon juice are cheaper and just as effective.
Do I need to clean my Keurig after every use?
No, you don’t need to clean it every time. However, it’s a good idea to do a regular clean of the exterior and parts, and descaling should be done every 3-6 months.
Is it safe to use vinegar in my Keurig?
Yes, vinegar is safe to use for descaling your Keurig. It’s a natural cleaner that helps break down mineral deposits inside the machine.
Can I use lemon juice to descale my Keurig?
Yes, lemon juice can be used to descale your Keurig. It’s an effective alternative to vinegar and leaves a pleasant scent.
Do I need to rinse after using a descaling solution?
Yes, you should always rinse your Keurig after descaling. Run a few brew cycles with clean water to remove any remaining solution.
Is it okay to use tap water in my Keurig?
While it’s okay to use tap water, filtered water is recommended to prevent mineral build-up that leads to limescale.
Can descaling help my Keurig brew faster?
Yes, descaling can improve the flow of water and reduce any clogs, which may help your Keurig brew faster and more efficiently.


