As an Amazon Associate, I earn from qualifying purchases at no extra cost to you.
Roomba i7 Red Light on Clean Base: Troubleshooting Guide
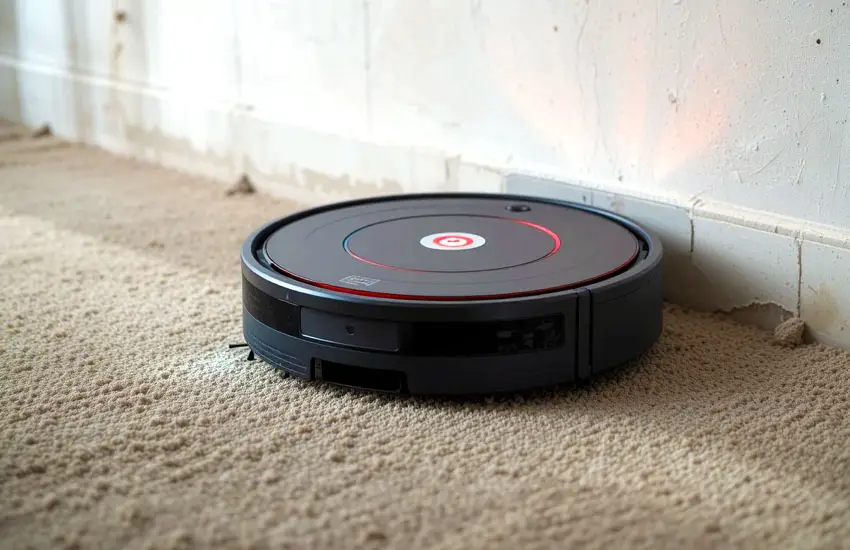
You’ve probably noticed the red light glowing on your Roomba i7 Clean Base, and it’s got you wondering: “What does this mean?” Don’t panic just yet! A red light could be a sign that something’s not quite right, but it’s usually an easy fix. Whether it’s a minor issue like a dirty sensor or something a bit more serious, you can solve it in no time. In this post, we’ll break down why the red light appears and guide you through fixing it, so your Roomba is back to cleaning like new. Let’s dive in!
Understanding the Roomba i7 Red Light on Clean Base: What Does It Mean?
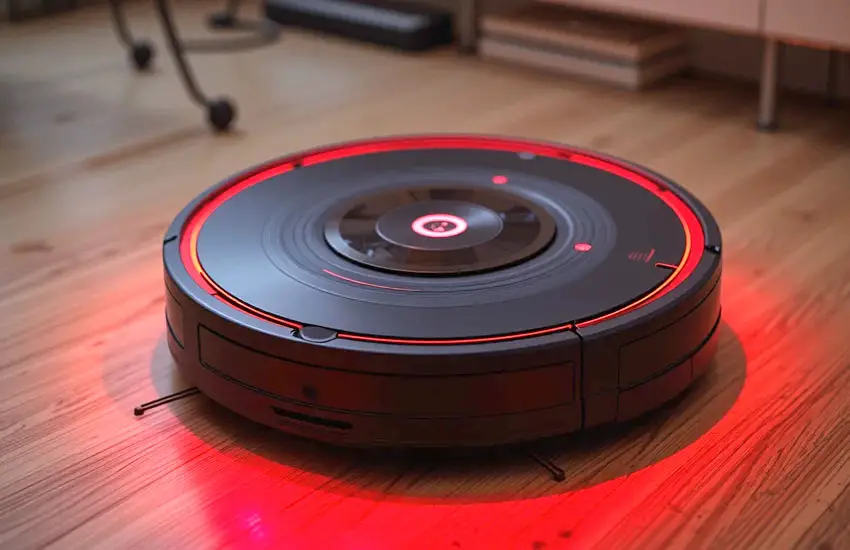
If you’ve come across the red light blinking on your Roomba i7’s clean base, you’re probably wondering what the heck is going on. The red light is actually a warning sign from your robot vacuum. It’s your Roomba’s way of telling you that something is wrong, and it’s time to give it some attention.
But don’t panic. The red light isn’t necessarily a sign that your Roomba i7 is broken beyond repair. In fact, it’s a pretty common issue that can be resolved with just a little bit of troubleshooting.
Here’s the thing: the clean base, also called the charging dock, is where your Roomba i7 returns to recharge and empty its dustbin. When you see the red light flashing or solid on the clean base, it’s often indicating a problem related to charging, the clean base, or the dustbin. Let’s break down the most common reasons for the red light, so you can figure out exactly what needs fixing.
1. Charging Problems
One of the most common causes for a red light on the clean base is a charging issue. Your Roomba i7 needs to be properly docked on the charging station for it to recharge its battery, and if it can’t make a proper connection, you’ll see that dreaded red light. There are a few things to check here.
- Make sure the charging contacts are clean: Over time, dust and dirt can accumulate on the charging contacts of both your Roomba and the clean base. This can create a barrier that prevents proper charging. Use a soft cloth or cotton swab to gently clean both the charging contacts on the Roomba and the clean base. A little dust goes a long way in messing with the connection.
- Check the power supply: If the power cord is loose or disconnected, your Roomba won’t be able to charge. Make sure the cord is securely plugged into both the clean base and the wall outlet. You may also want to check for any visible signs of damage to the power cord.
- Check for a malfunctioning battery: If your Roomba has been running low on battery or hasn’t been used for an extended period of time, the battery might be too depleted to charge. In this case, try charging your Roomba for several hours to see if the red light goes away.
2. Dustbin Problems
Another reason for the red light could be an issue with your Roomba’s dustbin. The i7 model is equipped with a self-emptying feature, so if the dustbin isn’t properly seated in the clean base, or if it’s too full, the red light could appear. Here’s what you should check:
- Empty the dustbin: If your Roomba has been cleaning for a while, the dustbin may be full and unable to empty into the clean base. Make sure to check and empty the dustbin, then try docking your Roomba again.
- Check the dustbin’s position: The dustbin needs to fit securely into the clean base for it to empty properly. If it’s not aligned correctly, your Roomba won’t be able to complete the process. Try removing the dustbin, cleaning it, and then reinserting it into the clean base.
3. Clean Base Sensor Issues
Your Roomba i7 relies on sensors to properly dock and empty the dustbin. If these sensors are dirty or obstructed, it can cause a red light to flash. The sensors are located on both the clean base and the Roomba itself, so make sure to inspect both areas.
- Clean the sensors: Use a soft, dry cloth to wipe down the sensors on both your Roomba and the clean base. Be gentle, as these sensors can be delicate.
- Check for obstructions: If there’s any debris blocking the sensors, that could be the reason your Roomba isn’t functioning properly. Clear away any objects or buildup that could be interfering with the sensors’ performance.
4. Software or Firmware Updates
Sometimes, a simple software issue can trigger the red light on your Roomba i7. Your robot needs to be up-to-date with the latest firmware to perform its best. Check the iRobot Home app for any available updates. If an update is available, install it, as it may help fix any bugs or glitches causing the red light to appear.
How to Fix the Roomba i7 Red Light on Clean Base: A Step-by-Step Guide
If you’ve tried checking the basics like the charging connection, dustbin, and sensors, and you’re still seeing that pesky red light, don’t worry! I’m going to guide you through a detailed, step-by-step troubleshooting process that should help you fix the problem. It’s easier than you think, so grab a coffee and let’s get started!
Step 1: Power Cycle Your Roomba i7
The first thing you should try is to turn off your Roomba and restart it. This is called a “power cycle,” and it’s like giving your Roomba a little break to reset. Sometimes, just restarting your Roomba can clear up small problems and make the red light go away.
To power cycle your Roomba i7:
- Turn Off Your Roomba: Look for the CLEAN button on top of your Roomba. Press and hold the button for about 10 seconds until the Roomba turns off. It should make a sound or the lights should go off. This means it’s completely powered off.
- Wait a Minute: After turning it off, leave your Roomba powered down for about 60 seconds. This gives it time to fully reset and clear any temporary issues. It’s just like rebooting a computer when something is acting strange!
- Turn It Back On: After waiting a minute, press the CLEAN button again to turn your Roomba back on. You should hear a sound or see the lights turn back on, signaling that it’s working again.
Now, check the clean base. If the red light is still on, move on to the next step.
Step 2: Inspect the Charging Contacts
Sometimes the red light happens because your Roomba i7 isn’t charging properly. There are special metal charging contacts on both your Roomba and the clean base that need to be in good condition to allow charging. If these contacts are dirty or not making a good connection, your Roomba won’t charge and the red light will appear.
Here’s how to check and clean the charging contacts:
- Turn Off the Roomba: Just like in the previous step, turn off your Roomba by pressing and holding the CLEAN button for 10 seconds.
- Unplug the Clean Base: For safety, unplug the clean base from the wall outlet. This will prevent any electrical issues while you’re cleaning the contacts.
- Clean the Charging Contacts on the Roomba: Flip your Roomba upside down to see the metal charging contacts. These are small metal dots or strips located near the bottom of the Roomba. Use a soft cloth or a cotton swab to gently wipe away any dust, dirt, or hair that might be covering these contacts. Be very gentle to avoid scratching the metal.
- Clean the Charging Contacts on the Clean Base: Now, look at the charging contacts inside the clean base. These are the metal plates that touch the Roomba when it docks. Use the same soft cloth or cotton swab to clean them as well. Make sure there’s no dirt or debris on these contacts.
- Plug Everything Back In: After cleaning, plug the clean base back into the power outlet.
- Dock Your Roomba: Place your Roomba back onto the clean base. The charging contacts should now connect properly. Wait a few moments to see if the red light goes away.
If the red light is still on after cleaning the contacts, you can try the next step.
Step 3: Check the Dustbin and Its Alignment
Another reason for the red light could be a problem with the dustbin, which is the part of the Roomba that collects dirt and debris. If the dustbin is too full, or if it’s not sitting properly in the clean base, the red light can appear. Let’s check that everything is in the right place.
Here’s how to check and fix the dustbin:
- Remove the Dustbin: Start by pulling out the dustbin from your Roomba. It’s located on the top of the Roomba, and you should be able to lift it out easily.
- Empty the Dustbin: If the dustbin is full, it may not be able to empty properly into the clean base. Hold the dustbin over a trash can and open the lid to empty it. Shake it gently to make sure all the dust and debris are cleared out.
- Clean the Dustbin: Even if the dustbin isn’t full, it’s a good idea to clean it. Use a dry cloth to wipe down the inside and outside of the dustbin. If there’s any dirt stuck in the filters or corners, you can use a small brush to remove it. Make sure the dustbin is completely dry before putting it back into your Roomba.
- Check for Blockages: Look for anything that might be blocking the dustbin’s connection to the clean base. There should be no hair, dust, or other debris that could stop it from sitting properly. If there’s anything in the way, clear it out.
- Reinsert the Dustbin: Place the dustbin back into the Roomba. Make sure it clicks into place and is securely seated. If the dustbin is not positioned properly, it could prevent the clean base from working correctly, causing the red light.
- Try Docking Again: After making sure the dustbin is in place, place your Roomba back on the clean base. Wait a few seconds and check if the red light is gone.
Step 4: Clean the Sensors
Your Roomba uses sensors to find its way around your home and to dock correctly at the clean base. If these sensors are dirty or blocked, it can cause problems, including the red light on the clean base. Let’s make sure the sensors are clean and working properly.
Here’s how to clean the sensors:
- Turn Off Your Roomba: Turn off the Roomba by holding down the CLEAN button for 10 seconds.
- Locate the Sensors: The sensors are small, round, or rectangular pieces located on both the Roomba and the clean base. They can be found on the front and underside of the Roomba, and there are also sensors on the clean base.
- Use a Soft Cloth: Gently clean the sensors with a soft, dry cloth. You don’t need to use any liquid or cleaning products—just a dry cloth is fine. Be careful not to scratch the sensors.
- Check for Obstructions: Look around the sensors to see if there’s anything blocking them, like dirt, dust, or hair. Even small things can interfere with the sensors, so make sure they are clear of any debris.
- Reassemble Everything: Once the sensors are clean, you can place your Roomba back on the clean base. After that, check to see if the red light has disappeared.
Step 5: Update the Software
Sometimes, the issue could be related to your Roomba’s software. Just like your phone or computer needs updates, your Roomba also needs the latest software to run smoothly. If your Roomba’s software is outdated, it might cause the red light to appear.
Here’s how to update your Roomba’s software:
- Open the iRobot Home App: Use your smartphone to open the iRobot Home app. This app is where you can control your Roomba and check for software updates.
- Check for Updates: In the app, look for an option to check for available updates. If there’s a new update for your Roomba, the app will show it to you.
- Install the Update: Follow the instructions in the app to install the update. The process may take a few minutes, so be patient and let the update finish.
- Restart the Roomba: After the update is complete, restart your Roomba. You can do this by turning it off and then back on again using the CLEAN button.
- Check the Clean Base: Once your Roomba has restarted, check if the red light is still on the clean base. If the software update was the issue, the red light should be gone.
Step 6: Contact iRobot Support
If you’ve tried everything and the red light is still on, it might be time to contact iRobot’s customer support team. They can help you with more advanced troubleshooting steps, or they might be able to guide you through a repair process if your Roomba needs attention.
I Hope this Guide Helps You Get Your Roomba i7 Back in Action!
Dealing with a red light on your Roomba i7 clean base can be frustrating, but don’t let it ruin your day! With these simple steps, you should be able to get your robot vacuum back to cleaning in no time. Whether it’s cleaning the contacts, checking the dustbin, or updating the software, a little troubleshooting goes a long way.
Frequently Asked Questions
Is it normal for the Roomba i7 clean base to have a red light?
The red light on the clean base is usually a warning that something is wrong, such as charging issues, a full dustbin, or dirty sensors.
Can I fix the red light issue myself?
Yes! Most of the time, the red light can be fixed by cleaning the charging contacts, checking the dustbin, or ensuring that the sensors are not obstructed.
Do I need to replace the Roomba i7 battery if the red light stays on?
Not necessarily. If the charging contacts are clean and the power supply is working, the issue could be related to something else like the dustbin or sensors.
Is there a reset button on the Roomba i7?
The Roomba i7 doesn’t have a reset button, but you can perform a reset by holding down the CLEAN button for 10 seconds.
Can the red light indicate a malfunctioning clean base?
Yes, in rare cases, the red light may indicate a problem with the clean base itself. In such cases, you may need to contact customer support.
Is it safe to use a damp cloth to clean the Roomba sensors?
No, you should never use a damp cloth on the Roomba’s sensors. Use a dry, soft cloth or cotton swab to gently clean them.
Can I run my Roomba with the red light on?
It’s not recommended. The red light indicates an issue that may prevent your Roomba from properly charging or emptying its dustbin.
Do I need to call a technician if my Roomba’s red light won’t go off?
Not immediately. Start with the troubleshooting steps, and if the issue persists, contact iRobot support for further assistance.

Zein
Related Posts

How to Descale a Keurig Without Solution: Easy and Natural Methods
How to Remove Airlock from Your Nespresso Machine: Quick Solutions

Sage Barista Express Water Not Coming Out of Group Head: How to Fix It
Bella Pro Series Coffee Maker Not Warming Up? Here’s What You Can Do!
Philips 3200 Pre-Ground Coffee Not Working? Here’s How to Fix It!

How to Descale Your Nespresso Machine: A Step-by-Step Guide
Frigidaire Ice Maker Troubleshooting: How to Fix Your Ice Maker Like a Pro
Keurig K Duo Essentials Troubleshooting: The Ultimate Guide