
As an Amazon Associate, I earn from qualifying purchases at no extra cost to you.
How Long to Cook Chicken Breast in Air Fryer (Expert Guide)
Dry chicken is the worst. You follow the recipe, you do everything right, and somehow it still comes out like cardboard. So many people struggle with getting chicken breast right in the air fryer, especially with timing and temperature. But here’s the good news. This guide will show you exactly how long to cook chicken breast in air fryer and how to nail it every single time without guessing.
Key Takeaways: Set your air fryer to 375°F, pat the chicken dry, season it well, then cook a medium breast for 18 to 20 minutes, flipping halfway at the 10-minute mark. Always check that the inside hits 165°F with a meat thermometer before eating. Let it rest for 5 minutes so the juices stay locked in and every bite stays tender and moist.
How Long Does it Take to Cook Chicken Breast in an Air Fryer?
The honest answer is somewhere between 15 and 22 minutes. But it really depends on the size of your chicken breast. A small one comes out faster. A thick, large one needs more time. So size actually matters more than people think.
Most medium-sized chicken breasts, around 6 to 8 ounces, cook perfectly at 375°F in about 18 minutes. That is the sweet spot for most home cooks. You get a golden outside and a juicy inside without overcooking anything.
The biggest mistake people make is not using a thermometer. Instead of guessing by time alone, stick a meat thermometer into the thickest part. Once it reads 165°F, your chicken is done and safe to eat. That one step alone will save your dinner many times over.
Also, every air fryer runs a little differently. Some run hotter, some cooler. So after cooking a few times in yours, you will get a feel for how it behaves. Then you can adjust by a minute or two if needed.
- Small breast (4 to 5 oz): 14 to 16 minutes at 375°F
- Medium breast (6 to 8 oz): 18 to 20 minutes at 375°F
- Large breast (9 to 11 oz): 20 to 22 minutes at 375°F
- Always flip halfway through cooking
- Let chicken rest 5 minutes before cutting
- Always confirm 165°F internal temp before serving
How to Cook Chicken Breast in Air Fryer the Right Way
Step 1: Pound or Flatten the Chicken First
Before anything else, take a look at your chicken breast. Most of them are thicker on one end and thin on the other. That uneven shape is actually why so many people end up with dry edges and a raw center.
So grab a rolling pin or a heavy pan and gently pound the thick end down. You want it close to an even thickness all the way across. About 3/4 of an inch is ideal. This one little step changes everything.
After flattening, your chicken will cook evenly from edge to edge. No dry spots, no raw bits in the middle. Plus, it cooks a bit faster too, which is always a bonus.
- Even thickness means even cooking every time
- Aim for about 3/4 inch thickness throughout
- Use a zip-lock bag to pound without mess
- No special tools needed, a pan works fine
Step 2: Season It Generously, Don’t Be Shy
Plain chicken is boring chicken. And honestly, the air fryer needs a little help to build that delicious crust on the outside. So do not hold back on the seasoning.
First, pat the chicken dry with a paper towel. This matters a lot because moisture on the surface stops the chicken from browning properly. Then drizzle a little olive oil over it. After that, season both sides with salt, pepper, garlic powder, and paprika.
The paprika is the secret weapon here. It gives the chicken that beautiful golden color and a tiny bit of smoky taste. Garlic powder adds depth. And the salt pulls everything together nicely.
- Always pat dry before adding oil and seasoning
- Olive oil helps seasoning stick to the surface
- Paprika gives great color and light smoky flavor
- Season both sides, not just the top
Step 3: Preheat the Air Fryer for 3 to 5 Minutes
Skipping the preheat is one of the most common mistakes. When you put chicken into a cold air fryer, it starts cooking slowly and unevenly. The outside does not sear properly. And the timing gets thrown off completely.
So just turn on your air fryer and let it run at 375°F for about 3 to 5 minutes before adding the chicken. Think of it like preheating an oven. You would not skip that step there either.
Once it is hot, place the chicken breast in the basket. Make sure the pieces are not touching or overlapping. Good airflow around each piece is what makes the air fryer work its magic.
- Preheat at 375°F for 3 to 5 minutes before cooking
- Hot air fryer sears the outside properly right away
- Leave space between pieces for good air circulation
- Do not stack chicken in the basket
Step 4: Cook at 375°F and Flip Halfway Through
Now here comes the main event. Place your seasoned chicken in the basket and set the temperature to 375°F. For a medium breast, set the timer for 18 minutes. Then walk away and let the air fryer do its thing.
At the 9-minute mark, open the basket and flip the chicken over. This step helps both sides cook evenly and get that nice color all around. After flipping, close it back up and let it finish cooking.
Also, resist the urge to open and check it every few minutes. Every time you open the basket, heat escapes and the cooking time gets longer. Just flip once and trust the process.
- Cook at 375°F for best results on most chicken breasts
- Flip at the halfway mark for even browning on both sides
- Do not keep opening the basket during cooking
- Adjust time by 2 minutes for very small or very large pieces
Step 5: Check the Internal Temperature Before You Eat
This step is non-negotiable. A meat thermometer is your best friend in the kitchen. Especially with chicken, which needs to hit exactly 165°F inside to be safe.
Insert the thermometer into the thickest part of the breast. Make sure it is not touching the bottom of the basket. If it reads 165°F or above, you are good to go. If it is below that, cook for another 2 to 3 minutes and check again.
Many people skip the thermometer and just cut the chicken open to look. But that actually lets all the juices run out. And then you end up with dry chicken anyway. So use the thermometer, it is worth it.
- Target internal temperature is always 165°F
- Insert thermometer into the thickest part of the breast
- Do not guess by color alone, always confirm the temp
- Recook for 2 to 3 more minutes if it is not there yet
Step 6: Let It Rest for 5 Minutes Before Cutting
Your chicken just came out of the air fryer and it smells amazing. But wait. Do not cut into it yet. Give it 5 minutes to rest on a plate or cutting board first.
When chicken cooks, the juices all rush toward the center. Resting lets those juices spread back out through the whole piece. So when you finally cut into it, everything stays moist and tender. Cut too soon and all that juice just runs out onto your board.
Cover it loosely with foil during the rest if you want to keep the heat in. After 5 minutes, slice it up and enjoy. That resting step is honestly the difference between okay chicken and really great chicken.
- Always rest chicken for at least 5 minutes after cooking
- Resting keeps the juices inside where they belong
- Loosely cover with foil to hold in warmth while resting
- Slice against the grain for the most tender bites
Can You Cook Frozen Chicken Breast in an Air Fryer?
Yes, totally. And it actually works really well. This is one of the best things about an air fryer. You do not have to plan ahead or remember to thaw anything the night before.
Start by cooking the frozen chicken breast at 360°F for about 15 minutes first. This lower temperature thaws the outside without burning it. Then increase to 375°F and cook for another 10 to 15 minutes depending on thickness.
Always check the internal temperature because frozen chicken takes longer than fresh. It might need up to 30 minutes total. So do not just set a timer and forget about it. Check with that thermometer toward the end.
One more thing. Do not add seasoning to frozen chicken right away. It will not stick while the surface is icy. Let it cook for the first 15 minutes first. Then open the basket, season it up, and continue cooking. That simple trick makes a real difference in the final flavor.
- Cook frozen breast at 360°F for the first 15 minutes
- Then raise to 375°F for the remaining 10 to 15 minutes
- Total cook time can reach up to 30 minutes from frozen
- Add seasoning after the first 15 minutes, not before
- Always confirm 165°F internal temp on frozen chicken
- Do not overcrowd the basket with frozen pieces
Final Thoughts
Hopefully now cooking chicken breast in the air fryer feels a lot less scary. The key is simple: season well, preheat your air fryer, cook at 375°F, flip halfway, and always check that temperature. Once you try this a couple of times, it becomes second nature. Now go cook some chicken breast in the air fryer and enjoy every juicy bite. You have totally got this.
| Chicken Size | Weight | Temperature | Cook Time | Flip Time | Safe Internal Temp |
|---|---|---|---|---|---|
| Extra Small | 3 to 4 oz | 375°F | 12 to 14 min | 6 to 7 min | 165°F |
| Small | 4 to 5 oz | 375°F | 14 to 16 min | 7 to 8 min | 165°F |
| Medium | 6 to 8 oz | 375°F | 18 to 20 min | 9 to 10 min | 165°F |
| Large | 9 to 11 oz | 375°F | 20 to 22 min | 10 to 11 min | 165°F |
| Extra Large | 12+ oz | 370°F | 23 to 26 min | 12 to 13 min | 165°F |
| Frozen Small | 4 to 5 oz | 360°F then 375°F | 24 to 26 min | After 15 min | 165°F |
| Frozen Medium | 6 to 8 oz | 360°F then 375°F | 27 to 30 min | After 15 min | 165°F |
| Frozen Large | 9 to 11 oz | 360°F then 375°F | 30 to 33 min | After 15 min | 165°F |
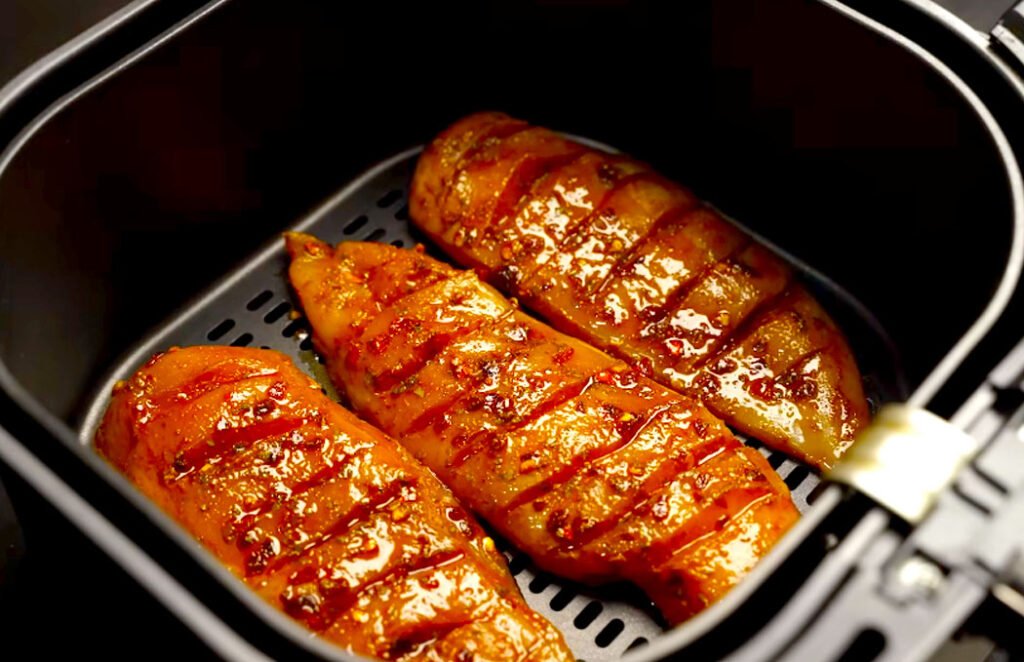
| Marinated Breast | 6 to 8 oz | 375°F | 18 to 22 min | 9 to 11 min | 165°F |
| Stuffed Breast | 8 to 10 oz | 365°F | 22 to 25 min | 11 to 12 min | 165°F |
| Breaded/Coated | 6 to 8 oz | 375°F | 16 to 18 min | 8 to 9 min | 165°F |
| Boneless Thin Cut | 3 to 4 oz | 380°F | 10 to 12 min | 5 to 6 min | 165°F |
Frequently Asked Questions (FAQs)
Is it Necessary to Flip Chicken Breast in the Air Fryer?
Yes, flipping halfway through gives you even browning on both sides. Without flipping, the bottom can come out pale while the top gets all the color. It takes two seconds and is totally worth it.
Can I Use Butter Instead of Olive Oil on Chicken?
You can, but butter burns faster at high heat. Olive oil handles the 375°F temperature much better. If you love butter flavor, brush a tiny bit on after cooking instead of before.
Is it Okay to Stack Chicken Breasts in the Air Fryer Basket?
No, do not stack them. Air needs to circulate around each piece to cook it properly. Stacking blocks that airflow and leads to uneven cooking. Cook in batches if needed.
Can I Put Marinade Directly on Chicken Before Air Frying?
Yes, but pat off the extra liquid first. Too much wet marinade creates steam instead of that nice sear. A light coating of marinade with most of the moisture removed works great.
Do I Need to Cover Chicken in the Air Fryer?
No covering needed. The air fryer basket is already enclosed and circulates hot air all around the chicken. Covering would actually block airflow and slow down the cooking.
Is the Air Fryer Better Than the Oven for Chicken Breast?
For speed and juiciness, yes. The air fryer cooks faster and uses less energy. It also gives you a slightly crispier outside. The oven works fine too, but the air fryer is just quicker and easier.
Can I Cook Two Chicken Breasts at the Same Time?
Yes, as long as they fit without touching. Most standard air fryers handle two medium breasts side by side easily. Just make sure there is a little gap between them for air to move around.
Do I Have to Preheat My Air Fryer Every Time?
Honestly, yes. Preheating for just 3 to 5 minutes makes a real difference in how the chicken cooks. It helps the outside sear quickly and keeps the inside from drying out during the cooking process.
