
As an Amazon Associate, I earn from qualifying purchases at no extra cost to you.
How to Clean Kitchen Shears: The Right Way to Do It
Kitchen shears get dirty fast. Grease, raw meat, herbs, and sticky sauces, they all build up quickly. Most people rinse them under the tap and call it done. But that is not enough. Bacteria hides in the pivot screw, the blades, and anywhere moisture sits. This guide shows you exactly how to clean kitchen shears the right way, so they stay sharp, safe, and ready every time you need them.
Key Takeaways: Separate the blades if your shears come apart, then wash each piece with warm soapy water and a stiff brush, paying close attention to the pivot joint and the screw area where grime collects most. Rinse thoroughly, dry each part completely before putting them back together, and store them in a dry spot to stop rust from forming. Never soak them for too long, and check the label before tossing them in the dishwasher.
Are Kitchen Shears Supposed to Be Taken Apart for Cleaning?
Yes, and most good-quality shears are designed exactly that way. That little pivot screw in the middle is where everything collects. Food particles, grease, and moisture all sit there, and you cannot reach them properly without separating the blades. If your shears pull apart, always take them apart before washing.
Some cheaper shears do not come apart. That does not mean you skip cleaning the joint area. It just means you work harder with a brush or an old toothbrush to get into the gap. A little dish soap and some patience go a long way.
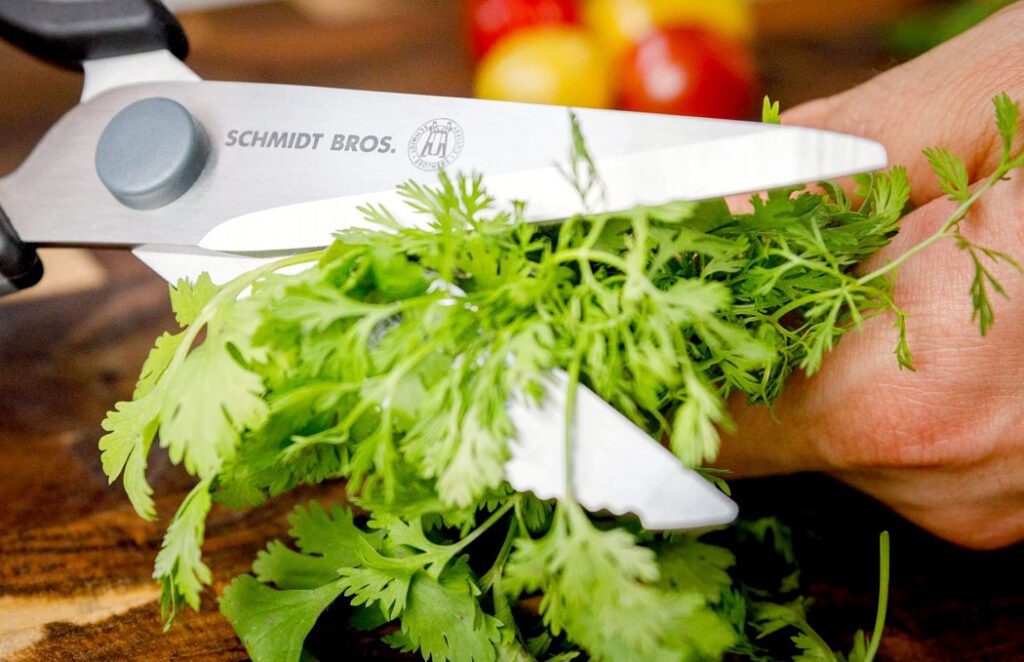
Pull the blades apart gently. Do not force them or twist aggressively. Most shears have a locking ring or a button near the joint. Release that first, then slide the blades apart slowly. If they feel stiff, a tiny drop of cooking oil near the joint helps before you try again.
Once they are apart, treat each blade like a regular knife. Wash, scrub, rinse, and dry. Simple as that.
- Always check if your shears are designed to come apart before forcing them
- Use the locking mechanism or button, not brute strength
- Clean the pivot area every single time, not just occasionally
- An old toothbrush works perfectly for scrubbing the joint area
- Apply a tiny drop of cooking oil if the joint feels stiff or stuck
- Treat each separated blade the same way you would treat a sharp kitchen knife
How to Clean Kitchen Shears Step by Step
Rinse Off the Big Stuff First
Start at the sink. Hold the shears under warm running water and rinse away any loose food, blood, or herb bits. Do this right after using them, before anything dries and sticks. Dried food is twice as hard to remove, so do not let the shears sit on the counter for an hour after cutting raw chicken.
Use your fingers carefully, or hold the blades with a cloth, to wipe away anything visible. This step only takes twenty seconds, but it saves you a lot of scrubbing later. Get into the habit of doing this every single time, right after you put the food down.
Separate the Blades If You Can
If your shears come apart, now is the time to do it. Find the pivot joint and look for a button, a ring, or a sliding lock. Press or slide it, then pull the two blades apart gently. Lay them flat on the counter so you can see both pieces clearly.
Separating them gives you full access to the areas where bacteria actually hides. That groove where the blades cross, the inside of the joint, the screw thread itself, these spots never get clean when the shears stay together. This one step makes a bigger difference than anything else in the whole process.
Scrub With Warm Soapy Water
Fill a small bowl or use the sink. Squirt in some dish soap and get the water warm, not boiling, just comfortably warm. Use a stiff-bristled brush or an old toothbrush. Scrub both sides of each blade, the spine, the handle holes, and especially the joint area.
Work the brush into any groove or gap you can see. If there is dried grease near the screw, press the brush in firmly and move it in small circles. This is where proper kitchen shears maintenance really matters. A minute of real scrubbing beats a quick rinse every time.
Clean the Pivot Joint and Screw
This is the most important spot and the most skipped one. The pivot screw collects grease and food residue every time you use the shears. If you never clean it properly, that buildup gets worse with every use. Eventually it affects how the blades move and how sharp they feel.
Dip your toothbrush in soapy water and scrub directly on the screw and the joint threads. If you have separated the blades, clean around the hole on each blade too. Rinse that area well. You want no soap or food particles sitting near the metal parts, because both can cause rust over time.
Rinse and Dry Completely
Rinse every part under warm water until there is no soap left. Soap residue is slippery and can attract dust. After rinsing, shake off the water and then dry everything with a clean cloth right away. Do not air-dry metal shears. Water sitting on the blades, even for a short time, starts the rust process.
Dry the joint area extra carefully. That spot holds moisture longest. Drying kitchen shears properly is one of those small habits that keeps them working well for years. Once dry, press the blades back together gently and lock the joint back in place.
Oil the Joint After Cleaning
Once the shears are clean and completely dry, put one small drop of food-safe oil on the pivot joint. Mineral oil works well. So does a tiny bit of cooking oil if that is all you have. Open and close the blades a few times to spread the oil around the joint.
This keeps the joint moving smoothly and stops rust from forming in that metal-on-metal contact point. Oiling kitchen shears after washing is a step most people skip, but it makes a real difference. The blades will open and close more easily, and the shears will last much longer with this simple habit.
- Always separate the blades before deep cleaning if your shears allow it
- Use a stiff brush or old toothbrush to scrub the pivot joint and screw area
- Wash with warm, soapy water and scrub every surface including the handle holes
- Rinse all soap off completely before moving to the drying step
- Dry every part with a cloth immediately, do not leave them wet on the counter
- Apply one small drop of food-safe oil to the joint after every thorough wash
Can You Put Kitchen Shears in the Dishwasher?
Some shears are dishwasher-safe, and some are not. The only way to know for sure is to check the label or the brand’s website. If the box says dishwasher-safe, go ahead. If you are not sure, hand wash them. The dishwasher is not worth the risk.
Here is the problem with the dishwasher. The heat and strong detergent are harsh on metal. Over time, they strip away any protective coating on the blades and weaken the joint. The best way to wash kitchen shears is almost always by hand, even if they are technically dishwasher-safe.
If you do use the dishwasher, separate the blades first, place them on the top rack, and open them up fully so water can reach the joint. Never drop them loosely into the cutlery basket with the blades closed. That traps moisture and speeds up rust.
After the dishwasher cycle ends, take the shears out right away and dry them by hand. Never leave them sitting in a closed dishwasher after washing. The steam inside finishes the job of rusting what the cycle started.
- Check the label or brand website before putting shears in the dishwasher
- Hand washing is always safer, even for dishwasher-safe models
- Separate the blades and place them open on the top rack if you use the dishwasher
- Never place closed shears loosely in the cutlery basket
- Always dry them by hand immediately after the dishwasher cycle ends
- Strong dishwasher detergent wears down blades and joints faster over repeated use
Final Thoughts
I hope this gives you a clear and simple routine you can actually stick to. Cleaning kitchen shears does not have to be complicated. Rinse, scrub, dry, oil. Do it consistently and your shears will stay sharp, safe, and rust-free for a long time. Even two minutes of proper care after each use makes a difference. You have got this, and your kitchen deserves tools that actually work well.
| Step | What to Do | Tool to Use | How Often | Key Area to Focus | Common Mistake |
|---|---|---|---|---|---|
| Rinse | Wash away loose food under warm running water | Running tap water | After every use | Blade edges and joint gap | Letting food dry before rinsing |
| Separate blades | Pull apart at the pivot joint using the lock mechanism | Your hands | Every wash if possible | Pivot point and screw thread | Forcing the blades apart without releasing the lock |
| Scrub with soap | Scrub all surfaces with dish soap and a stiff brush | Stiff brush or toothbrush | After every use | Both sides of each blade and handle holes | Only scrubbing the cutting edge and skipping the spine |
| Clean the joint | Scrub the screw, thread, and joint hole with a brush | Old toothbrush | Every wash | Screw threads and inner joint surface | Skipping this step because it looks clean on the outside |
| Rinse and dry | Rinse off soap completely, then dry immediately with a cloth | Clean kitchen towel | After every wash | Joint area and blade spine where water collects | Air-drying and leaving moisture on the metal |
| Oil the joint | Apply one drop of food-safe oil to the pivot, open and close blades to spread it | Food-safe mineral oil or cooking oil | After every deep wash | Pivot joint contact point | Skipping the oil step or using too much oil |
Frequently Asked Questions
Is it safe to clean kitchen shears with bleach?
Only if you rinse extremely well afterward. Bleach is harsh on metal and can speed up corrosion if left on the blades. Warm soapy water is enough for most cleaning. Save bleach for deep sanitizing after cutting raw meat, and rinse immediately.
Can I sharpen kitchen shears at home after cleaning them?
Yes. A simple sharpening stone or a dedicated shear sharpener works well. Run the blade edge along the stone at the same angle a few times. Clean them after sharpening to remove any metal dust before using them on food.
Are stainless steel shears easier to maintain than regular ones?
Generally, yes. Stainless steel resists rust better and is easier to dry without worrying. But stainless does not mean rust-proof. You still need to dry them properly and oil the joint regularly to keep them in good shape.
Do kitchen shears need to be sanitized after cutting raw meat?
Yes, always. Wash with hot soapy water first, then rinse with a diluted bleach solution or a food-safe sanitizer. Dry completely right after. Raw meat carries bacteria that regular rinsing alone does not remove fully.
Is soaking kitchen shears a good idea?
No. Soaking weakens the joint, loosens any handle rivets, and encourages rust. A few minutes in soapy water while you scrub is fine, but do not leave them sitting in water for an hour or overnight. That causes real damage over time.
Can rusty kitchen shears be saved?
Often yes, if the rust is surface-level. Scrub with a paste of baking soda and a little water, or use a cut potato dipped in dish soap. Rinse well, dry completely, and oil the joint. Deep rust that has pitted the blade is harder to fix.
Are wooden-handled shears harder to clean than plastic ones?
Yes, a bit. Wood absorbs water and can crack or swell if you soak them. Wipe wooden handles with a damp cloth rather than submerging them. Dry the handles fast and apply a little mineral oil to the wood occasionally to keep it from splitting.
Do I need a special brush to clean the joint area?
No special brush needed. An old toothbrush works perfectly. The small head fits into tight gaps around the screw and joint, and the bristles are stiff enough to dislodge dried grease. Keep one near the sink just for cleaning tools like this.
