As an Amazon Associate, I earn from qualifying purchases at no extra cost to you.
The Right Way to Hold Your Chef Knife: Master the Art of Knife Skills
Have you ever watched a chef wield a knife with grace and precision, wondering how they do it? Holding a chef knife might seem simple, but there’s an art to it that can make cooking safer and more enjoyable. In this article, we’ll unlock the secrets to holding a chef knife like a pro.
From understanding grip techniques to finding the perfect balance point, we’ll cover everything you need to know to feel confident and efficient in the kitchen. Whether you’re a beginner or a seasoned home cook, mastering the proper way to hold a chef knife can elevate your cooking skills and make chopping, slicing, and dicing a breeze. Let’s dive in and sharpen those knife skills!

Understanding the Chef Knife
Understanding how to use a chef knife is super important for cooking safely and efficiently. So, let’s break it down! First off, what is a chef knife? Well, it’s that big knife you see chefs using on TV, with a sharp blade and a handle. Think of it like your kitchen’s superhero!
Now, when we talk about the chef knife, it’s helpful to know its parts. There’s the blade, which is the sharp, cutting part. Then, there’s the handle, where you hold onto the knife. It’s like the grip on a bike – it helps you control where the knife goes.
Chef knives come in different shapes and sizes, but they all do pretty much the same thing: chop, slice, and dice food! They’re like the MVPs of the kitchen because they can handle so many different tasks.
But here’s the thing: to use a chef knife properly, you need to hold it the right way. You want to have a good grip on the handle, with your fingers wrapped around it comfortably. This helps you control the knife better and reduces the chances of accidents.
Importance of Proper Grip
Having the right grip when you hold a chef knife is super important. It’s like driving a car safely – you need to have control. When you grip the knife correctly, you can avoid accidents and hurting yourself. Imagine trying to cut vegetables with a loose grip – the knife could slip and hurt you. But if you hold it right, you have more control and can cut smoothly and safely.
Another reason for a proper grip is to make your cooking easier. When you hold the knife the right way, you can cut things more precisely and quickly. Think about it like holding a pencil when you write – if you hold it wrong, your writing might be messy. But if you hold it right, you can write neatly and quickly.
Having a good grip also helps you not get tired easily. If you hold the knife too tightly, your hand and arm can get tired fast. But if you relax your grip and hold the knife properly, you can chop and slice for longer without feeling tired.
So, having the right grip when you hold a chef knife is not just about safety – it’s also about making your cooking experience better and more enjoyable.
Steps to Holding a Chef Knife Correctly
Holding a chef knife the right way is super important for cooking safely and efficiently. Here’s how to do it step by step:

Get Familiar with Your Knife
First, take a good look at your chef knife. Notice its different parts: the blade, the handle, and the bolster. The blade is the sharp part for cutting, the handle is where you grip the knife, and the bolster is the thick part between the blade and the handle. Understanding these parts will help you hold the knife correctly.
Find the Right Grip
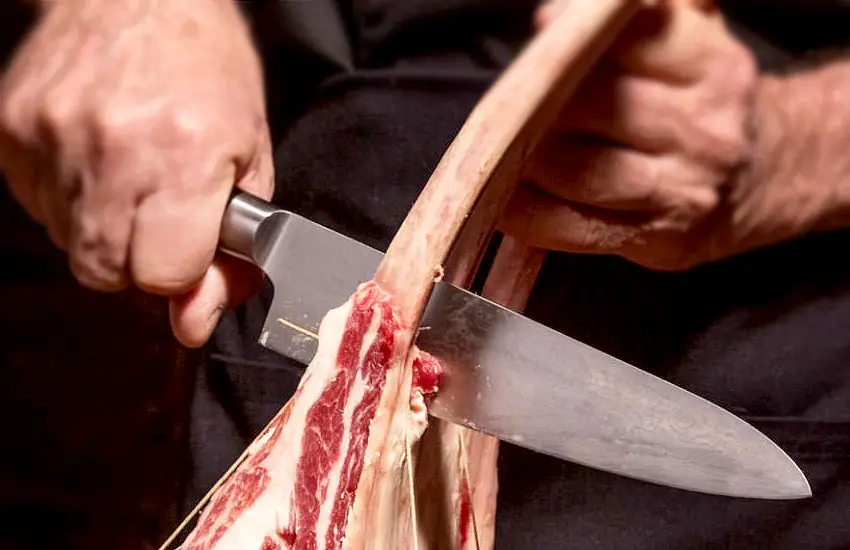
Hold the knife with your dominant hand. Wrap your fingers around the handle, making sure your thumb is resting on the side of the blade. Your index finger should be positioned on the spine of the blade, just above the bolster. This grip gives you stability and control while cutting.
Balance the Knife
Make sure the knife feels balanced in your hand. You don’t want it to feel too heavy on one side or the other. Adjust your grip until you feel comfortable and in control.
Relax Your Grip
Avoid gripping the knife too tightly. This can cause tension in your hand and arm, making it harder to cut and increasing the risk of accidents. Instead, keep a firm but relaxed grip on the knife.
Steady the Knife
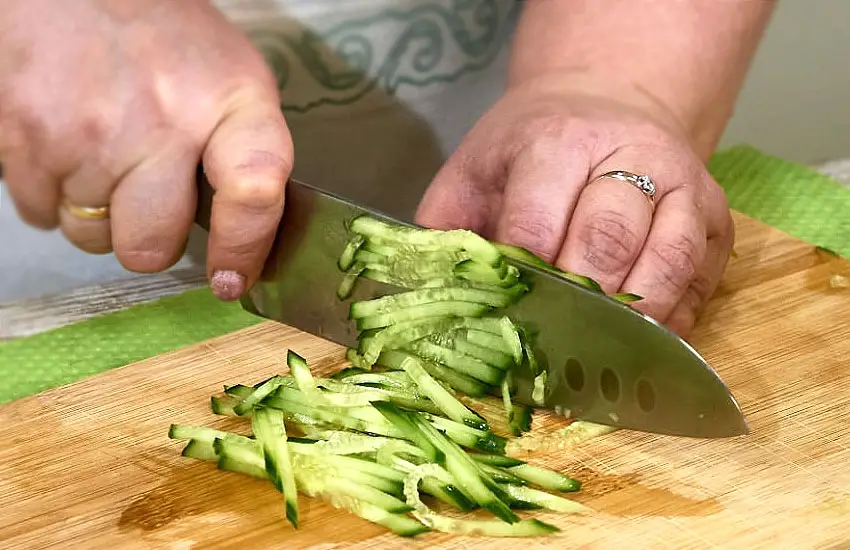
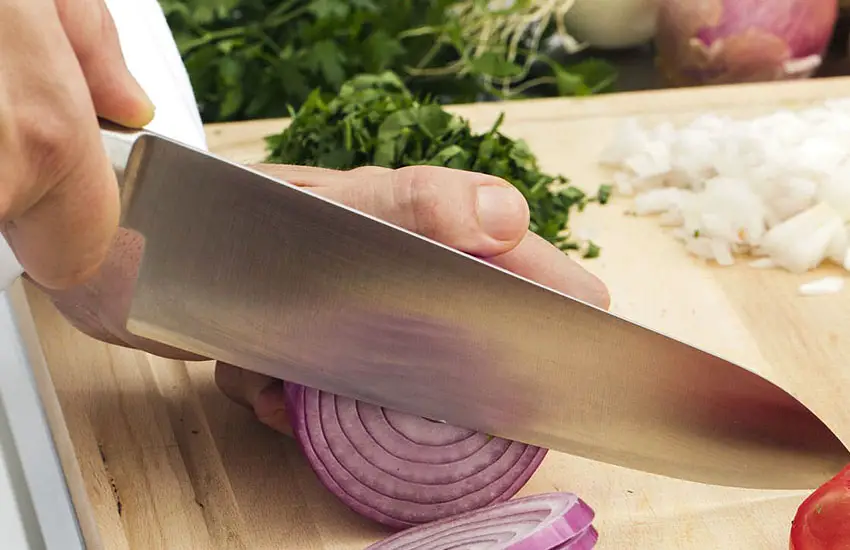
Use your non-dominant hand to stabilize the food you’re cutting. Place your fingertips on top of the food, keeping them curled under to protect them from the blade. This “claw grip” helps keep the food steady and prevents your fingers from getting in the way of the knife.
Position Your Body
Stand with your feet shoulder-width apart and your knees slightly bent. This stable stance gives you better balance and control while cutting. Position your body so that you’re facing the food directly, with your knife hand slightly behind the food and your non-dominant hand slightly in front.
Practice Basic Cutting Motions
Start by practicing basic chopping motions. Hold the knife with your dominant hand and use a rocking motion to chop the food. Keep your other hand steady and out of the way. Practice slicing and dicing, making sure to keep your fingers safely tucked away.
Focus on Accuracy Over Speed
When you’re first learning how to hold a chef knife, focus on accuracy rather than speed. Take your time to make precise cuts, paying attention to your grip and technique. As you become more comfortable, you can gradually increase your speed.
Build Muscle Memory
Repetition is key to mastering any skill, including holding a chef knife. The more you practice, the more your muscles will remember the correct grip and technique. Set aside time each day to practice your knife skills, even if it’s just for a few minutes.
Be Patient and Persistent
Learning how to hold a chef knife correctly takes time and practice. Don’t get discouraged if you don’t get it right away. Keep practicing, and soon it will become second nature.
By following these steps and practicing regularly, you’ll soon become confident and comfortable holding a chef knife like a pro!
Gripping Techniques

Gripping Techniques: Pinch Grip
To achieve precision and control while holding a chef knife, mastering the pinch grip technique is crucial. This grip allows you to have a firm hold on the knife, giving you better command over your cuts and minimizing the risk of accidents.
With the pinch grip, start by placing your thumb on the back of the knife’s blade, close to where the handle begins. Your index finger should curve around the spine of the knife, laying parallel to the thumb. Wrap your remaining three fingers around the handle for support and stability. The pinch grip ensures that you have optimal control over the blade’s movement.
When using the pinch grip, make sure your hand is relaxed but firm. Avoid gripping the knife too tightly as it can strain your hand and hinder your cutting technique. By maintaining a relaxed grip, you allow for fluid movements and reduce the chances of muscular fatigue.
Gripping Techniques: Hammer Grip
Another gripping technique commonly used by chefs is the hammer grip. This grip provides a different level of comfort and control for certain types of cuts, such as chopping and slicing through tougher ingredients.
To use the hammer grip, wrap your fingers firmly around the handle, similar to how you would grip a hammer. Your thumb should rest on the handle’s side, opposite to the blade, providing stability and balance. The hammer grip provides a solid foundation for exerting force while cutting, allowing you to leverage the weight of the knife.
The hammer grip is often preferred when dealing with heavy-duty tasks or when the pinch grip might not provide enough power. Remember to maintain a relaxed grip as you would with the pinch grip, avoiding excessive tension in your hand and wrist.
Proper Hand And Finger Placement
Learn the proper hand and finger placement for holding a chef knife to ensure control and precision while cutting. Mastering this technique is essential for kitchen safety and efficient food preparation.
Positioning Your Hand On The Handle
When it comes to holding a chef knife correctly, proper hand and finger placement is crucial. One of the first things to focus on is the positioning of your hand on the handle. Ensure that you have a firm grip on the handle, allowing you to control the knife effectively.
Curling Your Fingers
Once you have a secure grip on the handle, the next step is to curl your fingers around it. Start by placing your index finger on the top of the handle, near the base of the blade. Let your thumb rest on the side of the handle, providing stability and control.
Allow the rest of your fingers to curl around the handle naturally, providing a secure and comfortable grip. This grip allows you to have better control over the knife, ensuring safer and more precise cuts.
Positioning Your Thumb And Index Finger
In addition to curling your fingers, pay attention to the position of your thumb and index finger. Your thumb should be placed behind the guard, which is the area separating the blade from the handle. This position helps to guide the knife and prevent accidental slips.
Similarly, your index finger should be positioned along the blade, resting firmly against the side. This anchor point aids in stability and control while allowing you to guide the knife smoothly through various cutting motions.
Tips For Better Hand And Finger Placement
Here are some additional tips to improve your hand and finger placement:
- Keep a relaxed but firm grip on the handle, avoiding excessive tension in your hand and fingers.
- Hold the knife with your dominant hand, while using your non-dominant hand to stabilize the ingredients being cut.
- Regularly check and adjust your grip during prolonged cutting sessions to prevent hand fatigue and maintain accuracy.
- Practice proper hand and finger placement regularly until it becomes natural and comfortable.
By mastering the art of holding a chef knife with proper hand and finger placement, you can elevate your culinary skills and enhance your overall cooking experience. With practice and attention to detail, you will soon discover the difference it makes in your cutting techniques.
Knife Cutting Techniques
Rocking Motion
The rocking motion is a fundamental cutting technique commonly used for chopping herbs, garlic, or creating a fine mince. To perform this motion, place your guiding hand on top of the blade near the tip, while using a gentle up-and-down rocking motion to slice through the ingredients with precision.
Chopping Motion
When tackling larger ingredients such as onions, carrots, or potatoes, the chopping motion is your go-to technique. Begin by gripping the knife handle firmly while keeping your guiding hand on the opposite end of the ingredient. With a quick up-and-down motion, apply steady pressure to create uniform chunks or pieces.
Final Words
I hope this guide has helped teach you the proper way to hold a chef knife. By understanding the importance of grip and following the steps outlined, you can improve your cooking skills and ensure safety in the kitchen. Remember to practice regularly and be patient with yourself as you develop muscle memory and confidence. With time and dedication, you’ll master this essential kitchen skill and enjoy the satisfaction of preparing delicious meals with precision and efficiency. Happy cooking!
