
As an Amazon Associate, I earn from qualifying purchases at no extra cost to you.
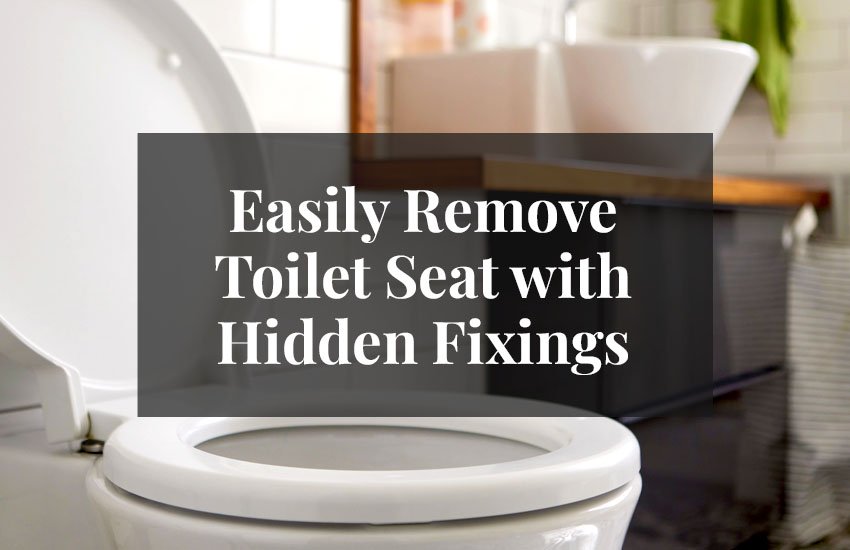
How to Remove Toilet Seat with Hidden Fixings (6 Steps)
Ever tried removing a toilet seat only to find the bolts completely invisible? Hidden fixings can be surprisingly tricky, leaving many scratching their heads. I once spent 20 minutes poking around under a toilet, wondering if I needed a magic tool. The good news is, with a few practical tricks, you can remove even the sneakiest hidden toilet seat fast and without scratching anything. Let's dive into exactly how to do it safely and efficiently.
Locate the hidden fixings by lifting the small caps or covers, gather simple tools like a flathead screwdriver or plastic pry tool, carefully release the clip or bolt mechanism, use gentle force to lift the seat off, check both sides for any secondary locks, remove washers or screws, clean the area before installing a new seat, and optionally use a safe metal key wrapped in tape if extra leverage is needed.
How to Remove Toilet Seat with Hidden Fixings – Easy DIY Tips
Identify the Hidden Fixings
The first challenge is spotting those hidden fixings. Most toilets with concealed bolts have small caps at the back of the seat. These caps can be plastic tabs that snap open or push-button covers. Start by gently prying them with a plastic tool. Plastic pry tools are recommended because they won't scratch your toilet's porcelain. If the cap is stubborn, a small flathead screwdriver wrapped in tape works too. Carefully lift or twist the cover to reveal the bolt underneath.
Once you uncover the bolt, check if it's a standard screw or a snap-in clip. Some modern toilet seats use a spring-loaded mechanism that pops off with gentle pressure. Examine both sides of the seat to ensure you've found all hidden fixings. Don't rush this step, as forcing the cap or bolt can crack your toilet or break the seat. Taking a few extra seconds to inspect properly makes the removal smooth.
After identifying all bolts, note their orientation and type. This helps if you plan to reinstall or replace the seat later. Some hidden bolts are longer or shorter than they appear, so keep everything organized. Knowing what you're dealing with also reduces surprises when lifting the seat off.
- Look for small caps or tabs at the back of the seat
- Use plastic pry tools or taped screwdriver to avoid scratches
- Check both sides for all hidden fixings
- Identify bolt types for smooth removal
Gather the Right Tools
Removing a toilet seat with hidden fixings doesn't require a full toolbox. The essentials include a plastic pry tool, a flathead screwdriver, and possibly an adjustable wrench. Plastic tools are preferred because they prevent scratching. The flathead screwdriver can help if the plastic pry tool can't fully release a tight cap. Wrapping the screwdriver in tape prevents accidental chips or marks.
An adjustable wrench may be needed if the hidden bolt has a nut underneath the toilet. In some cases, hidden fixings have a spring clip system, and the seat can pop off without tools, but having the wrench handy prevents unexpected struggles. Some DIYers even keep a small flashlight nearby to see under the seat clearly.
It's important to prepare a safe workspace. Lay a towel on the floor to protect your knees and catch any small screws that might fall. Clear the area of items that could get wet or dirty. This small preparation saves frustration and keeps your bathroom clean while you work.
- Plastic pry tool prevents scratches
- Tape flathead screwdriver for safety
- Adjustable wrench for nuts underneath
- Flashlight can help visibility under seat
Release the Clips or Bolts
Once tools are ready, it's time to release the clips or bolts. Start with gentle pressure on the plastic pry tool under the cap. You should feel a soft click when the mechanism releases. Avoid forcing it; if it resists, double-check for additional clips. Some toilets have bolts with hidden tabs that need to be pushed simultaneously to unlock.
After the clips are released, hold the seat firmly and lift slightly. If it doesn't come off easily, inspect for a secondary locking mechanism. Some modern seats include a small latch under the bolt area. Press or pull this latch while lifting to free the seat. This process ensures you won't bend or crack the plastic seat.
Once the seat is free, set it aside and collect all bolts and clips. Organize them in a small container if you plan to reuse them. This way, you won't lose tiny pieces and can reinstall the seat efficiently. Keeping bolts separate also helps when cleaning the toilet before installing a new seat.
- Apply gentle pressure to pry tool
- Look for soft clicks when clips release
- Inspect for secondary locks
- Organize bolts and clips safely
Remove Washers and Nuts
After lifting the seat, the hidden fixings usually include washers or nuts underneath. These parts prevent the seat from wobbling and must be removed carefully. Use an adjustable wrench or pliers to loosen any nuts, turning counterclockwise. Plastic nuts can often be unscrewed by hand. Avoid over-tightening when removing to prevent cracking.
Washers are often tucked between the bolt and the seat. Inspect each washer for damage or buildup. Cleaning them now prevents grime from interfering with the new seat. If any washers are broken or worn, it's better to replace them. Keeping everything clean ensures a smooth installation later.
Once nuts and washers are removed, double-check that all hidden parts are accounted for. Some systems include small spacers or clips that are easy to overlook. Missing parts can make reinstallation difficult, so inspect carefully before discarding anything.
- Loosen nuts with wrench or by hand
- Remove and inspect washers
- Clean all components before reuse
- Check for small spacers or clips
Lift the Toilet Seat Off
With all fixings released, lifting the seat is straightforward. Grip both sides of the seat firmly and pull upward. The seat should come off without much effort. If it feels stuck, double-check for any hidden clips still engaged. A slight wiggle can help release stubborn areas without forcing the seat.
When lifting, avoid rocking side-to-side aggressively. Porcelain toilets can crack under uneven pressure. Hold the seat evenly and remove it slowly. Plastic seats are less fragile but still benefit from careful handling. If replacing with a new seat, place the old one aside safely to avoid tripping hazards.
After removal, wipe down the toilet rim. Hidden fixings often trap dirt and grime, so cleaning now improves hygiene and makes the new seat fit better. A quick scrub with mild cleaner removes residue and ensures a fresh installation.
- Pull seat evenly from both sides
- Wiggle gently if stuck
- Avoid rocking aggressively to prevent cracks
- Clean toilet rim before installing new seat
Clean and Inspect the Toilet Area
Once the seat is removed, it's the perfect time to clean and inspect the toilet area. Hidden bolts often collect dust, hair, and grime. Use a damp cloth and mild cleaner to wipe around the bolt holes and under the rim. This not only improves hygiene but ensures the new seat fits snugly.
Inspect the porcelain for cracks or chips. Even minor damage can worsen if a new seat is installed without noticing. Check bolt holes for wear—if the holes are enlarged or damaged, new fixings may not hold securely. In this case, a repair kit or longer bolts may be necessary.
A clean and inspected toilet area reduces future maintenance headaches. It ensures that the hidden fixings of your new seat will work perfectly and prolongs the life of both the toilet and the seat. Small preventative care here saves time and effort later.
- Clean around bolt holes and under rim
- Inspect porcelain for cracks
- Check bolt holes for wear
- Ensure new seat fits snugly
Reinstall or Replace the Seat
After cleaning, reinstalling or replacing the seat is simple. Place the seat over the holes, aligning the bolts with the openings. Insert washers and nuts, tightening gently. Plastic bolts usually snap into place; metal nuts may need a wrench. Make sure the seat is centered and level before fully tightening.
Test the seat by pressing down and shifting side-to-side. It should be stable without rocking. If the seat wobbles, slightly adjust the bolts or tighten nuts incrementally. Avoid over-tightening, which can crack plastic seats or porcelain. Once secure, snap on the caps or covers to hide the fixings.
With everything in place, your toilet seat looks neat and functions smoothly. Hidden fixings are no longer a mystery, and future removal will be easier because the seat was reinstalled properly. Small attention to detail ensures years of hassle-free use.
- Align seat with bolt holes
- Insert washers and nuts carefully
- Test stability and adjust if needed
- Snap on caps to hide fixings
Final Thoughts
Removing a toilet seat doesn't have to be stressful. By taking your time, using plastic tools, and checking all clips and bolts, you can easily master how to remove toilet seat with hidden fixings. Cleaning the area and handling parts carefully ensures smooth reinstallation and long-lasting results. With these simple techniques, even tricky hidden bolts become easy to manage.
| Action | Details | Tips |
|---|---|---|
| Locate caps | Lift or pry small plastic caps at back of seat | Use plastic pry tool or taped screwdriver |
| Identify bolt type | Check if standard screw, snap clip, or spring mechanism | Look on both sides of seat |
| Gather tools | Plastic pry tool, flathead screwdriver, wrench, optional flashlight | Tape metal tools for safety |
| Release fixings | Pry gently to release clips or bolts | Look for secondary locks |
| Remove washers/nuts | Unscrew counterclockwise | Inspect and clean all washers |
| Lift seat | Pull evenly from both sides | Wiggle gently if stuck |
| Clean area | Wipe rim and bolt holes | Remove grime and check porcelain |
| Reinstall seat | Align bolts, insert washers, tighten nuts | Test stability before snapping caps |
Frequently Asked Questions (FAQs)
Is it safe to use a metal screwdriver on hidden fixings?
Yes, using a metal screwdriver is safe if you wrap it in tape. The tape prevents scratches on the porcelain or seat plastic. Always start gently to avoid slipping. For tight clips, the taped metal screwdriver can provide leverage without damage. Avoid applying excessive force, and keep a plastic pry tool handy as a backup for delicate spots.
Can I remove a toilet seat without any tools?
It depends on the seat design. Some hidden-fixing seats use snap-in clips that release by hand. Carefully lift the small caps and press or pull the mechanism. If the seat resists, tools may be needed. Always check for secondary locks and release gently to avoid cracking the seat or porcelain.
Do I need to clean the toilet before installing a new seat?
Absolutely. Hidden bolts often trap grime, hair, and dust. Cleaning the rim and bolt holes ensures the new seat sits flush and prevents wobbling. Use mild cleaner and a damp cloth. Inspect for cracks or wear to avoid future issues. A clean surface also improves hygiene and prolongs seat life.
Is it necessary to remove washers when taking off the seat?
Yes, washers should be removed to free the bolts completely. They prevent wobbling and may trap dirt. Inspect each washer for wear or cracks and clean them. Reuse if intact, or replace with new ones for a secure fit when reinstalling the seat.
Can hidden fixings crack the toilet if forced?
Yes, porcelain toilets are fragile under uneven force. Avoid aggressive rocking or prying. Always use gentle pressure, check for all clips, and lift evenly. Using plastic tools reduces risk, and inspecting the mechanism before pulling ensures the seat comes off safely.
Do I need an adjustable wrench for every toilet seat removal?
Not always. Some seats can be removed by hand or with a flathead screwdriver. An adjustable wrench is helpful for nuts under the toilet. Keep one handy for unexpected tight bolts, but many hidden-fixing seats are designed for easy tool-free removal.
Is it better to use plastic or metal tools for this task?
Plastic tools are preferred to prevent scratching. A metal screwdriver wrapped in tape can be used for extra leverage, but plastic should handle most tasks. Plastic pry tools reduce risk of chipping porcelain and are gentler on clips and caps.
Can I reuse the old hidden-fixing bolts and clips?
Yes, if they are intact and not worn. Inspect all parts for cracks or damage. Clean washers and bolts before reuse. Replace any worn components to ensure the new or reinstalled seat is stable and secure. Proper inspection prevents wobbling and future repairs.
