
As an Amazon Associate, I earn from qualifying purchases at no extra cost to you.
How to Sharpen Your Mandoline Slicer (Expert Tips)
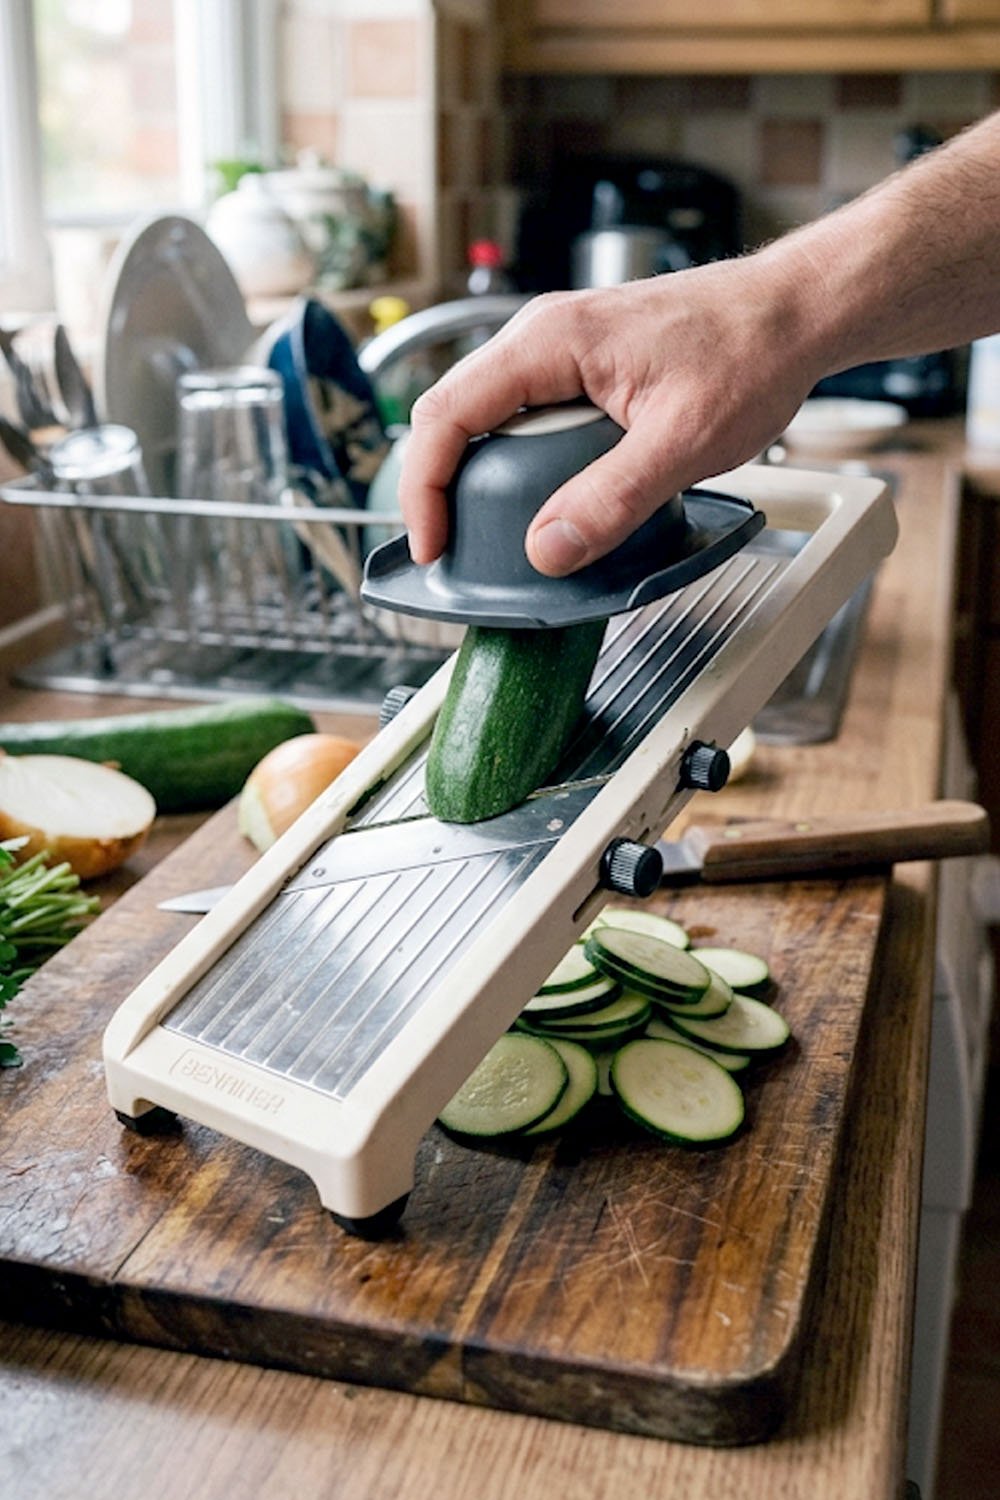
Most people don’t realize their mandoline slicer is dull until it starts tearing food instead of slicing it. A dull blade is actually more dangerous than a sharp one. You push harder, you lose control, and accidents happen fast. So today, you’ll learn exactly how to sharpen a mandoline slicer the right way, safely and simply.
First, always unplug or secure your mandoline before touching the blade. Then, choose the right sharpening tool, either a whetstone, honing rod, or pull-through sharpener, based on your blade type. After that, use slow and steady strokes at the correct angle, clean the blade well, and always test sharpness carefully before your next use.
Why Does a Mandoline Blade Get Dull So Fast?
A mandoline slicer works hard. Every single slice puts pressure on that tiny blade edge. Over time, that edge just wears down, especially if you’re slicing firm vegetables like carrots, beets, or sweet potatoes. It’s totally normal, and honestly, it happens faster than most people expect.
The material of your blade matters a lot too. Stainless steel blades are common and affordable, but they dull quicker than high-carbon steel ones. Ceramic blades stay sharp longer, but they’re harder to sharpen at home. So knowing what kind of blade you have is the very first step.
Another big reason blades go dull fast is washing. Putting your mandoline in the dishwasher is rough on the blade edge. The high heat and strong detergent slowly damage it. Hand washing and drying immediately after use can actually extend the life of your blade by months.
So basically, regular use plus heat plus tough vegetables all add up. But the good news is, sharpening it back up is not that hard once you know what you’re doing.
- Firm vegetables like carrots and beets wear the blade down faster
- Dishwasher washing slowly damages the blade edge over time
- Stainless steel blades dull quicker than high-carbon steel ones
- Ceramic blades need special tools to sharpen properly
- Blade angle and pressure during slicing also affect sharpness
- Regular light sharpening is better than waiting until it’s completely dull
Gather the Right Tools Before You Start
Before you touch that blade, you need the right tools nearby. The most common options are a whetstone, a honing rod, a pull-through sharpener, or a sharpening stone stick. Each one works differently, so picking the right one for your blade type really matters here.
A whetstone gives you the most control and the best results. It takes a little practice, but once you get the hang of it, it’s honestly the best way to go. Pull-through sharpeners are faster and easier for beginners. They don’t give the same precision, but they do the job for everyday home cooks.
Also grab a thick kitchen towel or cut-resistant gloves before starting. Safety first, always. Lay everything out on a stable surface so nothing slides around while you work. Being prepared makes the whole process way less stressful.
- Use a whetstone for the sharpest and most precise results
- Pull-through sharpeners work great for quick and easy sharpening
- Cut-resistant gloves protect your hands during the whole process
- Always work on a stable, non-slip surface for better control
- Have a clean cloth nearby to wipe the blade between strokes
- Know your blade material before choosing your sharpening tool
How to Stay Safe While Handling the Blade
Safety is not optional here. Mandoline blades are seriously sharp, even when they feel dull to you. So before anything else, put on your cut-resistant gloves. These are cheap, easy to find, and they can genuinely save your fingers from a nasty cut.
Next, make sure the mandoline is fully detached or locked in place before you start working on the blade. Some models let you remove the blade completely, which is the safest option. If yours doesn’t, lock the frame securely so it doesn’t shift around while you sharpen.
Always move the sharpening tool away from your body, never toward yourself. Keep your grip firm but not tense. And take your time. Rushing through this step is how accidents happen, so just slow down and stay focused the whole time.
- Always wear cut-resistant gloves before touching the blade
- Remove the blade from the frame if your model allows it
- Lock the mandoline frame tightly if the blade can’t be removed
- Always sharpen in a direction away from your body
- Keep your movements slow, steady, and fully in control
- Never rush this step, no matter how little time you have
How to Sharpen a Mandoline Slicer With a Whetstone
Start by soaking your whetstone in water for about five to ten minutes. This helps the stone glide smoothly and gives you a cleaner edge. While it soaks, dry your mandoline blade gently with a cloth so there’s no moisture causing slipping during the process.
Now, hold the blade at about a 20-degree angle against the whetstone. Use your fingertips on the flat side to guide the blade. Then, with gentle and steady pressure, slide the blade across the stone from one end to the other. Repeat this about eight to ten times on each side, keeping that angle consistent the whole way through.
After a few strokes, wipe the blade clean and check your progress. You should start to feel a slightly smoother edge forming. Once both sides feel even, rinse the blade well, dry it off, and do a quick test slice on a soft vegetable like a tomato or cucumber to check the sharpness.
- Soak the whetstone for five to ten minutes before starting
- Hold the blade at a steady 20-degree angle throughout
- Use gentle pressure, never press too hard on the blade
- Sharpen both sides evenly for the best balanced edge
- Wipe the blade clean between sessions to check progress
- Always test on a soft vegetable before full use again
How to Use a Pull-Through Sharpener the Easy Way
A pull-through sharpener is the most beginner-friendly option out there. It’s simple, quick, and doesn’t require any special skill. Just make sure you’re using one that’s compatible with thin blades, because not all pull-through sharpeners work well with mandoline blades specifically.
Set the sharpener flat on your counter and hold it steady with one hand. With your other gloved hand, slowly pull the blade through the slot from base to tip. Use light pressure and let the sharpener do the work. Don’t force it or press down hard because that can actually damage the edge instead of fixing it.
Do this about four to six times, then wipe the blade clean. Pull-through sharpeners remove a tiny bit of metal each time, so don’t overdo it. A few careful passes are enough to bring the edge back to life without wearing the blade down too fast.
- Choose a pull-through sharpener made for thin, fine blades
- Keep the sharpener flat and steady on your counter at all times
- Always pull the blade from base to tip in one smooth motion
- Use light pressure and let the tool do the actual work for you
- Four to six passes are usually enough for a good sharp edge
- Wipe the blade clean after every couple of passes to check progress
How to Test if Your Blade is Sharp Enough to Use
Testing sharpness is just as important as the sharpening itself. A lot of people skip this step, and then they end up back at square one after one use. So please don’t skip it. It only takes a minute and it tells you a lot.
The easiest test is the paper test. Hold a piece of regular printer paper and slowly drag the blade across the top edge. If it cuts cleanly and smoothly, your blade is sharp. If it tears or drags, you need a few more sharpening passes before you call it done.
Another great test is the tomato test. A ripe tomato has soft skin, so a sharp blade should glide right through it with almost zero pressure. If you have to push or the skin squishes instead of slicing, the blade still needs more work. Go back and sharpen a little more, then test again.
- Try the paper test first for a quick and easy sharpness check
- A clean paper cut means your blade is sharp and ready to go
- The tomato test is the most practical real-world sharpness check
- If the tomato skin squishes instead of slices, sharpen more
- Never use the blade on hard vegetables until it passes both tests
- Always re-test after each sharpening session before full cooking use
How to Clean and Store the Blade After Sharpening
After sharpening, your blade needs a good clean before it goes anywhere near food. Tiny metal particles can sit on the edge after sharpening, and you definitely don’t want those in your salad. So rinse the blade under warm running water and wipe it carefully with a clean cloth.
Dry it completely right after washing. Moisture is the enemy of a freshly sharpened blade because it leads to rust, especially on stainless steel. A few seconds of drying makes a big difference in how long your blade stays sharp and clean.
For storage, never toss the blade loose in a drawer. That damages the edge fast and it’s a safety hazard too. Use the blade guard that came with your mandoline, or wrap it in a thick cloth. Some people use a magnetic knife strip, which works great and keeps the blade protected and easy to grab.
- Rinse the blade under warm water right after sharpening it
- Wipe off any tiny metal particles with a clean dry cloth
- Dry the blade fully to prevent rust from forming on the edge
- Always use the blade guard or a protective wrap for storage
- Never store the blade loose in a drawer with other kitchen tools
- A magnetic knife strip is a smart and safe storage option too
What Are the Most Common Mandoline Sharpening Mistakes?
The biggest mistake people make is skipping the gloves. It seems obvious, but honestly, so many people try to “be careful” without protection and end up with a cut. Just wear the gloves. Every single time, no exceptions.
Another common mistake is using the wrong angle. If you hold the blade too flat or too steep against the sharpening stone, you’ll either round off the edge or create a weird bevel that doesn’t slice well. Stick to around 20 degrees and keep it consistent throughout your sharpening session.
People also over-sharpen, which is a real thing. Doing 30 to 40 passes on a whetstone when five to ten would have done the job wears down the blade faster than normal use would. Less really is more here. A few careful passes beat a hundred rushed ones every time.
Lastly, people forget to clean the blade before testing it. Metal residue from sharpening can make the blade feel smoother than it actually is, giving you a false reading on sharpness. Always wipe it clean first, then test properly.
- Skipping gloves is the most common and most dangerous mistake
- Using the wrong blade angle creates an uneven or rounded edge
- Over-sharpening wears the blade down faster than regular cooking use
- Rushing through strokes causes inconsistent and patchy results
- Forgetting to clean the blade before testing gives a false sharpness reading
- Using the wrong sharpening tool for your blade type causes damage
Final Thoughts
I hope this gave you the confidence to actually go sharpen that mandoline instead of leaving it in the back of the cabinet. Knowing how to sharpen a mandoline slicer is a simple skill that makes a huge difference in your cooking. Take it slow, wear your gloves, and don’t overthink it. You’ve totally got this!
| Sharpening Method | Best For | Skill Level | Tools Needed | How Many Passes | Result Quality |
|---|---|---|---|---|---|
| Whetstone (coarse grit) | Very dull or chipped blades | Intermediate | Whetstone, water, cloth | 10 to 15 passes per side | Excellent, precise edge |
| Whetstone (fine grit) | Light touch-up after coarse grit | Intermediate | Fine whetstone, water | 8 to 10 passes per side | Polished, razor-sharp edge |
| Pull-through sharpener | Quick everyday sharpening | Beginner | Pull-through tool | 4 to 6 passes total | Good, consistent edge |
| Honing rod | Minor realignment of the edge | Beginner to intermediate | Honing rod | 5 to 8 strokes per side | Decent, maintenance level |
| Diamond sharpening stick | Ceramic or hard steel blades | Intermediate | Diamond stick | 6 to 10 passes per side | Very good, clean bevel |
| Professional sharpening service | Severely damaged or chipped blades | None needed | Just drop it off | N/A, done for you | Professional grade results |
| Sandpaper method (emergency) | When no tools are available | Beginner | Fine grit sandpaper | 10 to 15 light passes | Decent, short-term fix |
| Ceramic sharpening rod | Stainless steel blades only | Beginner | Ceramic rod | 6 to 8 strokes per side | Good, smooth finish |
| Electric sharpener | Fast results with minimal effort | Beginner | Electric sharpening tool | 2 to 3 passes only | Good but less precise |
| Leather strop (finishing step) | Polishing after any sharpening | Beginner | Leather strop | 5 to 10 light passes | Incredible, barber-sharp edge |
Frequently Asked Questions (FAQs)
Is It Safe to Sharpen a Mandoline Blade at Home?
Yes, totally safe as long as you wear cut-resistant gloves and work on a stable surface. Take it slow, follow the right steps, and you’ll be completely fine doing it at home.
Can I Use a Regular Knife Sharpener for My Mandoline?
You can try a pull-through knife sharpener if the slot fits the blade. But a whetstone or a sharpener made for thin blades gives you much better results overall.
Do I Need to Remove the Blade Before Sharpening?
It depends on your mandoline model. Removing the blade is safer and easier. If your model doesn’t allow that, lock the frame tightly so it stays secure while you sharpen.
Is a Dull Mandoline Blade More Dangerous Than a Sharp One?
Yes, actually. A dull blade makes you push harder, and that’s when you lose control. A sharp blade does the work for you with less pressure and way more control.
Can I Sharpen a Ceramic Mandoline Blade at Home?
It’s tricky. Ceramic blades need a diamond sharpening tool specifically. A regular whetstone won’t work. If the blade is chipped or cracked, a professional sharpening service is your safest option.
Do I Have to Sharpen My Mandoline After Every Use?
No, not every use. Light honing every few weeks helps maintain the edge. Full sharpening is usually needed every few months, depending on how often you use it and what you slice.
Is the Paper Test a Reliable Way to Check Blade Sharpness?
Yes, it’s a quick and reliable test. If the blade cuts through paper cleanly without tearing, it’s sharp enough to use. If it snags or drags, you need a few more passes.
Can I Send My Mandoline Blade to a Professional for Sharpening?
Absolutely. Many knife sharpening services handle mandoline blades too. It’s a great option if your blade is severely dull, chipped, or you simply don’t feel confident sharpening it yourself.
