
As an Amazon Associate, I earn from qualifying purchases at no extra cost to you.
How to Sharpen a Serrated Bread Knife at Home (Expert Tips)
Serrated bread knives are sneaky. They feel sharp for years, then one day the bread just squishes instead of slices. Most people think serrated knives can’t be sharpened at home. That’s not true. You can do it yourself, with a simple tool and about ten minutes. This article shows you exactly how, step by step, even if you’ve never sharpened a knife before.
Sharpen each serration separately using a tapered ceramic rod, matching the rod size to the scallop, working at the angle of the bevel, and finishing with a few light strokes on the flat side to remove the burr. You only need to sharpen the beveled side, not both. The whole process takes around ten minutes and brings the knife back to clean, easy slicing.
Can You Really Sharpen a Serrated Knife at Home?
Yes, you absolutely can. A lot of people skip sharpening their bread knife because they assume it needs a professional or special machine. But the truth is, serrated knives are actually forgiving to sharpen. You don’t need perfect technique. You just need the right tool.
The tool you want is a tapered ceramic sharpening rod, sometimes called a serration sharpener. It looks like a thin cone or stick. It comes in different diameters so you can match it to the size of each scallop on your blade. Most bread knives have medium-sized serrations, so a standard rod works fine.
One thing to know upfront is that serrated knives dull slowly. You won’t need to sharpen yours every month. Maybe once a year, or when you notice the knife dragging through bread instead of gliding. That’s your sign. Catching it early means less work and a faster result.
The whole process is low-risk too. You’re working on one small scallop at a time, so even if you’re slow or unsure, you won’t ruin the blade. Take it easy and trust the process.
- Serrated knives can be sharpened at home without professional tools
- A tapered ceramic rod is the only tool you need
- Only the beveled side needs sharpening, not both sides
- Each serration gets sharpened individually
- The flat side gets a quick finishing stroke to remove the burr
- You only need to do this once a year or when the knife feels dull
How to Sharpen a Serrated Bread Knife Step by Step
Find the Beveled Side First
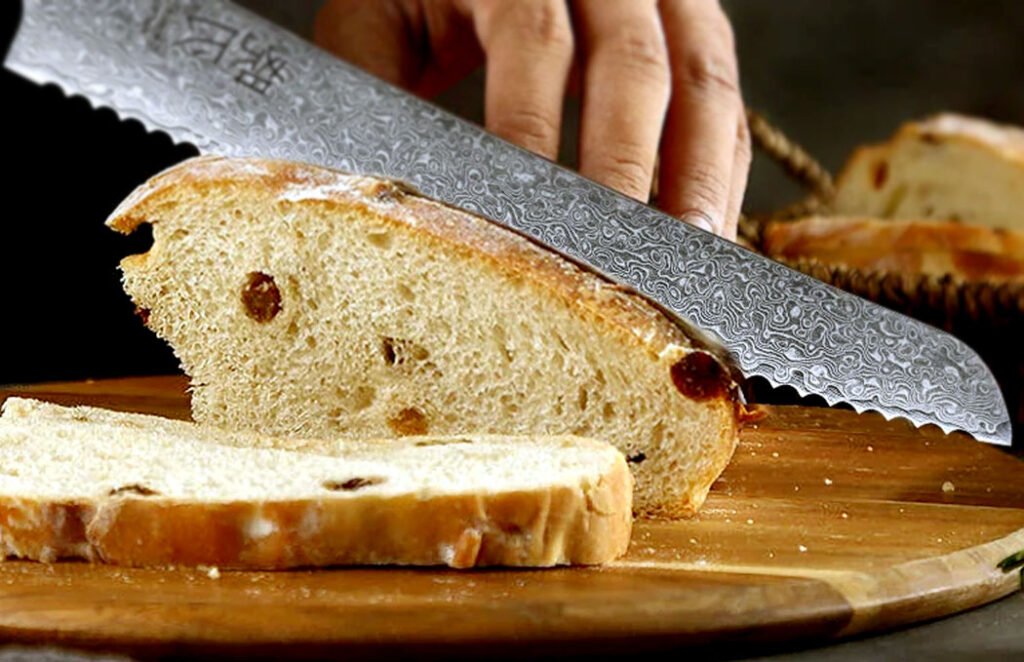
Before you touch anything, look at your knife closely. Hold it up to a light and look at the serrated edge from the side. One side of the blade is flat, and the other side has a slight angle or bevel ground into it. That angled side is the one you sharpen. The flat side stays flat.
This matters a lot. If you try to sharpen both sides equally, you’ll change the geometry of the blade and it won’t cut properly. Most bread knives are single-bevel, meaning only one side has the angle. Some knives are double-bevel, but it’s rare. When in doubt, sharpen the side that looks beveled and treat the flat side gently.
Run your finger lightly along both sides. The beveled side often feels slightly different, a bit more angled under your fingertip. Once you identify it, mark it in your head. That’s your working side for the whole sharpening session.
- Hold the knife at eye level under good light to spot the bevel
- The beveled side has a slight angle ground into the metal
- Most bread knives are single-bevel, so only one side needs work
- The flat side only gets a light finishing stroke at the end
- Never sharpen the flat side with the rod
- Double-bevel knives are rare but exist, so check before starting
Match the Rod Size to the Serration
Your tapered ceramic rod is cone-shaped, thinner at one end and thicker at the other. This taper is the whole point. You slide the rod into each serration and find the spot where it fits snugly, not too loose, not forced. That snug spot is the right diameter for that particular scallop.
Most bread knives have serrations of similar size, but not always identical. Some knives mix large and small scallops. Take a second to look at yours before you start. If the serrations vary in size, you’ll shift your grip on the rod slightly for the bigger or smaller ones, using the thicker or thinner part of the taper to match.
A rod that’s too small will rattle around inside the scallop and scratch unevenly. A rod that’s too big won’t seat properly and won’t sharpen the full curve. Matching the size correctly is the part that makes the biggest difference in how well the knife comes back.
- Tapered rods come in different diameters to match different scallop sizes
- Slide the rod into a scallop to find where it fits snugly
- Move your grip up or down the rod to adjust for larger or smaller serrations
- A loose fit means the rod is too thin for that scallop
- A forced fit means it’s too thick
- Most standard bread knives work well with a medium-diameter ceramic rod
Set the Right Angle
Now place the rod inside the first serration on the beveled side. You want the rod angled to match the bevel of the blade, usually around 13 to 17 degrees. You don’t need a protractor. Just tilt the rod so it sits flush with the ground angle of that scallop. If it looks like it’s sitting naturally in the groove without forcing, you’re close enough.
Don’t stress about precision here. Unlike flat knives, serrated knives are forgiving about angle. The serration itself guides you. As long as you’re on the beveled side and the rod feels seated in the groove, you’ll get a good result. A few degrees off won’t matter much.
Keep your other hand out of the way. Always stroke away from your body, or use a stable surface. The knife doesn’t move. The rod moves. Place the blade flat on a cutting board with the edge facing away from you, hold the handle steady, and work with the rod in your dominant hand.
- Angle the rod to match the existing bevel on the blade
- Typical bevel angle is between 13 and 17 degrees
- The scallop itself helps guide the rod naturally
- Don’t force precision, close enough is fine for serrated edges
- Keep the knife still and move the rod, not the other way around
- Always stroke away from your body to stay safe
Sharpen Each Serration One at a Time
This is the main work. Place the rod in the first serration, hold it at the bevel angle, and make two to three short strokes going away from you. Light pressure. You’re not grinding. You’re just polishing the edge inside each scallop. Then move to the next serration and repeat.
Go through the whole knife this way. Don’t rush it. If a particular serration feels rougher or more damaged, give it one or two extra strokes. But for a knife that’s just mildly dull, two to three strokes per scallop is all it takes. You’ll feel a slight resistance as the rod catches the metal, and that tells you it’s working.
After a few strokes, run your thumb lightly across the flat side of the blade where the serrations meet. You’ll feel a tiny wire edge, called a burr. That burr means metal is being moved, which means the sharpening is working. When you feel that burr consistently along the flat side, you’re done with the rod.
- Make two to three light strokes per scallop, moving the rod away from you
- Use light pressure, you’re polishing, not grinding
- Extra strokes are fine for particularly dull or damaged serrations
- Work through every scallop from tip to heel of the blade
- Check for a burr on the flat side after every few serrations
- Feeling the burr consistently means the sharpening is working
Remove the Burr from the Flat Side
Once you’ve worked through all the serrations and feel the burr along the flat side, it’s time to remove it. Lay the flat side of the blade against a piece of fine-grit sharpening stone or use the rod itself held nearly flat. Make two to three very light passes from heel to tip.
You’re barely doing anything here. The goal is just to knock off that wire edge so the blade feels clean and sharp. Think of it like erasing a pencil mark. Very gentle. If you press hard, you risk rounding the flat side and dulling the knife instead of finishing it.
Some people use a leather strop instead of a stone for this step. That works too. A few strokes on the strop, flat side down, cleans up the burr nicely and leaves the edge polished. Either way, keep it light and let the material do the work. After this step, the knife is done.
- Lay the flat side of the blade flat against a stone or use the rod held almost flat
- Make two to three very light passes from heel to tip
- You’re only removing the wire burr, not reshaping the edge
- Use almost no pressure, this step is about polishing, not cutting
- A leather strop works just as well as a stone for this final step
- After removing the burr, the knife is ready to test
Test the Knife and Store It Right
Cut a piece of bread. Don’t push down. Let the knife do the work with a gentle back-and-forth sawing motion. If it bites into the crust cleanly and glides through the crumb without tearing, you’re done. If it still drags, go back and do two more strokes per scallop.
A sharp serrated knife needs almost no force. That’s the test. If you’re pressing, the knife isn’t sharp enough yet, or you may need to repeat the process one more time. It rarely takes more than two rounds for a knife that just needs routine maintenance.
Store the knife properly after sharpening. A magnetic knife strip or a blade guard protects the edge. Throwing it loose in a drawer with other utensils will dull it fast. Treat it like you would any good tool, and it’ll stay sharp much longer before needing another round.
- Slice through bread using a gentle sawing motion, no pressing
- A sharp knife bites into the crust without dragging
- If it still drags, do two more strokes per scallop and retest
- You rarely need more than two full rounds for a mildly dull knife
- Store the knife on a magnetic strip or with a blade guard
- Avoid storing it loose in a drawer to protect the freshly sharpened edge
What Tools Do You Actually Need to Sharpen a Serrated Knife?
You really only need one tool: a tapered ceramic sharpening rod. That’s it. Everything else is optional. The rod does the real work, fits the curved serrations, and removes metal at the right angle. A flat whetstone won’t work on serrated edges, and a pull-through sharpener can damage the blade.
If you want to do the job well, a tapered diamond sharpening rod is even better than ceramic. Diamond rods remove metal faster and last longer. They cost a bit more, but for a kitchen knife you use every day, it’s worth it. Some brands also sell serration-specific sharpening kits that include a few rod sizes and a strop.
The optional extras are a strop for finishing, a honing stone or fine sandpaper for removing the burr from the flat side, and a marker to color the bevel so you can see exactly where you’re removing metal. That marker trick is genuinely useful if you’re unsure about your angle.
You don’t need an electric sharpener. Most electric machines aren’t designed for serrated edges and will either skip the scallops entirely or grind them down in a way that ruins the knife’s bite. Stick to the rod and do it by hand.
- A tapered ceramic rod is the only essential tool
- Tapered diamond rods work faster and last longer than ceramic
- Pull-through sharpeners and flat whetstones don’t work on serrated blades
- A leather strop helps finish the flat side cleanly
- A marker on the bevel helps confirm your angle while learning
- Electric sharpeners are not suitable for most serrated knives
Final Thoughts
I hope this makes sharpening your bread knife feel doable, because it really is. You don’t need a fancy setup or years of practice. Just a rod, a little patience, and ten quiet minutes in the kitchen. Sharpen one scallop at a time, check your burr, clean up the flat side, and you’re done. Your knife will feel new again. You’ve got this.
| Step | Tool Needed | Side of Blade | Pressure | Strokes Per Scallop | What to Check |
|---|---|---|---|---|---|
| Identify the bevel | Your eyes | Beveled side | None | None | Look for the angled side |
| Match rod to scallop | Tapered ceramic or diamond rod | Beveled side | None | None | Rod should fit snugly, not loose |
| Set the angle | Ceramic rod | Beveled side | Light | 0 | Rod sits flush with bevel angle |
| Sharpen each serration | Ceramic or diamond rod | Beveled side | Light | 2 to 3 | Feel for burr on flat side |
| Sharpen extra dull scallops | Ceramic or diamond rod | Beveled side | Light | 4 to 5 | Burr should appear after extra strokes |
| Remove the burr | Honing stone, rod held flat, or leather strop | Flat side | Very light | 2 to 3 | No wire edge remains on flat side |
| Test sharpness | The bread itself | Full blade | None | N/A | Knife bites crust without pressing |
| Store the knife | Magnetic strip or blade guard | Full blade | None | N/A | Edge protected from contact |
Frequently Asked Questions
Is it worth sharpening a serrated bread knife or should I just replace it?
It’s worth sharpening. A good bread knife lasts decades with occasional maintenance. Replacing it every few years wastes money. Ten minutes with a ceramic rod brings most dull serrated knives back to almost-new condition.
Can I use a regular whetstone to sharpen a serrated knife?
No. A flat whetstone can’t reach inside the curved serrations. You need a tapered rod that fits into each scallop. A whetstone is fine for the flat side only, to remove the burr at the end.
Are electric knife sharpeners safe to use on serrated bread knives?
Most are not. Electric sharpeners are built for straight-edge blades. They typically skip the scallops or grind them unevenly. A tapered hand rod gives you far more control and won’t damage the serration pattern.
Do I need to sharpen both sides of a serrated knife?
No. Most serrated knives are single-bevel, so you only sharpen the angled side. The flat side just gets a light pass at the end to remove the burr. Sharpening both sides equally will mess up the blade geometry.
Does sharpening a serrated knife remove a lot of metal?
Very little. You only make two to three light strokes per scallop, so metal removal is minimal. With occasional once-a-year sharpening, a quality serrated knife holds its shape for many years.
Can I sharpen a serrated knife if the serrations are heavily damaged or chipped?
You can improve it, but heavily damaged serrations need more work. Add a few extra strokes per damaged scallop. If the tips are broken off completely, a professional grind may be needed before home maintenance makes sense.
Are serrated knives harder to sharpen than regular knives?
They take more attention because each scallop is separate. But they’re actually more forgiving about angle. You don’t need perfect technique. The scallop guides the rod naturally, so beginners usually get good results on their first try.
Is a ceramic rod better than a diamond rod for serrated knife sharpening?
Both work. Ceramic is gentler and better for regular maintenance. Diamond removes metal faster and suits very dull blades or harder steel. For most home cooks, a quality ceramic rod is enough and will last for years.
