
As an Amazon Associate, I earn from qualifying purchases at no extra cost to you.
How to Clean a Keurig (Fresh Brew Fix)

Coffee mornings turn sour fast when a Keurig starts tasting off, or brewing slow. Mineral buildup and old coffee oils sneak up over time, even with regular rinsing. A few simple steps, done once a month, keep every cup tasting clean. This guide walks through the full clean, start to finish, from vinegar to the final rinse.
You can clean a Keurig by removing the water reservoir, pod holder, and drip tray, then washing each piece with warm soapy water. Next, run a descaling solution or white vinegar through a full brew cycle, to break up mineral buildup inside the machine. Finish with two or three water only cycles, to rinse out any leftover taste before the next cup.
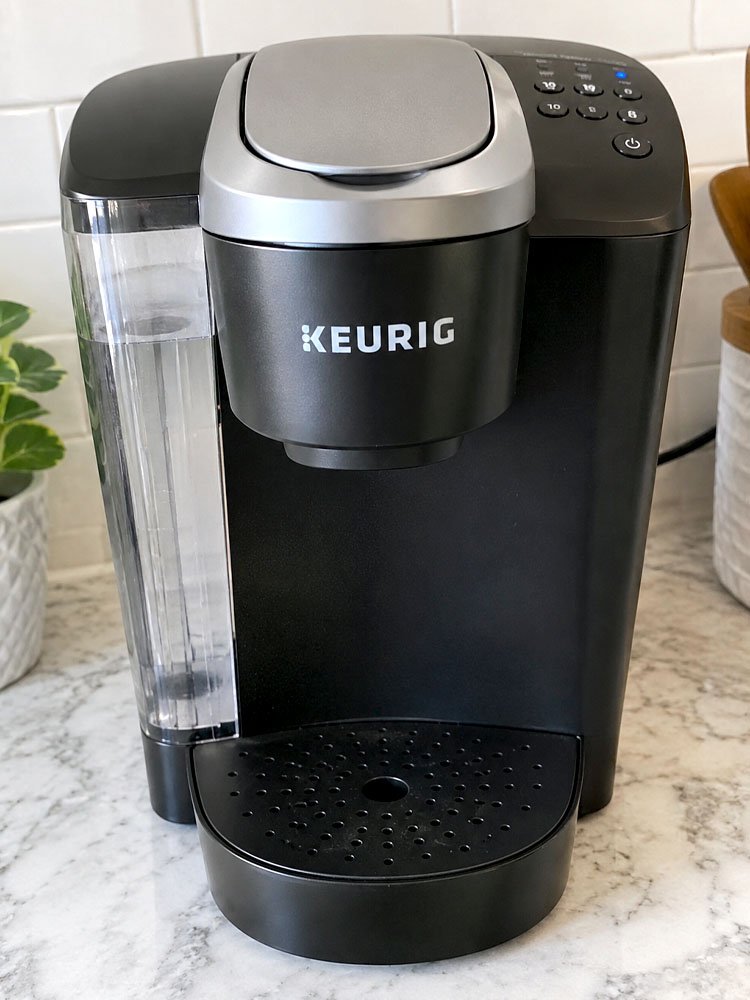
Why Does a Keurig Need Regular Cleaning?
Keurig machines pull water through narrow tubes and a small needle, so minerals and coffee residue build up fast, especially with hard water.
Mineral Scale Buildup
Hard water leaves tiny mineral deposits inside the machine every time it heats water. Over months, this scale coats the internal tubes and heating element. That buildup slows the flow, and it can keep the machine from reaching full temperature.
Clogged Coffee Needle
The needle that punctures each pod can trap tiny coffee grounds after every brew. Left alone, those grounds dry out and block water flow. A clogged needle often causes weak streams, or a machine that sputters instead of pouring smoothly.
Bacteria and Mold Growth
Water sitting in the reservoir or drip tray creates a damp spot that bacteria and mold love. Since coffee makers stay warm and moist, germs grow quietly if nobody empties or wipes the parts. Regular cleaning stops that buildup early.
Hard Water Damage
Areas with hard water see faster scale buildup than places with soft water. Minerals like calcium and magnesium cling to metal parts inside. Over time, this can shorten the machine’s life, and lead to more descale light warnings.
Stale Flavor in Every Cup
Old coffee oils cling to internal parts long after brewing, and that residue turns rancid over time. Even fresh pods pick up a stale, bitter taste as water passes through dirty tubes. A clean machine keeps every cup tasting right.
Slow or Weak Brew Cycles
A dirty Keurig often takes longer to brew, or it pours out a thin, weak stream. Clogged tubes and a blocked needle both slow water flow down. Cleaning clears the path, so the machine goes back to brewing at full strength.
Skipping cleaning for too long lets small problems turn into bigger ones, like a machine that won’t heat right or stops brewing. Catching it early saves both time and money.
- Empty and dry the drip tray every few days
- Wipe the reservoir lid after each refill
- Run a vinegar cycle once a month
- Descale every three months, or sooner with hard water
- Check the needle for grounds weekly
- Watch for the descale light as a reminder
How to Clean a Keurig Step by Step
A full clean covers three parts, washing the removable pieces, descaling the inside, and rinsing everything out before the next cup.
Wash the Removable Parts
Start by unplugging the machine, then pull out the water reservoir, drip tray, and pod holder. These pieces come apart easily on most models, so no tool is needed.
Wash each part in warm soapy water, using a soft sponge to avoid scratches. Rinse well, since leftover soap can affect the taste of the coffee later.
Let everything air dry on a towel before putting the machine back together. A fully dry reservoir also helps stop mold from forming inside.
Wipe Down the Exterior
Grab a damp cloth and wipe the outside of the machine, paying attention to the handle and buttons where coffee splashes often land.
For sticky spots, add a small drop of dish soap to the cloth. Avoid spraying cleaner directly onto the machine, since liquid can seep into openings.
Dry the outside with a clean towel once done. This step keeps the machine looking fresh, and stops sticky residue from building up over time.
Clean the Water Reservoir
Fill the reservoir with a mix of equal parts water and white vinegar, or use a descaling solution made for coffee machines.
Let it sit for a few minutes, so the mixture can loosen mineral buildup along the sides and bottom of the reservoir.
Empty it out, then rinse with clean water two or three times. This step alone helps with both taste and overall performance.
Run a Descaling Cycle
Pour the vinegar and water mix, or a store bought descaling solution, into the empty reservoir before starting this step.
Run the machine without a pod, brewing a full cup at a time until the reservoir is empty. Repeat again if the model calls for it.
This cycle pushes the solution through every tube and part, breaking down scale that regular washing can’t reach alone.
Flush With Clean Water
Once descaling finishes, refill the reservoir with plain water only, skipping any vinegar or cleaning solution this time around.
Run two or three full brew cycles with just water, letting each one flush out leftover vinegar taste from the internal parts.
Taste the water after the final cycle. If any vinegar flavor lingers, run one more cycle before making a real cup.
Clean the Needle and Exit Needle
Open the pod area and look at the top needle, since dried coffee grounds often collect right around its tip.
Use a paperclip, or a small tool made for this job, to gently clear out any grounds stuck in the needle’s holes.
Check the exit needle at the bottom too, since a clogged one there can cause weak or uneven pours in the cup.
A full clean like this takes about thirty minutes, start to finish, but it makes a real difference in taste, speed, and lifespan.
- Use white vinegar or a Keurig descaling solution
- Never mix vinegar with bleach or other cleaners
- Clean the needle area every couple weeks
- Descale sooner if you notice a slow brew
- Keep spare paperclips or a needle tool nearby
- Dry all parts fully before reassembling
Also Read: How to Change Time on Microwave (Easy Guide)
Can You Use Vinegar Instead of Descaling Solution?
Vinegar works well for most home Keurig machines, and plenty of owners use it instead of store bought descaling solution. White vinegar breaks down mineral buildup in a similar way, since it’s naturally acidic and cuts through scale.
That said, some manufacturers recommend their own solution, since it’s made specifically for the machine’s internal parts. Vinegar can leave a stronger smell behind, so expect to run a few extra rinse cycles afterward.
Cost wise, vinegar is usually cheaper, and most people already have a bottle in the kitchen. Descaling solution tends to rinse out faster, with less lingering taste, though it costs a bit more per use.
Either option gets the job done, so the choice often comes down to what’s already on hand, or how much the smell bothers you during cleaning.
- White vinegar costs less and works on most models
- Descaling solution rinses out faster with less smell
- Both need a few water only cycles afterward
- Avoid apple cider or flavored vinegar types
- Check the manual if unsure which to use
- Never mix vinegar with bleach based cleaners
How Often Should You Clean a Keurig?
Most homes do fine cleaning the removable parts every week, since coffee oils and water residue build up fast with daily use. A quick rinse of the reservoir and pod holder keeps things fresh between deeper cleans.
Descaling is a bigger job, and it’s usually needed every three months for average use. Homes with hard water may need it sooner, sometimes every six to eight weeks, since minerals build up faster in that kind of water.
Watch for signs the machine needs attention sooner, like a slower brew, a strange taste, or the descale light turning on. These hints usually show up before things get bad enough to cause real problems.
Setting a simple reminder, like the first of the month, makes it easier to stay on schedule. A little consistency goes a long way toward keeping a Keurig running well for years.
- Rinse the reservoir and drip tray weekly
- Descale every three months with average use
- Descale every six to eight weeks with hard water
- Watch for the descale light as a signal
- Notice slower brews as an early warning sign
- Set a monthly reminder to stay consistent
Why Does Your Keurig Coffee Taste Bad After Cleaning?
A bad taste right after cleaning almost always points to leftover vinegar or descaling solution still sitting inside the machine. This happens most often when the rinse cycles get skipped, or cut short before the reservoir empties fully.
Running just one water cycle usually isn’t enough, since vinegar clings to internal tubes more than people expect. Two or three full cycles with plain water gives the machine a real chance to flush everything out.
Old water sitting in the reservoir for days can also cause a stale taste, even without any cleaning involved. Swapping in fresh water each time helps avoid that flat, off flavor completely.
If the taste still lingers after several rinses, check the water filter too, since an old filter can hold onto smells and flavors of its own.
- Run three water only cycles after descaling
- Replace the water filter every two months
- Use fresh water instead of water left sitting out
- Check the reservoir lid for a tight seal
- Avoid using flavored or scented cleaning agents
- Taste test before brewing a real cup
What Happens if You Never Clean Your Keurig?
Skipping cleaning for months lets mineral scale build up thick inside the tubes and heating element, and that buildup slows the whole machine down over time. Brews get weaker, and the water may never reach full temperature.
Mold and bacteria also get a chance to grow in the damp reservoir and drip tray, especially in warm kitchens. That buildup can affect both taste and, more importantly, what ends up in the cup each morning.
Eventually, the needle and internal tubes can clog completely, stopping the machine from brewing at all. At that point, a simple clean might not be enough, and a full repair or replacement could be the only fix left.
Regular care, even just once a month, keeps small issues from turning into an expensive problem down the road.
- Weak, slow brews from clogged internal tubes
- Mold growth in the reservoir or drip tray
- A permanently blocked needle over time
- Higher risk of the machine breaking down early
- Stale or bitter taste in every cup
- Costly repairs or a full replacement eventually
Final Thoughts
I hope this guide makes cleaning a Keurig feel simple, instead of like a chore. A little vinegar, a few rinse cycles, and some regular wiping go a long way. Stick to a schedule, watch for warning signs, and the machine will keep brewing strong, fresh cups for years to come.
| Part | How Often to Clean | What to Use |
|---|---|---|
| Water reservoir | Weekly | Warm soapy water |
| Drip tray | Every few days | Warm soapy water |
| Pod holder | Weekly | Warm soapy water |
| Exterior | Weekly | Damp cloth, mild soap |
| Coffee needle | Every two weeks | Paperclip or needle tool |
| Exit needle | Every two weeks | Paperclip or small brush |
| Internal tubes (descale) | Every three months | Vinegar or descaling solution |
| Water filter | Every two months | Replacement filter |
| Whole machine flush | After every descale | Plain water, two to three cycles |
| Reservoir lid | Weekly | Damp cloth |
Frequently Asked Questions
Can You Run Vinegar Through a Keurig Without Damaging It?
Yes, vinegar is safe for most Keurig machines when mixed with equal parts water. It’s a common, affordable way to descale, and plenty of owners use it regularly without any issues to their machine.
Is It Safe to Clean a Keurig With Bleach?
No, bleach should never go inside a Keurig, since it can damage internal parts and leave a smell that’s hard to fully rinse out. Stick to vinegar, mild soap, or a proper descaling solution instead.
Do You Need to Descale Every Time You Clean?
No, weekly cleaning covers the removable parts like the reservoir and drip tray, while descaling is a deeper job needed every few months. Both matter, but they don’t need to happen on the same schedule.
Are Keurig Descaling Solutions Worth Buying Over Vinegar?
They can be, especially if the smell of vinegar bothers you, or you want something made specifically for coffee machines. Vinegar still works well though, so the choice mostly comes down to preference and budget.
Should You Clean a Keurig After Every Use?
Not after every single use, but wiping the drip tray and checking the reservoir regularly helps a lot. A deeper clean once a week, plus descaling every few months, keeps the machine running well without daily upkeep.
Does Hard Water Make Cleaning More Important?
Yes, hard water speeds up mineral buildup inside the machine, which means more frequent descaling is needed. Homes with hard water may need to clean every six to eight weeks instead of the usual three months.
Will Cleaning Fix a Keurig That Won’t Brew?
Sometimes, yes, especially if a clogged needle or scale buildup is the cause. A full clean and descale often solves slow or stopped brewing, though a very old or worn machine may need more than cleaning alone.
Is It Normal for a Keurig to Smell Like Vinegar After Descaling?
Yes, a light vinegar smell right after descaling is normal, and it should fade after a few water only rinse cycles. If the smell lingers past that, run one or two more cycles to fully clear it.
