
As an Amazon Associate, I earn from qualifying purchases at no extra cost to you.
How to Cook Drumsticks in Air Fryer (Under 30 Minutes)

Your air fryer is ready, and you've got drumsticks that you want to cook perfectly, with crispy skin and juicy meat inside. Forget dry, bland chicken; this method delivers restaurant-quality results right in your kitchen, fast. You might be worried about getting the timing just right, or maybe your last attempt was a little off. I’ve got the exact steps you need to make your drumsticks shine every single time.
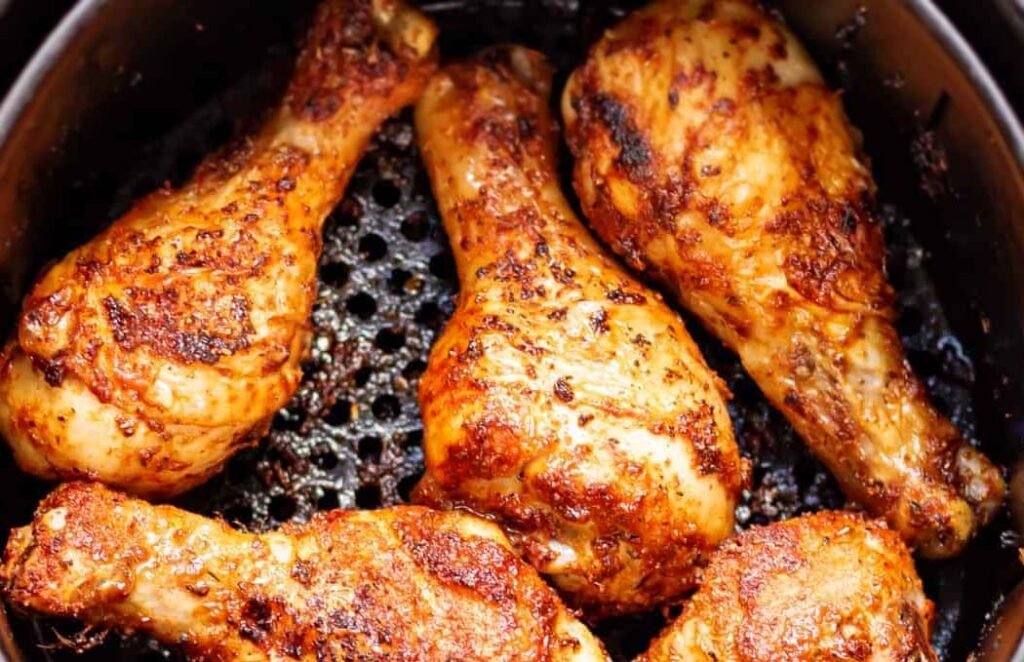
To cook drumsticks in your air fryer for the best crispy skin and tender meat, aim for 380°F for 22-25 minutes, flipping them halfway through. Make sure you don’t overcrowd the basket, as this is crucial for achieving that perfect crispiness you're looking for in your chicken. Your drumsticks should reach an internal temperature of 165°F.
Why Air Frying Drumsticks Works Wonders
Air frying is a game-changer for drumsticks, offering a way to get that desired crispy skin and moist interior that often feels impossible with other cooking methods. It circulates hot air, mimicking deep frying without all the oil, making your chicken healthier and the cleanup a breeze. You'll see why this method quickly becomes your go-to for perfectly cooked drumsticks.
Crispy Skin Goal
Achieving that perfect, crackly skin on your drumsticks is the ultimate goal for many home cooks. This is what separates a good drumstick from a great one, giving you a satisfying crunch with every bite. You want that golden-brown, slightly blistered exterior that just beckons you to dig in. Your air fryer excels at this by blasting the surface with intense, dry heat.
This intense heat causes the natural fats and moisture on the skin to render and crisp up rapidly. It's a process that happens quickly, so you need to pay attention to the timing to get it just right. Overcooking can lead to burnt skin, while undercooking leaves it flabby and unappealing.
To help your skin get as crispy as possible, pat your drumsticks completely dry with paper towels before seasoning. Moisture is the enemy of crispiness; you want to remove as much of it as you can from the surface. This simple step makes a huge difference in the final texture you'll enjoy.
Quick Prep Needs
Drumsticks are forgiving, but a little bit of prep goes a long way toward fantastic flavor and texture. You don’t need much, just a few minutes to get your chicken ready for the hot air. Your time spent here ensures a much tastier result than just tossing them straight into the fryer. Understanding these simple steps sets you up for success.
The key is to ensure your seasonings adhere well and penetrate the meat slightly. This helps build layers of flavor that complement the chicken's natural taste. You're not just cooking; you're building deliciousness from the start.
For your prep, think about patting the drumsticks dry first. Then, you can apply a light coating of oil, which helps your chosen spices stick. Finally, season generously, making sure to get some under the skin if you can.
Even Cooking Heat
The hot air in an air fryer moves constantly, wrapping around your food. This is different from an oven where heat mostly comes from static elements. For drumsticks, this means heat hits them from all sides, cooking them evenly. You get less of those annoying cold spots or unevenly cooked areas that can happen elsewhere.
This consistent circulation of air is what allows the skin to crisp up all over, not just on the parts facing a direct heat source. It's a gentle yet powerful way to cook chicken, ensuring tenderness without sacrificing that sought-after crispy exterior. Your drumsticks will brown beautifully.
To help your air fryer do its best work, always give your drumsticks enough space in the basket. Don’t pile them on top of each other. You need air to flow freely around each piece for the most even cooking.
Spice Adhesion
Getting your seasonings to stick is crucial for flavorful drumsticks. A dry surface and a little bit of oil create the perfect canvas for your spice rub. Without this, your seasonings might just fall off into the air fryer basket, leaving your chicken bland. Your taste buds will thank you for taking this small step.
Think of it like painting; you need the right primer for the paint to stick. Oil acts as that primer for your spices, helping them adhere to the skin. This ensures every bite is packed with the flavor you intended.
You want to create a slightly tacky surface for the spices to cling to. A small amount of olive oil, avocado oil, or even melted butter works well here. Rub it all over the drumsticks before applying your spice mix.
Fat Rendering Process
Drumsticks have a good amount of fat, especially under the skin, which is key to their juiciness and flavor. The hot air in the air fryer is excellent at rendering this fat, melting it away and allowing it to drip off. This process helps make the skin crispy and the meat underneath incredibly moist. Your air fryer handles this beautifully.
As the fat renders, it also contributes to the browning and crisping of the skin. It's a magical transformation that happens as the chicken cooks. You'll notice a little bit of liquid in the bottom of your basket, which is mostly rendered fat and juices.
You don’t need to trim much fat from your drumsticks beforehand. In fact, leaving some of it on helps keep the chicken moist during cooking. The air fryer does the work of rendering it down for you.
Avoid Overcrowding Basket
This is perhaps the most critical rule for air fryer success, not just for drumsticks but for most foods. If you pack too many drumsticks into the basket, the hot air cannot circulate properly. This means your chicken won’t get crispy, and it might end up steaming instead of frying. Your results will be disappointing.
When the basket is too full, the drumsticks essentially block the airflow to each other. Instead of getting that all-around blast of heat, they'll cook unevenly, likely resulting in some parts being undercooked and others drier than you'd like. You want each piece to have its own space.
For best results, cook your drumsticks in a single layer. If you have a lot of them, it's better to cook in two smaller batches rather than trying to fit them all in at once. Your crispy chicken is worth the extra few minutes.
Your goal with these steps is to prepare the drumsticks so the air fryer can do its best work. Focus on getting the surface dry, seasoning well, and giving them space. This sets the stage for incredibly delicious chicken.
- Pat drumsticks completely dry.
- Season generously on all sides.
- Preheat your air fryer.
- Ensure one layer in basket.
- Your timing is important.
- Flip halfway through cooking.
Air Fryer Drumstick Cooking Guide
This is where we get down to business, transforming those raw drumsticks into a crispy, juicy masterpiece using your air fryer. Follow these steps precisely, and you’ll be enjoying delicious chicken in no time at all. Your air fryer makes this process surprisingly simple and fast, so let's get started on creating your next favorite meal.
Preheat Air Fryer
Preheating your air fryer is like warming up an oven; it's a crucial first step that makes a big difference. It ensures that once your drumsticks go in, they immediately start cooking at the correct temperature. This helps achieve that lovely crispy skin right from the beginning, preventing a soggy start. You want your drumsticks to hit that hot air running.
Without preheating, the air fryer takes time to reach the set temperature after you add the food. This delays the cooking process and can lead to the outside cooking too slowly, allowing moisture to build up instead of evaporating. Your chicken will never achieve that perfect crisp if it starts in a lukewarm environment.
So, set your air fryer to 380°F (190°C) and let it run for about 3-5 minutes before you add your seasoned drumsticks. You’ll usually hear it stop humming when it’s reached temperature, or your machine might have a indicator light. This simple step is your ticket to perfectly cooked chicken.
Season Drumsticks Well
Now that your drumsticks are prepped and your air fryer is hot, it’s time to get them seasoned. This is where you build all the flavor. Don’t be shy with your spices; drumsticks are sturdy and can handle a good amount of seasoning. You can use a simple salt and pepper mix or a more complex rub.
Make sure you get the seasoning all over the drumsticks, including under the skin if you can easily lift it. This ensures that every single bite is packed with flavor, not just the surface. Your goal is maximum taste in every piece.
A good basic rub includes salt, pepper, garlic powder, onion powder, and maybe a pinch of paprika for color. You can also add cayenne for a little heat if you like. Just mix your favorite spices in a bowl and rub them all over the drumsticks.
Place Drumsticks In
With your drumsticks seasoned and your air fryer preheated, it's time to place them in the basket. Remember the golden rule: give them space. Overcrowding is the enemy of crispy air fryer food, and it's especially true for drumsticks which need air to circulate all around them to crisp up properly. Your delicious outcome depends on this.
You want to arrange the drumsticks in a single layer so that they are not touching each other. If your air fryer basket is too small for all of them, it's much better to cook them in batches. You can always keep the cooked ones warm in a low oven while you cook the rest.
Arrange them in the basket so there's a little gap between each one. This allows the hot air to flow freely, hitting all surfaces of the chicken and making the skin wonderfully crisp. You'll achieve a much better texture this way.
Cook and Flip
Now you're ready to let the air fryer work its magic. Set your timer for the initial cooking period. This is typically about 12 to 15 minutes to start. During this time, the drumsticks will begin to cook through and the skin will start to brown and crisp. Your patience will soon be rewarded with amazing chicken.
After that initial cooking time, you need to flip the drumsticks. This is a critical step for ensuring they cook evenly on all sides. Use tongs to carefully turn each drumstick over. This exposes the other side to the direct heat and helps render fat evenly.
Continue cooking for another 10 to 15 minutes, or until the drumsticks are golden brown and cooked through. The exact time can vary depending on the size of your drumsticks and your specific air fryer model. Your cooked drumsticks should have an internal temperature of 165°F (74°C).
Check for Doneness
Before you declare victory and pull them out, you must check if your drumsticks are fully cooked. The safest way to do this is with a meat thermometer. Stick it into the thickest part of the drumstick, avoiding the bone. You are looking for an internal temperature of 165°F (74°C).
If you don’t have a thermometer, you can check by inserting a knife or skewer into the thickest part. The juices should run clear, not pink. If you see any pinkness or the juices look bloody, they need more time in the air fryer. Your chicken must be safe to eat.
Keep a close eye on them during the last few minutes of cooking. Air fryers can cook quickly, and you don’t want to accidentally overcook them, which can lead to dry meat. Trust the temperature reading or the clear juices for a perfect result.
Rest Before Serving
Once your drumsticks have reached the correct temperature and look beautifully crispy, take them out of the air fryer. Resist the urge to serve them immediately. Letting them rest for a few minutes is an important step that allows the juices to redistribute throughout the meat. You'll end up with much juicier chicken.
If you cut into them right away, all those delicious juices will run out onto your plate, leaving the meat drier. Resting lets the muscle fibers relax and reabsorb the moisture. This might seem like a small detail, but it significantly impacts the final texture and taste of your drumsticks.
Let them rest on a clean plate or cutting board for about 5 minutes before you serve them. This short waiting period ensures that the moisture stays locked inside the drumsticks, making them incredibly tender and flavorful for you to enjoy.
Follow these steps, and you'll have perfectly cooked air fryer drumsticks every time. The combination of proper prep, the right temperature, and a little patience will lead to delicious results that you and your family will love.
Best Seasoning Blends
To elevate your air fryer drumsticks from good to absolutely amazing, experimenting with different seasonings is key. You can stick to simple salt and pepper, or you can create vibrant flavor profiles that will impress your guests. Your creativity is the only limit when it comes to flavoring chicken. Think about what kind of taste you are going for.
Smoky Paprika Blend
This blend offers a beautiful color and a deep, smoky flavor that pairs wonderfully with chicken. The paprika provides a mild sweetness and a rich hue, while smoked paprika adds that delicious campfire essence without any actual grilling. You'll love the depth this brings to your drumsticks.
The paprika helps the skin brown nicely, and when combined with other dry spices, it creates a rub that adheres well. It's a versatile flavor that works for almost any occasion and is generally well-loved by most people. Your family will likely request this one often.
Combine 2 tablespoons of sweet paprika, 1 tablespoon of smoked paprika, 1 teaspoon of garlic powder, 1 teaspoon of onion powder, and 1/2 teaspoon of salt. Mix thoroughly and rub all over your drumsticks before cooking.
Zesty Lemon Herb
For a lighter, fresher taste, a lemon-herb combination is fantastic. This blend cuts through the richness of the chicken and adds a bright, aromatic quality. It's perfect for a summer meal or when you want something that feels a little more elegant. Your drumsticks will taste incredibly refreshing.
The acidity from the lemon zest helps to tenderize the meat slightly, while the herbs add complexity. You can use dried herbs for convenience or fresh herbs for a more vibrant flavor. This combination is both comforting and sophisticated.
Mix 2 tablespoons of lemon zest (from about 2 large lemons), 1 tablespoon of dried rosemary, 1 tablespoon of dried thyme, 1 teaspoon of garlic powder, and 1 teaspoon of salt. Rub this mixture generously onto your drumsticks.
Spicy Cajun Kick
If you like a bit of heat, a Cajun-inspired blend is the way to go. This offers a complex flavor profile with a noticeable kick that really awakens the palate. It's a bold choice that's perfect for those who enjoy spicy food. Your drumsticks will have a fantastic fiery flavor.
Cajun seasoning typically includes paprika, cayenne pepper, garlic powder, onion powder, black pepper, and other spices. The heat level can be adjusted by the amount of cayenne pepper you use. This blend brings a taste of the American South to your kitchen.
Combine 2 tablespoons of paprika, 1 tablespoon of garlic powder, 1 tablespoon of onion powder, 2 teaspoons of dried oregano, 2 teaspoons of dried thyme, 1 teaspoon of cayenne pepper (or more), and 1 teaspoon of salt. Coat your drumsticks well.
Simple Garlic Parmesan
This is a classic combination that's hard to beat. The savory garlic and salty Parmesan cheese create a delicious crust when cooked. It's comforting, flavorful, and always a crowd-pleaser. Your drumsticks will be coated in a wonderfully savory and slightly cheesy exterior.
Parmesan cheese can brown quite quickly, so sometimes it's added in the last few minutes of cooking, or you can use a drier, grated Parmesan. However, many air fryer recipes have success with adding it from the start. Your air fryer will create a nice crisp.
Mix 2 tablespoons of grated Parmesan cheese, 1 tablespoon of garlic powder, 1 teaspoon of salt, and 1/2 teaspoon of black pepper. Ensure you rub this mixture evenly onto the drumsticks.
Your choice of seasoning significantly impacts the final taste of your air fryer drumsticks. Don't be afraid to experiment with your favorite herbs and spices to find what you love most.
- Taste your rub before applying.
- Your spice blends can be made ahead.
- Add a pinch of sugar for extra caramelization.
- Consider a marinade for deeper flavor.
- Your favorite store-bought rubs work too.
- Adjust heat levels to your preference.
Reheating Leftover Drumsticks
Leftover air fryer drumsticks are a treasure, but reheating them correctly is key to enjoying them as much as when they were fresh. Simply microwaving them can lead to soggy skin and dry meat, which is a disappointment. Your goal is to bring back that crispy skin and juicy tenderness.
Crispy Skin Revival
The microwave is the enemy of crispy skin. It heats food using moisture, which is the opposite of what you want when reheating something that was meant to be crisp. To get that satisfying crunch back, you need a cooking method that uses dry heat. Your air fryer is perfect for this task.
Using the air fryer at a moderate temperature will revive the skin, making it almost as good as when it was first cooked. It's a quick process that brings back the texture you loved. Your leftovers will taste significantly better.
Preheat your air fryer to 350°F (175°C). Place the leftover drumsticks in a single layer in the basket and cook for about 5-8 minutes, checking frequently. You might need to adjust the time slightly depending on their size.
Avoid Microwaving
While the microwave is fast, it's the worst option for reheating crispy foods like air fryer drumsticks. It tends to make the skin rubbery and the meat tough or dry because it heats from the inside out using water molecules. You lose all the texture that made them great in the first place. Your leftovers deserve better.
The microwave can be useful for heating something very quickly if you're in a pinch, but for drumsticks, the result is usually disappointing. You'll end up with something edible but far from the delicious crispy chicken you had initially. It's a trade-off for speed.
If you must use the microwave, try heating them for very short intervals, checking every 30 seconds. You can also try to place a paper towel under them to absorb some moisture. However, for the best texture, always opt for the air fryer or oven.
Oven Reheating Method
If you don't have an air fryer or prefer using your oven, it can also do a decent job of reheating drumsticks. It won’t be quite as quick or as crispy as the air fryer, but it's a solid alternative. This method is good if you have a large batch of leftovers to reheat. Your oven can still deliver good results.
Preheat your oven to around 375°F (190°C). Place the drumsticks on a baking sheet, preferably on a wire rack set inside the baking sheet so air can circulate. This helps prevent the bottoms from becoming too soggy.
Bake for about 10-15 minutes, or until they are heated through and the skin is re-crisped. Keep an eye on them to prevent burning. This method ensures your chicken is warm and has a pleasant, slightly crisp exterior.
Your leftovers can taste great again with a little effort. Don’t let them go to waste by reheating them poorly. A few minutes in the air fryer or oven will bring them back to life.
- Reheat in a single layer.
- Your goal is crispy skin.
- Avoid high heat for too long.
- Check internal temperature before eating.
- Your drumsticks should be heated through.
- Don’t stack them when reheating.
Air Fryer Drumstick Mistakes
Even with a great recipe, it's possible to make mistakes when cooking drumsticks in the air fryer. Knowing these common pitfalls can help you avoid them and ensure you always get that perfect crispy skin and juicy meat. Your air fryer is powerful, but it needs a little guidance.
Forgetting to Preheat
Not preheating your air fryer is a common mistake that can sabotage your results. When you put cold drumsticks into a cold air fryer, they won't start cooking immediately. The machine will take time to heat up, and during that time, the chicken's surface can become steamy, which is the enemy of crispy skin. You're missing out on that initial blast of heat.
This delay means the drumsticks cook more slowly overall, and the skin may not get as crispy as it should. It's the difference between chicken that's perfectly browned and chicken that's a bit pale and flabby. Your crispy skin goal depends on starting hot.
Always take the few minutes needed to preheat your air fryer. It ensures that the moment the drumsticks go in, they are hit with consistent, high heat, which is essential for rendering fat and creating that desirable crunch.
Overcrowding the Basket
This is probably the most frequent mistake home cooks make with air fryers. When you pack too many drumsticks into the basket, the hot air can't circulate freely around each piece. This leads to uneven cooking, where some drumsticks might be crispy while others remain pale and soft. Your drumsticks need room to breathe.
Proper airflow is what makes air frying work. If the drumsticks are touching or piled up, they steam each other rather than getting that all-around crisping effect. You'll end up with chicken that's cooked unevenly and likely won't be as crispy as you hoped.
Cook in batches if necessary. It's better to take a little extra time and have perfectly cooked, crispy drumsticks than to try and cram them all in at once for a disappointing result. Your patience will be rewarded.
Not Drying the Chicken
Moisture on the surface of the drumsticks is the biggest enemy of crispy skin. If you skip the step of patting your chicken completely dry before seasoning, you're setting yourself up for less crispy results. Water creates steam, and steam prevents the skin from crisping up properly. You want that skin to crackle, not steam.
Think of it this way: you can't fry a wet french fry and expect it to be crispy. The same principle applies here. Removing surface moisture allows the heat to directly crisp the skin and render the fat underneath it. Your crispy chicken journey starts with dryness.
Always use paper towels to thoroughly pat down each drumstick. Get into all the nooks and crannies. This simple step makes a significant difference in achieving that satisfyingly crunchy skin you're after.
Incorrect Temperature Setting
Using the wrong temperature can also lead to less-than-ideal drumsticks. Too low a temperature means the skin won’t crisp up properly, and the meat might become dry before the skin browns. Too high a temperature, and the outside can burn before the inside is fully cooked. Your air fryer needs the right heat.
The recommended temperature of 380°F (190°C) is generally a sweet spot. It's hot enough to crisp the skin and render the fat, but not so hot that it burns the exterior before the interior is safe to eat. Finding this balance is key for your drumsticks.
Always double-check your air fryer's temperature setting before you start cooking. If your model tends to run hot or cold, you may need to adjust the temperature slightly based on your experience. You want that perfect medium-high heat.
Making these simple adjustments can vastly improve your air fryer drumstick cooking experience. Pay attention to the details, and your chicken will always turn out wonderfully.
- Don’t skip the preheat.
- Give your chicken space to cook.
- Your dry drumsticks are key.
- Check the temperature carefully.
- Always flip them halfway.
- Trust your meat thermometer.
Air Fryer Drumstick Cooking Reference at a Glance
| Food Item | Temperature & Time | Key Tip to Watch For |
|---|---|---|
| Chicken Drumsticks | 380°F (190°C) for 22-25 min | Don’t overcrowd the basket; flip halfway |
| Seasoned Drumsticks | 380°F (190°C) for 22-25 min | Ensure even seasoning for full flavor |
| Dry Drumsticks | 380°F (190°C) for 22-25 min | Patting dry is crucial for crispiness |
| Spaced Drumsticks | 380°F (190°C) for 22-25 min | Allow air to circulate around each piece |
| Preheated Fryer | 380°F (190°C) for 22-25 min | Start with a hot basket for crisp skin |
| Flipping Drumsticks | 380°F (190°C) for 22-25 min | Cook evenly on all sides |
| Internal Temp 165°F | 380°F (190°C) for 22-25 min | Ensure chicken is safely cooked through |
| Rested Drumsticks | N/A | Allow juices to redistribute for moisture |
Frequently Asked Questions
How Long Do You Cook Drumsticks in an Air Fryer?
You should cook drumsticks in an air fryer at 380°F (190°C) for about 22-25 minutes. Remember to flip them halfway through to ensure they cook evenly on all sides. Your specific air fryer model might require slight adjustments to this time.
Can You Put Frozen Drumsticks in the Air Fryer?
Yes, you can cook frozen drumsticks in the air fryer, but you will need to increase the cooking time. Start with about 30-35 minutes at 380°F (190°C), flipping them halfway. Your chicken needs to be thoroughly cooked through.
Are Drumsticks Healthier in an Air Fryer?
Air frying drumsticks is generally healthier because it requires significantly less oil than deep frying. You get a crispy result with much less added fat, making them a lighter option for you to enjoy. Your chicken will be just as flavorful.
Do You Need to Spray Drumsticks with Oil?
While not strictly necessary, a light spray or toss with oil helps your seasonings adhere better and promotes crispier skin. Your drumsticks will still get crispy without added oil, but a little bit helps enhance the texture and flavor.
Should You Flip Drumsticks in the Air Fryer?
Yes, you absolutely should flip your drumsticks halfway through the cooking time. This step is crucial for ensuring that both sides of the chicken cook evenly and achieve that desirable crispy texture all around.
What Temperature Should You Use for Drumsticks?
The best temperature for cooking drumsticks in an air fryer is typically 380°F (190°C). This temperature is hot enough to render the fat and crisp the skin effectively without burning the outside before the inside is cooked. Your results will be superior.
Will Drumsticks Cook Through at 350°F?
You can cook drumsticks at 350°F (175°C), but it will take longer, and the skin may not get as crispy. For the best balance of crispy skin and moist meat, a higher temperature like 380°F is usually recommended. Your chicken will be more enjoyable.
How Do You Know When Air Fryer Drumsticks Are Done?
Your air fryer drumsticks are done when they reach an internal temperature of 165°F (74°C) when tested with a meat thermometer in the thickest part, avoiding the bone. The juices should also run clear when pierced.
Final Thoughts
I hope you found this guide helpful for making amazing drumsticks in your air fryer. Your crispy, juicy chicken is just a few simple steps away. Remember to give them space and get that skin nice and dry before seasoning. You've got this.
