
As an Amazon Associate, I earn from qualifying purchases at no extra cost to you.
How to Install a Moen Bathroom Faucet Cartridge (Easy Fix)

A dripping faucet usually means one thing, the cartridge inside has worn out. Moen bathroom faucets use a simple cartridge system, and swapping it out doesn’t take a plumber. You just need a few tools, some patience, and the right replacement part. This guide covers every step, so that drip finally stops for good.
You’ll need to shut off the water, take apart the handle, and pull out the old cartridge before pushing in a fresh one. Check your faucet model first, since Moen cartridges come in different sizes and shapes. Grab a cartridge puller if the old one feels stuck, it makes removal much easier. Test the water once everything’s back together, just to be safe.
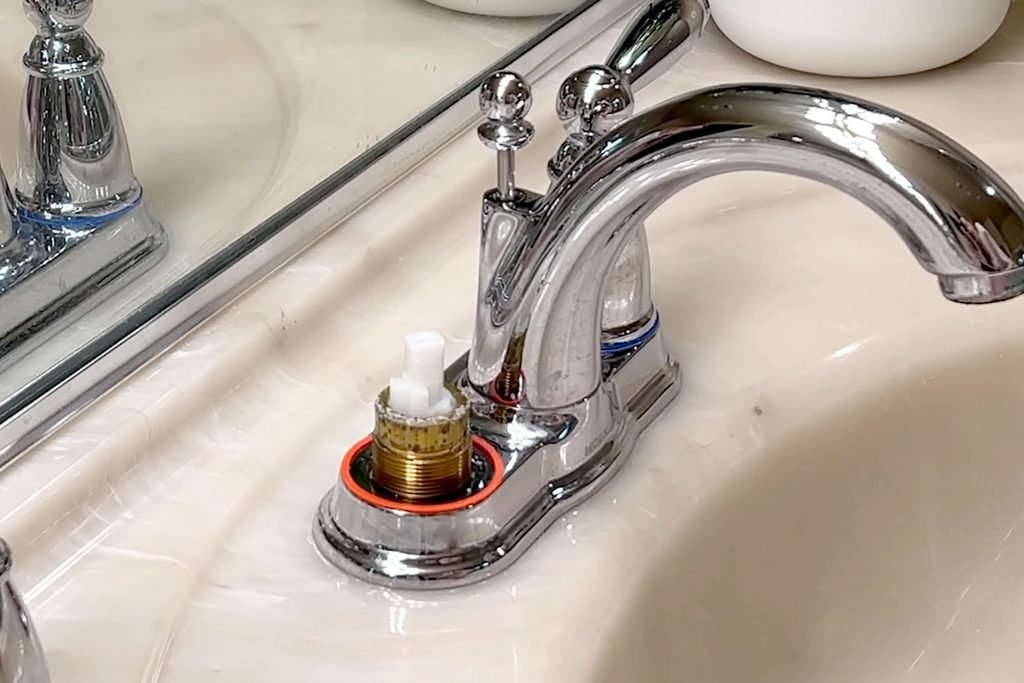
Why Does a Moen Bathroom Faucet Start Leaking?
Every faucet wears down eventually, and Moen models are no exception. Small rubber parts inside break down over time, letting water sneak past the seal.
Worn Cartridge Seals
Rubber seals inside the cartridge dry out and crack after years of use. Once that happens, water finds tiny gaps and drips out slowly, even when the handle sits in the off position. This is the most common reason behind a leaky Moen faucet.
Mineral Buildup Inside the Valve
Hard water leaves calcium and lime behind, and that buildup collects inside the cartridge over months. The extra grit stops parts from sealing tight, so water sneaks through even when everything looks fine on the outside.
High Water Pressure
Water pressure that runs too high puts extra stress on cartridge parts every single day. Over time, that pressure wears down seals faster than normal, so a faucet in a high-pressure home tends to leak sooner than one with gentler flow.
Age of the Faucet
Older Moen faucets, especially ones over ten years old, naturally start to show wear in their internal parts. Plastic and rubber both break down slowly with age, so an aging faucet is more likely to leak than a newer one.
Wrong Cartridge Type
A cartridge that doesn’t match the faucet model causes leaks almost right away. Moen makes several cartridge styles, and using the wrong one leaves gaps that water slips through, no matter how tightly everything gets put back together.
Installation Mistakes From Before
Sometimes the last cartridge went in a little crooked, or the retaining clip wasn’t seated all the way. Small mistakes like these don’t show up right away, but they usually lead to a slow drip within a few months.
Knowing the cause helps you pick the right fix from the start. Most of the time, though, replacing the cartridge itself solves the leak completely, without needing bigger repairs.
- Worn rubber seals cause most cartridge leaks
- Hard water buildup blocks a tight seal
- High water pressure speeds up wear
- Older faucets need cartridge swaps more often
- The wrong cartridge size never seals right
- A poorly seated retaining clip causes early leaks
How to Install a Moen Bathroom Faucet Cartridge
This part covers the full swap, from shutting off water all the way to testing the finished fix. Follow each step in order for the best result.
Turn Off the Water Supply
Look under the sink for two shutoff valves, one for hot water and one for cold. Turn both handles clockwise until they stop turning, this cuts water flow to the faucet completely, so nothing sprays while parts come off.
Once both valves sit closed, open the faucet handle and let any leftover water drain out of the lines. This little step keeps things from spraying everywhere once you start pulling parts apart under the sink.
Lay a towel across the sink basin too, just in case a few stray drops escape during the process. A little prep work now saves a much bigger mess later, and it only takes a minute.
Remove the Faucet Handle
Most Moen handles hide a small set screw, either on the side or under a decorative cap on top. Pop the cap off with a flathead screwdriver, gently, so the plastic doesn’t crack or snap.
Once you spot the set screw, use a hex key to loosen it, turning counterclockwise a few full turns. There’s no need to remove the screw completely, just loosen it enough to slide the handle free.
Wiggle the handle gently while pulling it straight up and off the faucet body. If it feels stuck, a bit of penetrating oil around the base can help loosen years of built-up grime.
Take Out the Retaining Clip
With the handle off, look for a small metal clip holding the cartridge in place inside the faucet body. This clip sits in a shallow slot, and it keeps the cartridge from sliding out on its own.
Use needle-nose pliers to grip the clip firmly, then pull it straight out. Some clips are U-shaped, others are shaped like a small horseshoe, either way, they usually come free without much force.
Set the clip somewhere safe, like a small dish, since you’ll need it again later. Losing this tiny piece means a trip to the hardware store before the job can finish.
Pull Out the Old Cartridge
Grab the top of the cartridge with pliers, or use a cartridge puller tool if the faucet came with one. Moen cartridges often have small notches or a stem that pliers can grip onto directly.
Pull straight up with steady, even pressure, twisting slightly if it feels stuck from mineral buildup or old grime. Avoid yanking too hard, since forcing it can crack the faucet body around the cartridge.
If the cartridge really won’t budge, soak the area in white vinegar for fifteen minutes first. That softens hardened mineral deposits, making the stubborn old part much easier to remove afterward.
Put In the New Cartridge
Check the new cartridge against the old one before installing, confirming the notches and stem line up the same way. Installing it backward stops hot and cold water from working correctly once everything’s reassembled.
Line up the cartridge with the slot inside the faucet body, then push down firmly and evenly. It should slide in smoothly, without needing much force, until it sits flush with the housing around it.
Rock it gently side to side if it feels off, this helps it settle into the correct position. A properly seated cartridge sits level, not tilted or sticking out unevenly on one side.
Reassemble and Test the Faucet
Slide the retaining clip back into its slot, making sure it clicks or locks fully into place. A loose clip lets the cartridge shift later, bringing that same leak right back within weeks.
Put the handle back on, lining it up the same way it came off, then tighten the set screw snugly with the hex key. Snap the decorative cap back over the screw once it’s secure.
Turn both shutoff valves back on slowly, then test hot and cold water separately at the handle. Watch closely under the sink for a minute, checking for any drips around the new cartridge.
Once everything’s back together, a fresh cartridge usually fixes the leak right away, with no more drips.
- Shut off both hot and cold valves first
- Remove the cap, then loosen the set screw
- Pull the retaining clip out with pliers
- Twist and pull the old cartridge straight up
- Match notches before seating the new cartridge
- Test the water slowly before walking away
Do You Need to Turn Off Water Before Changing a Faucet Cartridge?
Yes, always, and skipping this step almost guarantees a mess. Water lines stay pressurized even when the faucet handle sits closed, so pulling a cartridge without shutting things off first sends water spraying everywhere. That pressure builds up behind the cartridge, and once it’s removed, there’s nothing left holding the water back.
Shutting the valves under the sink takes just a few seconds, but it saves a lot of cleanup. After closing both valves, open the faucet handle briefly to bleed off any water still sitting in the lines. That extra step drains the last bit of pressure, making the whole cartridge swap much cleaner.
Some older homes don’t have shutoff valves under every sink, though. In that case, the main water valve for the whole house needs to close instead, which is a bit more involved but still simple.
- Always locate both hot and cold valves first
- Turn valves clockwise to fully shut them off
- Open the handle after closing valves to drain lines
- Skipping this step causes a sudden water spray
- Older homes might need the main house valve closed
- A dry towel nearby catches any leftover drips
How Do You Know Which Moen Cartridge to Buy?
Moen uses several cartridge types, so matching the right one to the right faucet really matters. Check the faucet’s model number first, it’s often printed on a sticker under the sink or stamped somewhere on the body. That number tells you exactly which cartridge fits, without any guessing involved.
Bringing the old cartridge to the hardware store works too, since staff can match it visually against replacement stock. Popular Moen cartridge numbers include the 1225, 1200, and 1255 series, each built for slightly different faucet styles and handle types. Buying the wrong one leads to leaks or a handle that won’t turn smoothly.
Online, searching the faucet model number alongside “cartridge” usually pulls up the exact match needed. Double checking against a parts diagram avoids an extra trip back to the store later.
- Find the faucet model number under the sink
- Bring the old cartridge along as a backup
- Common types include 1225, 1200, and 1255 series
- Single-handle and two-handle faucets need different cartridges
- Check parts diagrams online before ordering
- Avoid generic cartridges that aren’t Moen-branded
Why Is Water Still Leaking After You Replace the Cartridge?
A fresh cartridge doesn’t always solve everything right away, and a few common issues explain why. The retaining clip might not be fully seated, leaving just enough gap for the cartridge to shift slightly under water pressure. That small movement is often enough to bring the drip right back.
Sometimes the new cartridge itself is the wrong type, even if it physically fit into the housing. A close match isn’t the same as an exact match, and small differences in seal placement cause leaks that seem confusing at first. Checking the model number twice avoids this frustrating outcome.
Old mineral deposits left inside the faucet body can also stop a new cartridge from sealing properly. Cleaning that area with vinegar before installing anything new usually clears up leftover buildup for good.
- Recheck that the retaining clip clicked fully into place
- Confirm the cartridge model matches the faucet exactly
- Clean mineral buildup from the housing before installing
- Look for cracks in the faucet body itself
- Check that handle screws are tightened all the way
- Call a plumber if leaks continue after these checks
Can You Replace a Faucet Cartridge Without Removing the Faucet?
Yes, and this is actually the normal way most people do it. The whole faucet stays mounted to the sink the entire time, only the handle and the cartridge inside come apart during the process. There’s no need to unscrew anything from underneath the sink or disconnect the water lines completely.
This makes the job much faster than a full faucet replacement, since only a few small parts get touched. Most cartridge swaps take somewhere between fifteen and thirty minutes, once the water’s shut off and tools are ready nearby. Even first timers usually manage it without much trouble.
The only exception comes up if the faucet body itself is cracked or damaged somehow. In that rare case, replacing the whole faucet makes more sense than just swapping the cartridge alone.
- The faucet stays attached to the sink throughout
- Only the handle and cartridge get removed
- No need to disconnect water supply lines
- Most swaps finish within fifteen to thirty minutes
- Basic tools like pliers and a hex key work fine
- A cracked faucet body needs full replacement instead
Final Thoughts
I hope this guide made the whole cartridge swap feel a lot less intimidating. Most leaks really do come down to one small worn part, and fixing it yourself saves both time and money. Just take it slow, match the cartridge carefully, and that annoying drip should be gone for good.
| Cartridge Model | Common Faucet Type | Typical Price Range |
|---|---|---|
| Moen 1225 | Two-handle bathroom faucets | $12–$20 |
| Moen 1200 | Single-handle kitchen and bath | $10–$18 |
| Moen 1255 | Posi-Temp single-handle faucets | $15–$25 |
| Moen 1222 | Two-handle Roman tub faucets | $14–$22 |
| Moen 1224 | Reverse pressure balance faucets | $16–$24 |
| Moen 1209 | Older two-handle models | $10–$16 |
| Cartridge puller tool | Removing stuck cartridges | $10–$15 |
| Hex key set | Loosening handle set screws | $5–$10 |
| White vinegar | Soaking mineral buildup | $3–$5 |
| Plumber’s grease | Lubricating new cartridge seals | $4–$8 |
Frequently Asked Questions
Is It Hard to Replace a Moen Faucet Cartridge?
No, most people find it manageable with basic tools and a little patience. The process mostly involves shutting off water, removing a handle, and swapping one small part inside the faucet body itself.
Can You Use Any Cartridge in a Moen Faucet?
No, cartridges need to match the exact faucet model for a proper seal. Using the wrong type often causes leaks, temperature mixing problems, or a handle that feels loose or sticky when turning.
Are Moen Cartridges Interchangeable Between Models?
Sometimes, but not always, so checking compatibility charts first matters a lot. Similar looking cartridges can have different internal seals, which leads to leaks even when the physical fit seems close enough.
Do You Need Special Tools to Change a Cartridge?
Not really, most jobs only need pliers, a hex key, and maybe a cartridge puller tool. These tools are inexpensive and widely available at any hardware store or home improvement center nearby.
Does a New Cartridge Fix All Faucet Leaks?
Mostly yes, since worn cartridges cause the majority of bathroom faucet leaks over time. However, cracked faucet bodies or damaged supply lines need separate repairs beyond just a simple cartridge swap.
Should You Turn Off the Main Water Valve for This Repair?
Only if there’s no shutoff valve under the sink itself, which happens in some older homes. Otherwise, closing the two valves right below the faucet works fine for this kind of repair.
Will a Faucet Leak Again After a Cartridge Replacement?
It shouldn’t, as long as the retaining clip seats fully and the cartridge model matches correctly. Leaks after replacement usually point back to installation mistakes rather than a failed new part.
Is It Worth Replacing the Cartridge Instead of the Whole Faucet?
Yes, in almost every case, since cartridges cost far less than a full faucet replacement. Unless the faucet body is cracked or badly corroded, a cartridge swap solves the problem completely.
