
As an Amazon Associate, I earn from qualifying purchases at no extra cost to you.
How Long to Cook Grilled Cheese in Air Fryer (Expert Tips)
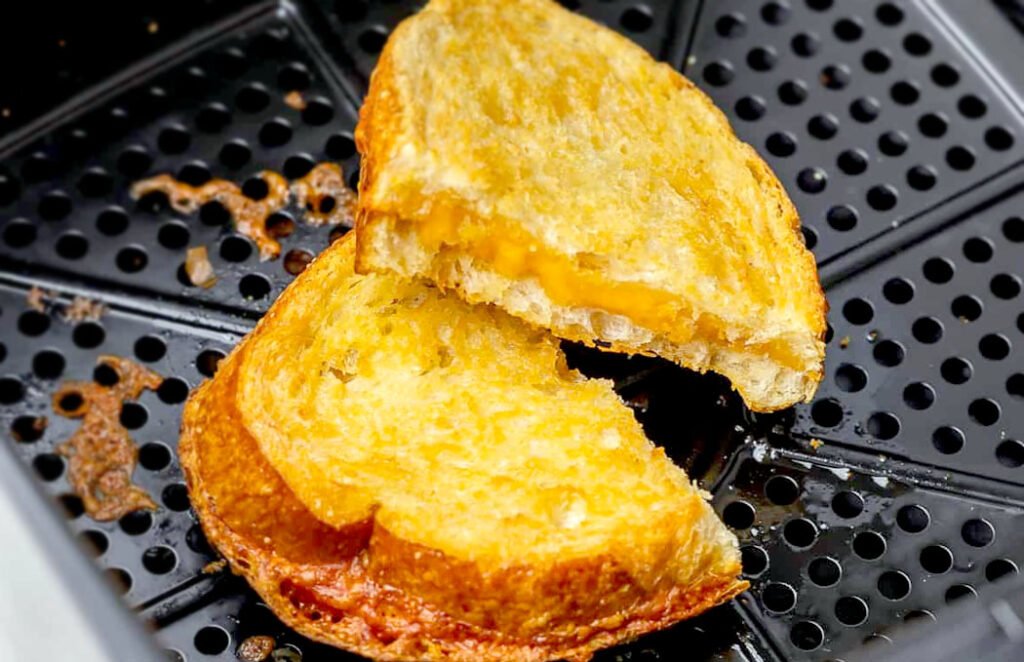
Bread turns to stone in eight minutes. Smoke drifts from the basket while the cheese sits cold and stubborn in the middle. Your lunch should be a simple joy, not a guessing game with a plastic appliance. Every brand heats differently. Some burn the crust before the cheddar even thinks about melting. You stand there, peering through the glass, hoping for gold but fearing charcoal. Getting the timing right changes everything about your midday meal.
Cook your grilled cheese at 360 degrees Fahrenheit for 6 to 8 minutes. Flip the sandwich halfway through to ensure both sides get even heat. Use room temperature butter or mayo for the best color. Check thin bread at the 5-minute mark to avoid burnt bread edges.
Why Does Air Fryer Toasting Time Seem So Complicated?
Most manuals give broad ranges that ignore bread thickness or cheese density. You end up with cold cheese centers because the outside cooks too fast. Air circulates differently in every model, making standard instructions feel like a total gamble.
Wattage Differences Matter
Your machine might run hotter than the one next door. High-power units blast the surface with intense heat immediately. Low-wattage baskets take longer to reach the right temperature. This gap causes a lot of frustration during the lunch rush. You must learn your specific unit’s personality first.
Bread Density Changes Speed
Sourdough resists heat much longer than a soft slice of white bread. Thick artisan cuts need more time for the middle to warm up. If you use thin sandwich bread, it can turn into a cracker in seconds. The density of the grain dictates the countdown. You should adjust your expectations based on the loaf.
Cheese Type Affects Results
Harder cheeses like sharp cheddar take longer to soften than processed slices. If you pack the sandwich too full, the middle stays solid. A single slice melts fast, but a triple-layer stack needs patience. Heat must travel through the bread into the filling. This delay is why timing feels inconsistent.
Preheating Habits Vary
Skipping the warm-up period adds minutes to your cook time. A cold basket starts from zero, while a hot one sears immediately. Most people toss the bread in and hit start without thinking. This leads to unevenly cooked crusts every single time. Consistent habits lead to predictable sandwiches.
Ambient Kitchen Temperature
Even the air in your house plays a small role in the process. A cold loaf from the fridge fights against the heating element. Room temperature ingredients reach the melting point much faster. You might notice your sandwich takes longer in the winter months. Small details like this explain the timing mystery.
- Models with smaller baskets cook faster.
- Frozen bread requires two extra minutes.
- Butter creates a slower browning.
- Mayonnaise browns rapidly due to sugar.
- Overcrowding blocks essential airflow.
- Lightweight bread might fly into the fan.
How to Cook Grilled Cheese in Air Fryer: A Step-by-Step Guide
Prepare Your Bread Surfaces
I always start by spreading a thin, even layer of fat on the outside of my bread. You can use softened butter or a swipe of mayonnaise to get that golden look. I found that mayo actually creates a more uniform crust because it has a higher smoke point.
Make sure you cover every single corner of the slice. If you miss a spot, that area will come out dry and pale. I learned that dried out bread surfaces in an air fryer feel like eating sandpaper.
Use a butter knife to smooth it out without tearing the loaf. I prefer salted butter for the extra flavor kick it gives the crust. You want just enough to coat the surface, not soak the grain.
- Apply fat to both outward-facing sides.
- Use room temperature spreads for easy coverage.
- Keep the layer thin to prevent sogginess.
- Avoid using low-fat spreads with high water.
Select the Right Cheese Blend
I used to just toss a single slice of American in and call it a day. Now, I mix a fast-melter with something that has a stronger flavor profile. I love using a blend of mozzarella for the pull and sharp cheddar for the taste.
Slice your cheese thinly so it has a chance to melt quickly. I once tried using a thick block of gouda and the bread burned before the cheese softened. Shreddable cheese also works well if you press it down firmly between the slices.
You should aim for about two to three ounces of cheese total. I found that any more than that leads to cheese leaking into basket areas. Use the bread as a shield to keep the gooey middle contained.
- Combine two different types of cheese.
- Avoid pre-shredded bags with anti-clumping powder.
- Place the cheese exactly in the center.
- Keep cheese away from the very edges.
Preheating Your Air Fryer Basket
I never skip the preheating phase because it sets the stage for a crisp crust. You should run your machine at 360 degrees for at least three minutes before the bread goes in. I noticed my sandwiches are much crunchier when the metal is already hot.
A cold basket allows the bread to soak up the butter without searing. This results in a greasy grilled cheese texture that nobody wants to eat. I want that immediate sizzle the moment the sandwich hits the rack.
Think of your air fryer like a small, powerful oven. You wouldn’t put a cake in a cold oven, so don’t do it to your lunch. I treat the preheat as the most important step for timing accuracy.
- Set the temperature to 360 degrees.
- Run the empty basket for three minutes.
- Listen for the fan to reach speed.
- Be careful when opening the hot drawer.
Securing the Sandwich Structure
I struggled for a long time with the bread flying off sandwich during the cycle. The air inside these machines moves with incredible force, especially in smaller pod-style units. I solve this by poking a single toothpick through the center of the sandwich.
You can also use a small metal rack to weigh the bread down. I found that a heavy slice of cheese helps, but light white bread still tends to migrate. I always double-check the placement right before I slide the drawer shut.
Press down firmly on the assembled sandwich with your palm. I like to feel the two slices bond together with the fat and cheese. This physical connection helps the heat transfer more efficiently through the layers.
- Use a toothpick to hold bread.
- Ensure the toothpick stays away from the fan.
- Press the sandwich flat before starting.
- Check position after sixty seconds.
Flipping for Even Browning
I always flip the sandwich halfway through the total cook time. This is the only way to avoid a soggy bread bottom and get a professional look. I use a wide silicone spatula to make sure I don’t tear the crust.
Be careful not to lose your cheese during the turn. I hold the top slice in place with my finger while I slide the spatula underneath. I found that the bottom side usually looks a bit pale before the flip.
The second side typically only needs about three minutes to finish. I noticed that the internal heat of the sandwich helps the cheese melt from the inside out now. This is the moment where the golden color really develops.
- Use a wide spatula for a flip.
- Check the color of the first side.
- Close the drawer quickly to keep heat.
- Rotate the sandwich if one side is darker.
Monitoring the Final Crunch
I take a peek at the sandwich when there is one minute left on the clock. You are looking for a deep golden brown color that looks uniform across the surface. I sometimes leave it in for an extra thirty seconds for a darker toast.
If the cheese is not quite oozing out yet, I give it more time. I have discovered that some breads take a sudden turn from gold to black very fast. I never walk away from the kitchen during the final sixty seconds.
The smell of toasted butter is your best indicator of success. I rely on my nose just as much as the digital timer on the machine. You want the bread to feel firm and crisp when you tap it.
- Watch for a uniform golden brown shade.
- Listen for a hollow sound when tapped.
- Check that the cheese has fully melted.
- Remove the sandwich immediately when done.
What are the Best Breads for the Air Fryer?
Choosing the right loaf changes the entire experience. You need a bread that can handle high-speed hot air without drying out completely. Some slices are too porous and let the cheese leak through the bottom.
Others are so dense that they never get that light, airy crunch. I spent weeks testing everything from cheap white bread to expensive artisan loaves. The results were surprisingly different each time I swapped the bag.
You want something with a tight crumb and a sturdy crust. This prevents the sandwich from collapsing or flying around the basket. A good slice acts as a thermal blanket for the cheese inside.
Sourdough for Extra Tang
I love sourdough because the crust becomes incredibly shatteringly crisp in the air fryer. The natural holes in the bread can sometimes let cheese escape, so I use slightly thicker slices. It provides a nice chew that contrasts well with a soft cheese like Havarti. I find that sourdough needs the full eight minutes because it is quite dense.
Brioche for Rich Texture
Brioche is very high in fat and sugar, which means it browns much faster than other breads. I have to lower my temperature to 340 degrees when I use it. Otherwise, the edges turn black before the middle even gets warm. It creates a dessert-like richness that pairs perfectly with a salty ham or sharp cheese.
Classic White Sandwich Bread
This is the old reliable choice for a reason. It is uniform in shape and size, which makes it easy to fit into smaller air fryer baskets. I noticed that the soft texture turns into a very light crunch that is easy on the teeth. It doesn’t need as much butter because the surface is so smooth.
Whole Wheat for Hearty Bites
Whole wheat bread can sometimes get a bit dry if you leave it in too long. I combat this by using a little extra mayonnaise on the outside of the slices. The nutty flavor of the grain actually deepens when it hits the heat. I find it holds up well to very heavy fillings like sliced tomatoes.
Texas Toast for Maximum Softness
If you love a thick sandwich, Texas toast is the way to go. These extra-thick slices require a bit more time to heat through to the center. I usually add an extra two minutes to my total cook time for these. The result is a sandwich that is crunchy on the surface but pillow-soft inside.
Why is My Cheese Not Melting Properly?
It is incredibly annoying to bite into a hot sandwich only to find cold cheese. This usually happens because the air fryer is too efficient at browning the bread. The outside looks done, but the heat hasn’t reached the core.
I have faced this problem many times when using thick-cut cheddar. The solution often involves a mix of temperature control and ingredient preparation. You cannot just blast a sandwich with heat and expect it to be perfect.
Cheese chemistry matters more than you might think in such a small space. Some types have a very high melting point that the air fryer struggles to hit. You have to work with the machine, not against it, for good results.
Using Fridge Cold Cheese
I used to take my cheese straight from the refrigerator and put it on the bread. This is a mistake because the cold core acts like an ice cube. I now let my cheese sit on the counter for ten minutes before I start cooking. This small head start allows the fat to soften faster.
Selecting Harder Aged Cheeses
Some aged cheeses are delicious but they don’t melt into a smooth pool. I found that hard cheese not melting is common with extra-sharp cheddar or aged parmesan. I solve this by mixing them with a bridge cheese like Monterey Jack. The softer cheese melts first and helps conduct heat into the harder bits.
Slicing Too Thickly
I once thought that one big thick slab of cheese would be better than several thin ones. I was wrong because the heat takes too long to penetrate the center of a thick block. Now I use three or four thin shavings instead of one massive chunk. This increases the surface area exposed to heat.
Overstuffing the Sandwich
I know it is tempting to load up a sandwich with half a pound of cheese. However, too much bulk prevents the air from circulating effectively around the food. The middle stays insulated and cold while the outside bread starts to smoke. I found that staying under three slices is the sweet spot.
Low Temperature Cooking
I tried cooking at 300 degrees to give the cheese more time, but the bread turned into a cracker. You need enough heat to brown the butter, but not so much that it happens instantly. If your cheese isn’t melting, you might actually need to slightly increase the heat and decrease the time.
High Moisture Cheeses
Fresh mozzarella or ricotta can release too much water when they get hot. I ended up with a soggy mess the first time I tried using fresh buffalo mozzarella. I now stick to the low-moisture version of these cheeses. This prevents too much steam in basket areas from ruining the crunch.
Airflow Blockage Issues
I noticed that if I put a heavy bowl or plate on top of my sandwich, the cheese stayed cold. You need the hot air to hit the top and sides of the bread. If you block that path, the process slows down significantly. I use the toothpick method specifically because it allows for airflow.
Is Butter or Mayonnaise Better for Air Fryer Toasting?
This is the biggest debate in the grilled cheese world right now. I have tried both extensively to see which one delivers the best crunch. Both fats have unique properties that react differently to the high-speed air.
Butter offers a classic flavor that most of us grew up with as kids. It contains milk solids that brown beautifully and provide a rich, savory aroma. However, it can be difficult to spread if it isn’t perfectly soft.
Mayonnaise is a favorite because it is easy to use and very consistent. It contains oil and egg, which help create a very even, golden crust. I found that many restaurants use this secret to get that perfect look every single time.
Flavor Comparison
I find that butter has a much better taste that compliments the cheese. There is a depth to the flavor that mayonnaise simply cannot match in my opinion. If you are using high-quality bread and cheese, butter is usually the winner for taste. I love the way the salted milk solids caramelize.
Ease of Application
I hate trying to spread cold butter on soft bread only to have it tear. This is where mayonnaise really shines because it is always ready to spread right out of the jar. I can coat a dozen sandwiches in seconds without any damage to the bread. This saves a lot of time.
Consistency of Browning
I noticed that mayonnaise produces a more uniform color across the entire surface. Butter can sometimes leave patchy spots if the milk solids aren’t distributed perfectly. Because mayo is an emulsion, it coats every nook and cranny evenly. This results in a sandwich that looks like it came from a shop.
Smoke Point Differences
Butter has a lower smoke point than the oils used in most mayonnaise. This means butter can burn more easily if you turn your air fryer up too high. I have to be more careful with my timing with butter. Mayonnaise is a bit more forgiving if you accidentally leave it in longer.
Texture and Crunch
I feel that butter produces a crispier, more traditional fried texture on the bread. Mayonnaise creates a slightly thinner, more delicate crunch that some people prefer. I find that butter-toasted bread stays crunchy longer after it sits on the plate. Mayonnaise-toasted bread can sometimes soften up faster as it cools.
Nutritional Considerations
I think about the calories, but honestly, both options are quite similar in fat content. Butter is a natural product, while some mayos have a lot of additives or preservatives. I prefer using butter when I want to keep the ingredient list simple. I have found avocado oil mayos work well too.
Can I Make More Than One Sandwich at a Time?
Making lunch for a group can be a challenge with a small air fryer. I have tried to cram three sandwiches into one basket with very mixed results. The secret to success lies in how much air can still move around the food.
If you pack them in like sardines, you will end up with soggy edges and cold centers. I had to learn that more is often less when it comes to speed. Efficiency is about airflow, not just the number of items you can fit.
There are a few tricks I use to increase my output without sacrificing quality. It involves a mix of hardware and careful timing to get everyone fed at once. You do not have to cook one at a time.
Vertical Stacking Racks
I bought a small metal rack that allows me to stack two sandwiches. This doubles my capacity while still letting air flow between the layers. I found that I need to swap the top and bottom sandwiches halfway through the cook time. The top one always browns faster because of the fan.
Side-by-Side Placement
If you have a large square basket, you might be able to fit two sandwiches side-by-side. I make sure there is at least a half-inch of space between the crusts. If they touch, the sides will stay soft and doughy. I often trim the edges of my bread slightly to make them fit.
Batch Cooking Strategy
I sometimes cook all the sandwiches in stages to keep things moving quickly. I will cook two at a time and then put the first batch back in for one minute to reheat. This keeps the bread from getting cold while I finish the rest. A quick flash heat restores the crunch.
Using the Oven Mode
Some newer air fryers have a toaster oven shape with multiple shelves. I love these for grilled cheese because I can make four sandwiches at once. I still rotate the trays to ensure even browning. I noticed that the air doesn’t circulate quite as fast in these larger units.
Mini Sandwiches for Kids
I often cut the bread into smaller squares for my children. This allows me to fit four or five mini grilled cheeses into the basket at once. Because they are smaller, the heat reaches the center much faster. I find that these only need about five or six minutes total to be perfect.
The Pre-Toasting Method
I have tried toasters for the bread and then finishing the melt in the air fryer. This works if you are in a massive rush. I toast the bread lightly, add the cheese, and then air fry for just two minutes. It isn’t quite as good, but it is very fast for hungry crowds.
Avoiding the Overlap
I once tried to lean two sandwiches against the walls of the basket to save space. This was a disaster because the cheese melted down and caused the sandwich sticking to rack problem. I learned that the sandwiches must always lie flat or on a proper rack. Gravity is not your friend here.
Adjusting Time for Volume
I noticed that three sandwiches take longer to cook than just one. The extra mass absorbs more of the heat and slows down the overall temperature rise. I usually add about twenty percent more time when I double the amount of food. I always use my eyes to judge the finish.
Final Thoughts
I hope you feel ready to go make the best lunch of your life. I know it sounds like a lot of steps for a simple sandwich, but the results speak for themselves. You deserve a meal that is perfectly crunchy and gooey every single time you hit the kitchen. Go grab your favorite bread and give it a try right now.
| Bread Type | Time (Minutes) | Best Cheese |
|---|---|---|
| White Sandwich | 6-7 Minutes | American |
| Sourdough | 8-9 Minutes | Sharp Cheddar |
| Brioche | 5-6 Minutes | Gruyere |
| Whole Wheat | 7-8 Minutes | Monterey Jack |
| Texas Toast | 9-10 Minutes | Mozzarella |
| Rye Bread | 7-8 Minutes | Swiss |
| Gluten-Free | 6-7 Minutes | Provolone |
| Multigrain | 7-8 Minutes | Havarti |
| Focaccia | 8-9 Minutes | Muenster |
| Pumpernickel | 7-8 Minutes | Gouda |
Frequently Asked Questions
Is it necessary to flip the sandwich?
Yes. You must flip it to get both sides crispy. The top side faces the fan and cooks much faster than the bottom. Flipping ensures the cheese melts evenly and the bread doesn’t get soggy on the underside.
Can I use frozen bread for this?
You can use frozen bread without any issues. Just add two extra minutes to the total cook time. The air fryer is very good at defrosting and toasting at the same time. I do this often for quick morning snacks.
Are there any cheeses I should avoid?
Avoid very hard cheeses like aged Parmesan on their own. They don’t melt well and can turn oily. Also, be careful with fresh mozzarella as it releases too much water. Stick to semi-hard cheeses for the best results.
Do I need to use a toothpick?
Use a toothpick if your bread is light or thin. The powerful fan can blow the top slice off the sandwich. This prevents the cheese from melting and creates a mess. A single toothpick in the center solves the problem.
Does mayonnaise taste like eggs on the bread?
No. The mayonnaise transforms into a neutral, fatty crust. You won’t taste the vinegar or egg once it hits the heat. It simply provides a beautiful golden color and a very satisfying crunch.
Should I preheat my air fryer first?
You should definitely preheat for at least three minutes. A hot basket sears the bread immediately, which prevents it from soaking up the fat and becoming greasy. This is the secret to getting a restaurant-quality crust.
Will the cheese leak into the basket?
The cheese will stay inside if you keep it away from the very edges of the bread. If some does leak, it usually crisps up on the tray. Most air fryer baskets have a non-stick coating for easy cleanup.
How do I know when it is done?
Look for a uniform golden brown color on the crust. You should also see the cheese starting to bulge or bubble at the edges. If you tap the bread with a knife, it should sound hollow and feel firm.
