
As an Amazon Associate, I earn from qualifying purchases at no extra cost to you.
How Long to Cook Onions in Air Fryer for Sweet Results (Fix It Now)
Blackened edges on the outside but raw, crunchy centers. Smoke detectors screaming while you just wanted a burger topping. Onions turn from pale to burnt in twenty seconds. You stand there, peering through the glass, wondering if five more minutes means dinner or a fire drill. The answer is closer than that timer dial suggests.
Cook sliced onions at 370°F for 10 to 15 minutes. Shake the basket every 5 minutes for even browning. If you want crispy fried onion strings, drop the temperature to 350°F and cook for 8 to 10 minutes. Use a light spray of oil to prevent them from drying out or burning.
Why Is Air Frying Onions So Confusing?
Most people think onions are simple until they see them fly around the basket like tiny white birds. These vegetables are full of water and natural sugars, which makes them tricky to handle. High heat turns that sugar into a bitter mess if you are not careful.
Understanding High Moisture Content
Onions hold a lot of water inside their layers. When you start the air fryer, that water needs to turn into steam before the browning starts. I spent months wondering why my onions looked gray and limp for the first ten minutes. It is because the machine is boiling them in their own juices before it can actually fry them.
Dealing With Natural Sugar Burn
Sugar is what makes a caramelized onion taste like candy. However, that same sugar is a liability when you use high-speed hot air. The fan can blow the heat so intensely that the sugars carbonize before the middle of the onion softens. You end up with onions burning too quickly while the centers stay sharp and pungent.
Avoiding The Crowding Trap
I used to dump three whole onions into the basket at once. This creates a thick wall of vegetable that air cannot pass through. Without airflow, the onions on the bottom stay raw while the ones on top get scorched. You need space for the air to dance around every single slice to get that golden color.
Selecting The Right Cut Size
Thickness determines your total cooking time more than the temperature setting does. If you cut them too thin, they shrivel into nothing and fly into the heating element. When you cut them too thick, you end up with raw centers in air fried food that ruin your meal. Consistency is the secret to a predictable timer.
Controlling The Internal Fan
The air fryer fan is much stronger than a standard oven fan. Light onion rings or small pieces often get sucked up or blown into the corners. This movement causes uneven browning in basket because some pieces stay in the hot spot while others hide. You have to learn how to weigh them down or keep them grouped.
- Onions are mostly water and sugar.
- Steam must escape before crisping begins.
- High fan speeds move light slices easily.
- Consistent cuts lead to even cooking.
- Overcrowding blocks the necessary airflow.
- Heat can turn sugar bitter very fast.
How to Cook Onions in Air Fryer: A Step-by-Step Guide
The process starts before you even plug in the machine. I learned that preparation determines the final texture more than the actual cooking time. You need to focus on how you handle the vegetable before it hits the heat.
Prep Your Onions For Success
Starting with a sharp knife makes a massive difference in how your onions turn out. I learned this the hard way after butchering a white onion into jagged chunks that cooked at different speeds. You want uniform slices to ensure every piece hits that sweet spot at the same time.
Aim for quarter-inch thickness if you want a mix of soft and crispy parts. Thinner slices tend to disappear or turn into carbon before the timer dings. I always peel back the papery skin and the first tough layer to reach the juicy heart.
Wash your hands after cutting to remove the pungent oils that linger on your skin. These oils can transfer to the air fryer handle and leave a scent that lasts for days. Prepare your workspace so you can move quickly from the cutting board to the basket.
- Peel the outer layers completely.
- Slice into even rings.
- Remove any bruised spots.
- Keep sizes consistent.
Choose The Right Temperature Setting
Heat is your best friend and your worst enemy in this process. I usually stick to 370°F for standard sliced onions because it balances speed with safety. If you go higher, you risk air fryer smelling like burnt food before the onions are even soft.
Lower temperatures like 350°F work better if you are doing thick wedges or whole blooms. This allows the heat to penetrate the core without destroying the exterior. I found that 400°F is almost always too hot for onions unless they are heavily breaded.
Give your air fryer two minutes to preheat before you add the onions. This ensures the cooking starts the moment you slide the basket in. A cold start leads to a soggy vegetable texture that never quite recovers its crunch.
- Preheat for two minutes.
- Use 370°F for slices.
- Use 350°F for thick pieces.
- Avoid the 400°F setting.
Apply The Perfect Oil Coating
You cannot skip the oil if you want that classic fried flavor. I prefer a high-heat oil like avocado or grapeseed because they do not smoke easily. Toss your onions in a bowl with a tablespoon of oil instead of spraying them in the basket.
This ensures every single surface is covered, which prevents the edges from drying out. When onions dry out too fast, they become papery and tasteless. I noticed that a light, even coat helps the salt and pepper stick where they belong.
Be careful not to overdo it, or you will end up with a greasy fried onion mess at the bottom. The goal is a light shimmer on the surface of the onion. This oil acts as a heat conductor to help the onion cook from the outside in.
- Toss in a bowl first.
- Use high-smoke point oils.
- Apply only a light coat.
- Avoid olive oil for high heat.
Arrange The Basket For Airflow
Layering is an art form when it comes to vegetables. I try to keep my onions in a single layer, but a little overlapping is fine if you shake them. Never fill the basket more than halfway or you will struggle with cold spots.
If you are cooking a large batch, it is better to work in two rounds. I found that cramming them in leads to onions sticking to bottom and tearing when you try to move them. Space allows the hot air to evaporate the moisture quickly.
Think of the basket like a crowded room where everyone needs to breathe. If the onions are packed tight, they will just steam and turn into mush. You want them to have enough room to move around when you give the basket a tug.
- Keep layers thin.
- Work in batches.
- Leave space for air.
- Do not overfill.
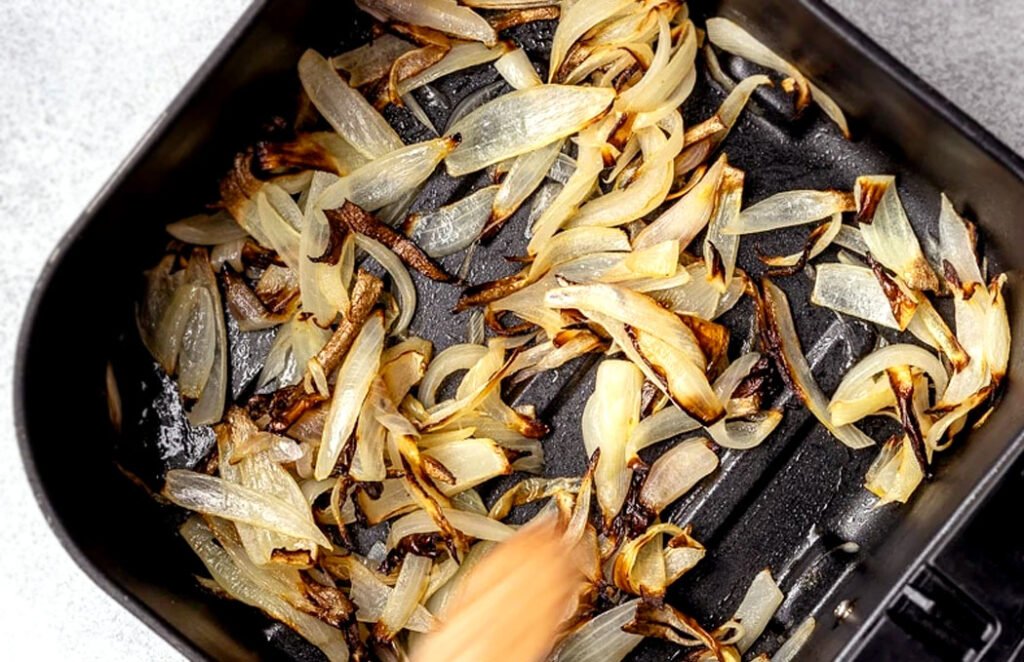
Shake The Basket Frequently
The timer is not a “set it and forget it” tool for onions. I set my phone timer for five-minute intervals to remind myself to check the progress. Shaking redistributes the oil and moves the bottom pieces to the top.
A good shake prevents the onions from fusing together into a giant clump. I like to use silicone tongs to move the pieces that are stuck in the corners. This ensures that the bitter tasting cooked onions on the edges do not get overdone.
You will see the onions shrink as they cook, which is normal. This shrinkage creates more space, so the second half of the cooking time usually goes faster. Stay close to the kitchen during the last three minutes of the cycle.
- Check every five minutes.
- Use silicone tools.
- Move corner pieces inward.
- Watch for shrinkage.
Determine The Final Doneness
Your eyes are better than the clock when deciding if the onions are finished. I look for a deep golden brown color on the edges and a translucent center. If they look white, they need more time to develop their sweetness.
Pull a small piece out and taste it if you are unsure. It should be soft with a slight bite and a sweet aftertaste. If it tastes like raw sulfur, put the basket back in for another two minutes.
Once they hit the perfect color, take them out immediately. Residual heat in the basket can continue to cook them even after the machine is off. I dump them onto a paper towel to soak up any tiny bits of extra oil.
- Look for golden edges.
- Check for translucence.
- Taste for sweetness.
- Remove immediately when done.
Can You Cook Different Onion Types?
Every onion behaves differently when hit with high-velocity heat. I have tried almost every variety to see which ones stand up to the pressure of the air fryer. Sweet onions like Vidalia are my personal favorite because they caramelize so quickly.
Yellow onions are the workhorses of the kitchen and hold their shape the best. They have a higher sulfur content, so they need a full twelve minutes to mellow out. Red onions are great for a quick blast of heat, but they can turn a strange grayish color if cooked too long.
White onions are very sharp and can sometimes become a bit watery in the basket. I find that they work best when you want a crunchier result for tacos or hot dogs. Shallots are the delicate cousins that need a much lower temperature to avoid burning into nothingness.
Sweet Onions
These have the highest sugar content of the bunch. They brown beautifully but can go from golden to black in a blink. I use them when I want a jammy texture for steak toppings.
Red Onions
Red onions are perfect for salads or quick charring. They don’t get as sweet as yellow onions, but they offer a great visual pop. I usually cut them into thick rounds to keep them from falling apart.
Yellow Onions
These are the most reliable for consistent results. They have a balanced moisture level that works perfectly with the air fryer fan. You can almost always count on them to be ready in exactly twelve minutes.
White Onions
Use these when you want a more pungent flavor profile. They stay firmer than sweet onions even after they brown. I like to use them for a quick fried topping on burgers.
Shallots
Shallots are small and thin, so they cook incredibly fast. I treat them like garlic and only give them five or six minutes. They offer a sophisticated flavor that feels more like a restaurant dish.
What About Breaded Onion Rings?
Making onion rings in the air fryer is a test of patience and technique. I struggled with the coating falling off vegetables for a long time before I figured out the flour trick. You need a dry base before you apply any wet batter.
The secret is to freeze the breaded rings for ten minutes before air frying them. This sets the breading so the fan doesn’t blow it all over the inside of the machine. I also use panko crumbs because they stay crispier than standard breadcrumbs.
You must spray the breaded rings with oil halfway through. If you don’t, the flour will stay dry and white, tasting like dust. I use a high-quality oil mister to get into every nook and cranny of the breading.
Flour Base
Start by dredging the rings in seasoned flour. This absorbs the surface moisture and gives the egg something to grab. I usually add a little smoked paprika to the flour for extra color.
Egg Wash
Whisk your eggs until they are completely smooth with no streaks. A splash of water or milk helps thin it out so it doesn’t get too clumpy. I dip each ring carefully to ensure total coverage.
Panko Crumbs
Press the rings firmly into the panko to make sure they stick. I like to double-dip the rings for an extra thick crust. This creates a sturdy shell that protects the onion inside.
The Freeze Step
Pop the tray of breaded rings into the freezer for a few minutes. This prevents the mess that happens when wet batter hits a hot basket. I found this step cut down my cleanup time significantly.
Oil Spraying
Spray the rings once they are in the basket. Then, flip them halfway and spray the other side. This is the only way to get that deep-fried golden look.
Cooking Time
Rings usually take about eight to ten minutes at 370°F. I keep them in a single layer with no overlapping at all. If they touch, they will stick together and the breading will rip.
Checking Crispness
Shake the basket gently to hear the sound of the rings. If they sound like dry crackers hitting the plastic, they are ready. If they sound soft, give them another minute.
How Do You Store and Reheat Them?
Leftover onions are great, but they can get slimy if you store them wrong. I always let them cool completely before putting them in a container. If you trap the steam, you end up with a soggy vegetable texture the next day.
Glass containers are better than plastic for onions because they don’t absorb the smell. Onions have a way of lingering in plastic for weeks. I keep them in the fridge for up to four days.
Reheating is where the air fryer shines brighter than the microwave. A microwave will turn your onions into rubber bands. The air fryer brings back the life and the crunch in just a couple of minutes.
Cooling Down
Spread the onions out on a plate to cool. This stops the cooking process and lets the moisture evaporate. I never put hot onions directly into a sealed lid.
Container Choice
Use a glass jar or a snap-top glass bowl. This keeps the onion scent from taking over your entire refrigerator. It also makes it easier to see how much you have left.
Reheat Temperature
Set the air fryer to 350°F for reheating. You don’t want to cook them further, just warm them through. I find that a lower heat prevents them from getting too dark.
Reheat Time
Two or three minutes is usually all it takes. I give the basket one good shake halfway through. It is amazing how fast they crisp back up.
Texture Check
The onions should feel light and a bit oily again. If they seem dry, a tiny spray of oil can help. I usually skip the oil and just let the natural fats do the work.
Using Leftovers
Cold air fried onions are actually great on cold sandwiches. I also toss them into omelets or over salads. They add a deep, toasted flavor that raw onions just can’t match.
Are There Common Problems to Avoid?
Even after years of cooking, I still run into issues if I get lazy with my routine. The most common problem is excessive smoke from fryer when the oil drips onto the heating element. You have to keep the bottom tray clean to avoid this.
Another issue is the “onion skin” effect where the outer layer becomes like parchment paper. This happens if your temperature is too low and you cook them for too long. You want a fast, hot blast to soften the inside while browning the outside.
If your onions taste like chemicals, check your oil. Some cheap sprays have additives that react poorly to the high heat of an air fryer. Stick to pure oils with no propellants for the best flavor.
Cleaning The Tray
Wipe out the bottom of your air fryer after every onion session. Onions release a lot of sugar that can burn onto the metal. I use warm soapy water and a soft sponge.
Managing Smoke
If you see white smoke, you probably have old grease in the machine. Stop the timer and wipe the bottom of the basket. This keeps your kitchen from smelling like a bonfire.
Fixing Thickness
If you notice some pieces are burnt and others are raw, your knife skills are the culprit. I started using a mandoline to get perfect slices every time. Just be careful with your fingers.
Dealing With Smell
Onions leave a strong scent in the air fryer basket. I run a cycle with a slice of lemon and some water to neutralize it. This keeps your next batch of cookies from tasting like shallots.
Preventing Sticking
If you find onions sticking to bottom, you might be using too little oil. A light coating acts as a barrier between the vegetable and the metal. I also shake the basket more often to keep them moving.
Avoiding Dryness
If your onions look dry and papery onion rings, they stayed in too long at a low heat. Increase the temp and shorten the time. You want the moisture trapped inside, not baked out.
Balancing Salt
Never salt your onions before they go into the air fryer. Salt draws out moisture, which leads to steaming instead of frying. I salt them the second they come out of the hot basket.
Heating Element Check
Make sure no small onion pieces flew up into the top heating element. This can cause a fire or a terrible smell. I always peek at the coils after the machine cools down.
Final Thoughts
I hope this guide helps you turn those raw onions into something spectacular. It took me a lot of burnt batches to realize that heat management is the real secret. Take your time, watch the colors change, and don’t be afraid to pull the basket out early. You have the tools now to make the perfect topping for your next meal!
Quick Guide Table
| Onion Cut Style | Temperature | Cooking Time |
|---|---|---|
| Thin Slices | 370°F | 8-10 Minutes |
| Medium Rings | 370°F | 12-15 Minutes |
| Thick Wedges | 350°F | 15-18 Minutes |
| Diced Pieces | 375°F | 10-12 Minutes |
| Pearl Onions | 360°F | 12-14 Minutes |
| Shallot Slices | 340°F | 5-7 Minutes |
| Breaded Rings | 370°F | 8-10 Minutes |
| Whole Bloom | 350°F | 20-25 Minutes |
| Red Onion Slabs | 380°F | 10-12 Minutes |
| Reheating Leftovers | 350°F | 2-3 Minutes |
Frequently Asked Questions
Is it necessary to preheat the air fryer?
Yes, preheating ensures the onions start cooking immediately. If you start with a cold basket, the onions often release too much moisture and become soggy before they have a chance to crisp up.
Can you use frozen onions in the air fryer?
You can, but they will take longer to cook because of the extra ice. Expect to add about three to five minutes to the total time. Shake them more often to help the extra water evaporate.
Are air fried onions healthier than deep fried ones?
Air fried onions use significantly less oil than deep frying. You only need a light coating to get great results. This reduces the total fat and calorie content while keeping the flavor you enjoy.
Do onions smell up the whole house when air fried?
Onions do have a strong aroma, but the air fryer’s filter helps contain some of it. If the smell is too much, place the air fryer under a kitchen vent hood. This pulls the scent away.
Does the type of oil matter for onions?
Yes, because onions need a fairly high heat to brown well. Use avocado or grapeseed oil because they can handle 370°F without smoking. Avoid extra virgin olive oil as it can taste bitter when heated.
Should you salt onions before air frying?
No, always salt them after they are finished cooking. Salting them before they go in the basket draws out water. This makes them steam rather than fry, resulting in a limp texture.
Will the onions fly into the heating element?
Lightweight onion slices can occasionally be picked up by the fan. If this happens, use a small metal rack to weigh them down. Cutting them slightly thicker also helps keep them in the basket.
How do you know when onions are perfectly caramelized?
Look for a dark golden color and a soft, jam-like texture. They should have shrunken significantly from their original size. A quick taste test will confirm that the sharp raw flavor is completely gone.
