
As an Amazon Associate, I earn from qualifying purchases at no extra cost to you.
How to Cook Butternut Squash in Air Fryer (How Long It Takes)
Roasting squash in a traditional oven takes forever, but the air fryer changes the game completely. Most people end up with soggy, mushy cubes because they crowd the basket or use too much oil. This guide shows you how to get perfectly tender insides with deeply caramelized, crispy edges in half the time. You will master the exact time, temperature, and tossing technique for perfect results every single single time.
To get the best results, peel the squash completely, cut the cubes into uniform half-inch pieces, and toss them with just one tablespoon of oil. Preheating your air fryer is a mandatory step for that instant crisp, and shaking the basket halfway through guarantees even browning.
Can You Cook Frozen Butternut Squash in the Air Fryer?
You can absolutely cook frozen squash cubes straight from the bag without thawing them first. Thawing actually ruins the texture, makes the veggies soggy, and prevents those beautiful crispy edges from forming.
The high heat of the air fryer vaporizes the surface ice instantly, which locks in the natural sweetness. You just need to crank the heat up slightly higher than you would for fresh veggies.
Always toss the frozen cubes with oil and spices quickly, so the seasoning sticks before the ice melts. Do not let the seasoned squash sit on the counter, but dump it straight into the hot basket.
Space out the pieces so the moisture can escape easily, which prevents the squash from steaming instead of roasting. Watch the clock closely, because frozen pieces cook slightly faster than raw, dense squash.
- Start with fully frozen cubes.
- Do not thaw the veggies.
- Crank the heat to 400 degrees.
- Toss with oil and spices quickly.
- Spread them in a single layer.
- Shake the basket every five minutes.
How to Cook Butternut Squash in Air Fryer Perfectly
Choose the Best Squash
Picking the right vegetable at the grocery store makes a massive difference in your final dish. Look for a squash that feels heavy for its size, has smooth skin, and features a deep beige color. Avoid any veggies with soft spots, green streaks, or deep cuts, because these signs mean the squash is not ripe or is starting to spoil. A matte finish means the squash is perfect, while a shiny skin usually means it was picked too early.
The shape matters just as much as the skin texture when you plan to chop it into cubes. Choose a squash with a long, thick neck and a smaller bulb end, because the neck contains solid, seedless orange flesh. This shape gives you the highest yield of perfect squares, which makes your prep work much faster and less wasteful.
Prep and Peel Like a Pro
Prepping this dense vegetable can feel intimidating, but using the right tools makes it incredibly safe and simple. Slice off the top stem and the bottom base first, which creates two flat surfaces for stability. Stand the squash upright on your cutting board, grip a sharp Y-shaped vegetable peeler tightly, and press down firmly to remove the tough skin. You must peel away the pale outer layer completely until you see the vibrant, deep orange flesh underneath.
Cut the squash in half right where the neck meets the round bulb, which leaves you with two manageable pieces. Slice the bulb in half lengthwise, grab a sturdy metal spoon, and scrape out all the stringy pulp and seeds. Rub the hollow inside clean, because any leftover strings will burn in the air fryer and create bitter flavors.
Cut Uniform Cubes
Consistency is the absolute secret to even cooking, so take your time during this crucial chopping step. Slice the seedless neck into thick planks, stack them carefully, and cut them into long sticks. Turn the sticks sideways, chop across them evenly, and aim for clean half-inch cubes. Treat the round bulb pieces the exact same way, but accept that these pieces will have slightly different shapes.
If your pieces vary too much in size, the small cubes will burn to a crisp before the large ones soften. Keep a trash bowl nearby for the odd, tiny end pieces, or save them for a future soup. Testing a few cubes against each other visually helps you maintain the right size throughout the process.
Season for Maximum Flavor
Classic savory seasonings work beautifully, but a touch of sweetness highlights the natural sugars of the vegetable. Place your dry cubes into a large mixing bowl, drizzle them with avocado oil, and use your hands to coat every side. Sprinkle salt, garlic powder, and black pepper evenly over the top, then toss the mixture vigorously until the spices stick.
For a warm autumn twist, swap the garlic for a pinch of cinnamon, nutmeg, and a tiny splash of maple syrup. Do not add the syrup until the last three minutes of cooking, because the sugar burns quickly under intense heat. Experimenting with smoked paprika or chili powder adds a fantastic smoky kick that contrasts nicely with the sweet flesh.
Arrange in a Single Layer
Crowding the basket is the number one mistake people make, and it always results in a mushy texture. Dump your seasoned cubes into the preheated basket, then use a spatula to spread them out evenly. The hot air must circulate freely around every single piece, so leave a little breathing room between the squares.
If you are cooking a large batch for a big family meal, cook the veggies in two separate rounds. Overcrowding traps steam inside the machine, which boils the squash instead of giving you those coveted crispy edges. Keeping the pieces separated ensures that beautiful caramelization happens on all four sides of the cubes.
Shake and Roast to Perfection
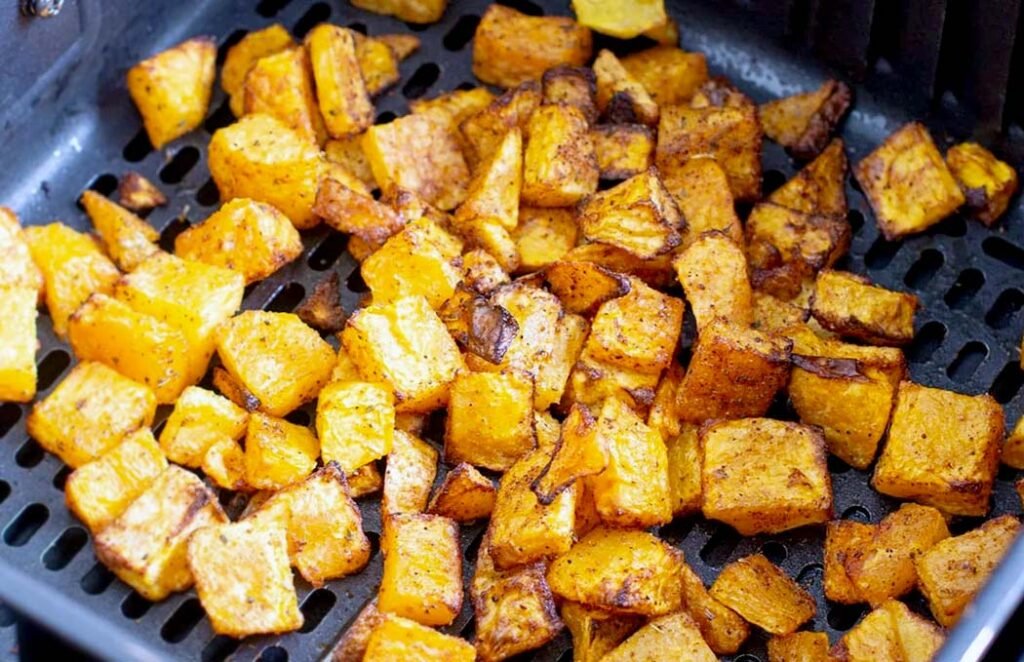
Set your air fryer to 395 degrees, which is the sweet spot for browning without burning the interior. Slide the basket inside, set the kitchen timer for fifteen minutes, and let the machine work its magic. You must pull the basket out every five minutes, give it a vigorous shake, and flip the pieces around.
The cubes are done when the edges look deeply browned, and a fork slides into the center easily. If you want an extra crunch, leave them in for two additional minutes while watching them like a hawk. Empty the hot basket immediately into a serving bowl so the steam does not soften the crispy outer skin.
- Select a heavy matte squash.
- Peel until deep orange appears.
- Scoop out all stringy pulp.
- Dice into even half-inch cubes.
- Avoid crowding the frying basket.
- Shake every five minutes regularly.
What is the Best Temperature for Air Frying Squash?
Cooking at 395 degrees provides the perfect balance between internal tenderness and external crispiness. Lower temperatures like 350 degrees take too long to cook, which dries out the interior and leaves the outside pale. High heat melts the natural sugars quickly, which creates a beautiful glaze on the surface of each cube.
If you notice the edges turning black too quickly, drop the heat down to 380 degrees immediately. Every air fryer model behaves a bit differently, so you must adjust the temperature based on your specific machine. Smaller air fryers trap heat more intensely, which means they often cook faster than large countertop ovens.
- Set the machine to 395.
- Lower heat if edges blacken.
- Higher heat cooks frozen pieces.
- Smaller machines run much hotter.
- Consistent heat ensures even browning.
- Avoid low temperatures entirely.
Final Thoughts
I hope you feel inspired to try this simple method tonight because it truly changes how you view this winter vegetable. Preparing healthy air fryer sides does not have to take hours, and cleanup is an absolute breeze. Grab your sharpest knife, pick out a beautiful squash, and start chopping those cubes today. You have got this, so go create a delicious, crispy side dish your whole family will love.
| Squash Weight | Prep Time | Air Fryer Temp | Total Cook Time | Shake Frequency | Cube Size |
| 1 Pound | 10 Minutes | 395 Degrees | 15 Minutes | Every 5 Minutes | 0.5 Inch |
| 2 Pounds | 15 Minutes | 395 Degrees | 20 Minutes | Every 5 Minutes | 0.5 Inch |
| 3 Pounds | 20 Minutes | 395 Degrees | 25 Minutes | Every 5 Minutes | 0.5 Inch |
| 1 Bag Frozen | 2 Minutes | 400 Degrees | 18 Minutes | Every 4 Minutes | Pre-cut |
Frequently Asked Questions (FAQs)
Can I leave the skin on the squash?
No, the skin on this specific vegetable is far too tough and fibrous to eat comfortably. Always peel it completely before cooking to ensure a smooth, tender texture.
Is it necessary to preheat the air fryer?
Yes, preheating ensures the hot air crisps the surface of the squash cubes immediately upon contact. It prevents the cubes from absorbing too much oil and getting soggy.
Are these squash cubes good for meal prep?
Absolutely, you can roast a large batch and store them in an airtight container for later. They stay fresh and delicious in the fridge for four days.
Do I need to use a lot of oil?
No, you only need one tablespoon of oil to achieve a beautiful, crispy texture. Too much oil will weigh down the veggies and make them mushy.
Can I use olive oil for roasting?
Yes, olive oil works wonderfully for adding flavor and helping the spices stick. Avocado oil is another excellent choice because it handles high heat perfectly.
How do I reheat the leftover squash cubes?
Pop the leftovers back into the air fryer basket at 350 degrees for three minutes. This quickly restores the original crispy texture without drying the inside.
Can I roast the seeds in the machine?
Yes, you can clean the seeds, toss them with salt, and fry them separately. They make a fantastic, crunchy snack at 325 degrees for ten minutes.
Does butternut squash taste sweet naturally?
Yes, it features a lovely, mild sweetness that intensifies beautifully during the air frying process. The high heat caramelizes the natural sugars inside the flesh.
