
As an Amazon Associate, I earn from qualifying purchases at no extra cost to you.
How to Fix a Dripping Faucet (Easy Fix)

A dripping faucet drives everyone a little crazy, especially late at night. That steady drip wastes water, and it can push your bill higher than expected. Good news, though, most drips come from small, cheap parts that wear out over time. Keep reading, and you’ll learn what causes it, and how to stop it fast.
You can stop most drips by replacing the worn washer, O-ring, or cartridge inside the faucet. First, turn off the water supply under the sink. Next, take apart the handle, and pull out the old part. Bring it to the hardware store, match it exactly, and put in the new one. Turn the water back on, and check for drips.
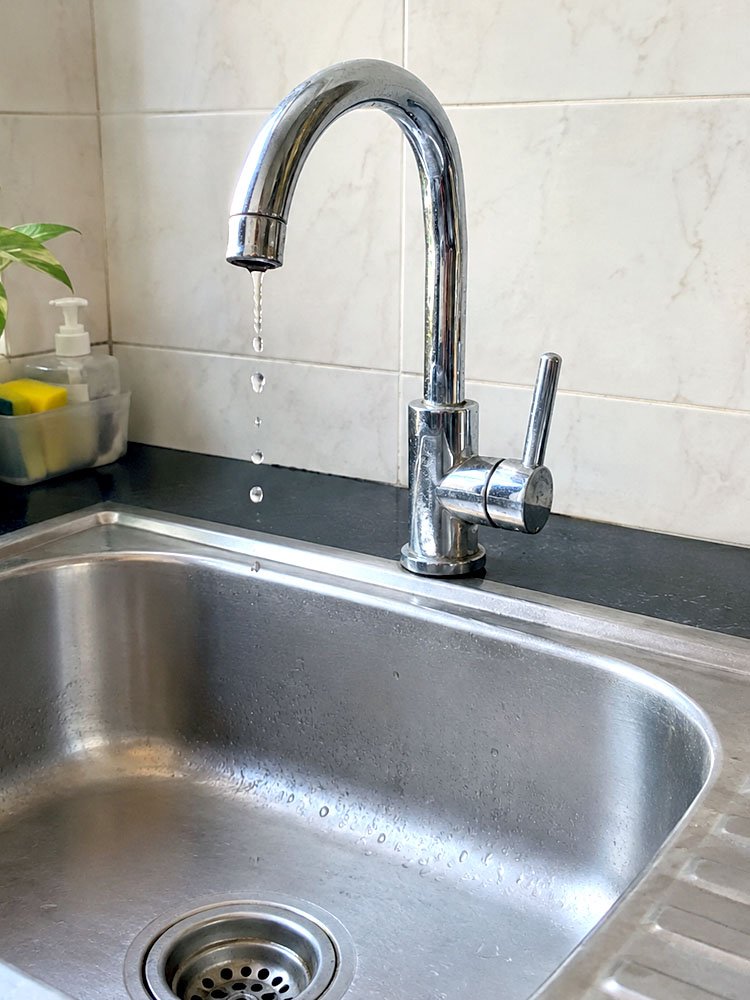
Why Does a Faucet Drip?
A dripping faucet almost always means a small part inside has worn out, cracked, or shifted out of place, and it usually happens slowly over many months.
Worn Rubber Washer
A washer sits inside the faucet, and it presses against the valve seat every time you turn the handle. Over years, that constant rubbing wears it down. Once it’s worn, water sneaks past, and you get that steady drip from the spout.
Damaged O-Ring
The O-ring is a small rubber ring that seals the base of the spout. It can crack or flatten with age. When that happens, water leaks around the handle, not just from the spout tip, and you’ll notice drips near the base too.
Corroded Valve Seat
The valve seat connects the faucet to the spout, and mineral deposits from hard water build up there over time. That buildup causes corrosion around the seat. Once it corrodes, the washer can’t seal properly anymore, and drips start showing up slowly.
Loose Parts
Sometimes the fix has nothing to do with worn parts at all. Screws, nuts, or the packing that holds everything together can loosen over years of use. A loose part lets water sneak through small gaps, even if every piece inside looks fine.
Faulty Cartridge
Newer faucets often use a cartridge instead of a washer. Inside that cartridge sits a small mechanism that controls water flow. When it wears out or cracks, water leaks past it, and no amount of tightening the handle will make the drip stop.
High Water Pressure
Too much water pressure in your pipes can strain every part of the faucet, even brand new ones. That extra pressure pushes water past seals that would normally hold up fine. A cheap pressure gauge can tell you if this is the real culprit.
Before you grab any tools, take a minute to watch the faucet closely, and figure out exactly where the water escapes from. That small detail saves you time and guesswork later.
- Check under the handle first, that’s the most common spot
- Look at the base of the spout for slow leaks
- Feel for moisture around any screws or joints
- Turn the water on low, and watch closely
- Note the faucet brand and model before buying parts
- Write down which handle drips, hot or cold
How to Fix a Dripping Faucet the Right Way
A dripping faucet takes patience more than skill, and most jobs need only a few basic tools from around the house, plus a little time.
Shut Off the Water Supply
Find the shutoff valves under the sink, and turn them clockwise until they stop turning. This step always comes first, no matter which part you end up fixing, so don’t skip it.
Once the valves are closed, open the faucet handle to release any water still sitting in the lines. This keeps you dry, and it keeps the work area clean while you take things apart.
Plug the drain with a rag or a stopper too. Small screws and springs love to disappear down there, and losing one mid-repair is the last thing you want to deal with.
Remove the Faucet Handle
Look for a small cap on top of the handle, it usually pops off with a flathead screwdriver. Underneath, you’ll find a screw holding the whole handle in place.
Loosen that screw, and set it somewhere safe, a small cup works great for this. Gently pull the handle straight up and off, wiggling it a little if it feels stuck.
Take a photo before you go further, it helps a lot when it’s time to put everything back together the same way it came apart.
Replace the Worn Washer
Once the handle is off, you’ll see the stem, and the washer sits right at the bottom of it. Unscrew the nut holding the stem, then lift the stem out carefully.
The washer is held by a small brass screw, remove that, and the old washer should lift right off. Bring it to the store, and match the size exactly, even a tiny difference matters here.
Press the new washer into place, replace the brass screw, and snug it down. Don’t overtighten it, just enough to hold the washer firmly in place.
Swap the Old O-Ring
The O-ring sits around the base of the stem, and it’s usually thin and flat when it’s worn out compared to a fresh one. Slide it off with your fingers or a small pick.
Coat the new O-ring lightly with plumber’s grease before installing it, this helps it seat properly and last longer. Slide it into the same groove the old one came from.
Make sure it sits flat and even all the way around, a twisted O-ring won’t seal right, and you’ll be back here again in a few weeks.
Clean the Valve Seat
Hard water leaves mineral buildup on the valve seat, and that buildup stops the washer from sealing tightly. A valve seat wrench removes it for cleaning or replacement.
Soak the seat in a bit of vinegar for ten minutes, this loosens mineral deposits without much scrubbing needed. Wipe it down with a soft cloth afterward.
If the seat looks pitted or damaged beyond cleaning, replace it entirely, they’re inexpensive and sold at any hardware store near the washers.
Reassemble and Test the Faucet
Put the stem back in, following the photo you took earlier, then tighten the nut back down snugly by hand.
Slide the handle back on, replace the screw, and snap the small cap back over top. Everything should feel snug, not loose or wobbly.
Turn the water supply back on slowly, then run the faucet for a minute. Watch closely underneath and around the handle for any new drips.
Most fixes hold for years once the right part goes in, so don’t rush this last step, a careful check now saves another repair later.
- Turn the water on slowly, not all at once
- Run both hot and cold sides for a full minute
- Check under the sink for hidden drips too
- Wipe everything dry, then look again after ten minutes
- Keep the old parts until you’re sure the fix worked
- Tighten anything that still feels loose to the touch
Also Read: How to Remove Odors From Fridge the Easy Way
Can You Fix a Dripping Faucet Yourself?
Most people can handle this repair without calling anyone, and that’s genuinely good news for your wallet. The parts are cheap, the tools are basic, and the whole job usually takes less than an hour once you know what’s wrong. Still, a little nervousness is normal the first time you take a faucet apart.
That said, some situations call for a professional instead. Old pipes that feel fragile, faucets with hidden or unusual designs, or any leak you can’t locate on your own are good reasons to call a plumber. There’s no shame in that, some setups are just trickier than others, and a wrong move can turn a small fix into a bigger mess.
For a standard kitchen or bathroom faucet, though, the steps stay pretty consistent across brands. Watch a video of your exact model if you’re unsure, it helps a ton to see the parts before you start pulling anything apart yourself.
- Basic drips almost always fit a do-it-yourself repair
- Unusual or commercial faucets may need a pro
- Watching your specific model helps a lot
- Keep the old parts as a size reference
- Don’t force anything that feels stuck or tight
- Call a plumber if water won’t shut off fully
How Much Does It Cost to Fix a Dripping Faucet?
Money matters, and thankfully this is one of the cheaper home repairs out there. A washer or O-ring usually costs just a couple of dollars, sometimes less if you buy a small assorted kit. Cartridges run a bit more, somewhere between ten and thirty dollars depending on the faucet brand.
Compare that to hiring a plumber, who often charges a flat visit fee before any parts get added on top. For a simple washer swap, that fee alone can cost more than doing the whole job yourself. Time adds up too, since scheduling a visit means waiting around your house for someone to show up.
Of course, cost isn’t the only factor worth weighing here. If the leak involves a valve seat replacement or something more involved, factor in a bit more for parts and maybe an extra tool or two you don’t already own.
- Washers and O-rings cost just a few dollars
- Cartridges run higher, ten to thirty dollars typically
- Plumber visit fees often beat the part cost alone
- Kits with mixed sizes save repeat trips to the store
- Tools like a wrench are a one time cost
- Doing it yourself usually saves real money overall
See Also: How to Clean a Sink Drain (Expert Tips)
What Tools Do You Need to Fix a Dripping Faucet?
Nothing fancy sits on this list, and that’s honestly one of the best parts about this repair. A flathead and a Phillips screwdriver cover most handles, since caps and screws vary between different faucet styles and brands. An adjustable wrench handles the larger nuts underneath.
Plumber’s grease helps new O-rings and washers seat smoothly, and it’s worth the couple dollars it costs at any hardware store. Some faucets need a valve seat wrench too, a specialty tool, but a cheap one works just fine for occasional home use.
Keep a small container nearby for screws and tiny parts, they roll away easily and hide well. A flashlight helps too, since the space under most sinks stays dim even with the cabinet doors wide open.
- A flathead and Phillips screwdriver set
- An adjustable wrench for larger nuts
- Plumber’s grease for new seals
- A valve seat wrench if needed
- A small container to hold tiny screws
- A flashlight for dim under sink spaces
How Do You Stop a Faucet From Dripping Overnight?
Sometimes there’s no time for a full repair, and the drip just needs to stop for now so everyone can sleep. Turning off the water supply valve under the sink stops it completely, though obviously you lose water access there until morning.
If shutting off the whole line feels excessive, try tightening the packing nut behind the handle a quarter turn. This sometimes stops a slow drip temporarily, buying you time until you can grab the right replacement parts during the day.
A folded towel or cloth wrapped loosely around the spout can also muffle the sound if the drip itself isn’t the main concern, just the noise keeping you awake. It’s not a real fix, but it helps in a pinch.
- Shut the supply valve for a full stop
- Tighten the packing nut slightly as a temporary fix
- Wrap a towel around the spout to muffle sound
- Place a folded cloth in the sink to soften drips
- Avoid duct tape, it damages the finish
- Plan the real fix for the very next day
Final Thoughts
I hope this made a dripping faucet feel a lot less mysterious. Most fixes come down to one small, cheap part, and a bit of patience. Take your time, keep track of the pieces, and you’ll likely have it sorted in under an hour.
| Faucet Part | Common Problem | Typical Fix |
|---|---|---|
| Rubber washer | Wears down with friction | Replace with matching size |
| O-ring | Cracks or flattens with age | Swap and grease the new one |
| Valve seat | Mineral buildup from hard water | Clean with vinegar or replace |
| Cartridge | Internal mechanism wears out | Full cartridge replacement |
| Packing nut | Loosens over time | Tighten a quarter turn |
| Handle screw | Loosens with regular use | Retighten with screwdriver |
| Supply line | Old or corroded fittings | Replace the connector |
| Aerator | Clogged with mineral deposits | Unscrew and rinse clean |
| Spout | Worn seal at the base | Replace O-ring underneath |
| Water pressure | Too high for the fixture | Add a pressure regulator |
Frequently Asked Questions
Is It Normal for a New Faucet to Drip?
It shouldn’t drip right away, and if it does, something likely got installed incorrectly during setup. Check that every part seated fully during installation, since a loose cartridge or washer often causes early drips on brand new fixtures.
Can a Dripping Faucet Raise Your Water Bill?
Yes, and the difference adds up more than most people expect over a full month. A slow drip can waste several gallons a day, which turns into hundreds of gallons wasted before you even notice the change on your bill.
Are All Faucet Washers the Same Size?
No, washer sizes vary quite a bit between brands and faucet models, so matching yours exactly matters for a proper seal. Always bring the old washer with you to the store, that way you avoid a second trip.
Do Cartridge Faucets Drip Less Than Washer Ones?
Generally yes, cartridge faucets tend to last longer between repairs compared to older washer style models. That said, cartridges still wear out eventually, and replacement remains a simple, affordable fix when that day comes around.
Does Hard Water Cause More Faucet Drips?
Absolutely, hard water leaves mineral deposits on valve seats and inside cartridges, which speeds up wear significantly over time. Homes with hard water often need faucet repairs more often than homes with softer, treated water supplies.
Should You Replace the Whole Faucet Instead of Repairing It?
Not usually, most drips fix with a small, cheap part rather than a full replacement. Consider a full swap only if the faucet is very old, visibly damaged, or if repairs keep happening again every few months.
Will Tightening the Handle Stop a Drip?
Sometimes, but only temporarily, and only if a loose packing nut is the actual cause behind the leak. If tightening doesn’t help within a day or two, the washer or O-ring likely needs a proper replacement instead.
Do You Need to Turn Off Water to the Whole House?
No, just the shutoff valves under the specific sink, which control that fixture alone in most homes. Whole house shutoffs are only needed if your sink lacks individual valves, which is fairly rare in newer construction.
