
As an Amazon Associate, I earn from qualifying purchases at no extra cost to you.
How to Oil a Wooden Cutting Board (Easy Steps)

A dry cutting board cracks faster than most people expect, and that’s a real shame after all the meals it’s helped make. Oil keeps the wood safe, smooth, and ready for years of chopping. Below, you’ll find the exact steps, the right oil to pick, and simple tips to keep your board looking great for a long time.
You want to oil a wooden cutting board every few weeks, or sooner if the wood looks dry or pale. Clean the board first, then dry it fully with a towel. Rub food-grade mineral oil or a beeswax blend into the wood with a soft cloth, moving along the grain. Let it soak for a few hours or overnight, then wipe off any extra oil before the board goes back to work.
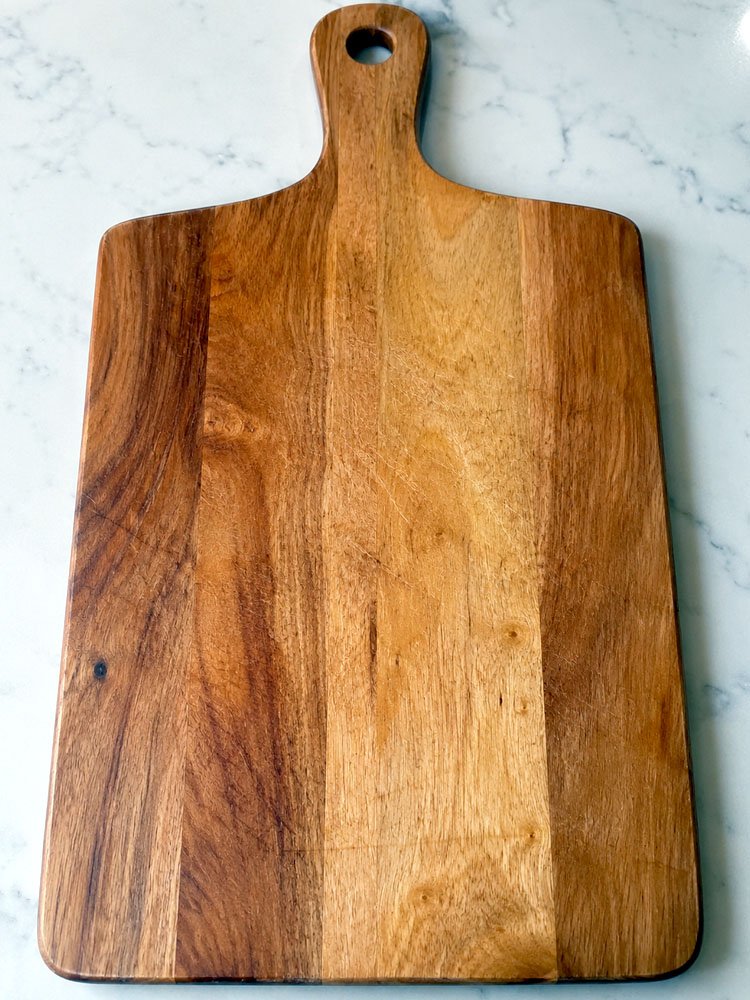
Why Does a Wooden Cutting Board Need Oil?
Wood breathes, and that means it loses moisture over time, especially near a sink or stove. Oil replaces what’s lost and keeps the board from turning brittle.
The Wood Dries Out Fast
Kitchen air pulls moisture out of wood all day long, and heat from a stove makes it worse. Once the wood dries too much, it shrinks unevenly, and that’s when little cracks start to form along the surface.
Water Sneaks Into the Grain
Every time a board gets washed, tiny amounts of water slip into the wood fibers. Without oil sealing the surface, that water sits there, swells the grain, and slowly weakens the whole board over time.
Cracks Start From the Inside
Small splits often begin deep in the wood, long before anyone notices them on top. Dry wood flexes less, so pressure from chopping builds up and finds the weakest spot to break through.
Bacteria Find a Home in Dry Wood
Rough, dry wood has more open pores than smooth, oiled wood. Food bits and moisture settle into those pores easily, giving bacteria a cozy spot to grow between cleanings.
Food Stains Sink Deeper
Beet juice, berry stains, and turmeric love unprotected wood, and they soak right in. A thin oil layer fills the pores first, so stains sit closer to the surface and wipe away easier.
A Board Without Oil Wears Out Quick
Boards left dry for months often warp, split, or splinter well before their time. Regular oiling adds years of use, and it costs far less than replacing a board too soon.
Taking care of a cutting board really doesn’t take much effort, and the payoff is huge for how long it lasts. Here’s a quick recap of why oil matters so much:
- Oil locks moisture into the wood, so it won’t dry out and crack
- A sealed surface keeps water from soaking into the grain
- Fewer open pores means less room for bacteria to grow
- Stains stay on the surface instead of sinking deep
- Oiled wood flexes better, so it resists splitting under pressure
- A well-oiled board simply lasts years longer than a neglected one
How to Oil a Wooden Cutting Board the Right Way
Getting this right just takes a few simple steps, plus the right oil for the job. Follow this order, and the board will thank you for it.
Clean the Board First
Wash the board with warm water and a little mild soap, scrubbing off any leftover food. Rinse it well, since soap left behind can mix strangely with oil later. A clean surface lets the oil soak in evenly, instead of sitting on top of grease or crumbs. Skipping this step often leads to patchy, uneven results once the oil goes on.
Let the Wood Dry Completely
Set the board upright, or lay it flat on a towel, and let it air dry fully. Trapped moisture under a layer of oil can lead to mold, so patience here really matters. This usually takes a few hours, though a full day is safer if the kitchen feels humid. Wood that still feels cool or damp to the touch isn’t ready yet.
Pick a Safe Oil
Food-grade mineral oil works well, and it’s cheap, easy to find, and doesn’t go rancid. Beeswax and mineral oil blends add extra shine and a bit more water resistance too. Skip cooking oils like olive or vegetable oil, since those turn sticky and smelly over time. A dedicated board oil or cream saves headaches down the road.
Apply the Oil With a Cloth
Pour a small amount of oil onto the board’s surface, then spread it with a soft, lint-free cloth. Work in the direction of the wood grain, covering the top, sides, and bottom evenly. Don’t forget the edges and any knife grooves, since dry spots there crack first. A little oil goes further than people expect, so start light and add more if needed.
Let It Soak Into the Wood
Leave the oiled board alone for several hours, or overnight if there’s time to spare. Wood drinks up oil slowly, and rushing this step wastes product and shortens how long the coat lasts. Set the board somewhere flat, away from direct sunlight or heat, while it absorbs everything. Checking on it once or twice is fine, but resist the urge to touch it too much.
Wipe Off the Extra Oil
Once the soak time is done, grab a clean cloth and wipe away anything the wood didn’t absorb. A greasy, sticky feel means there’s leftover oil sitting on top that needs removing. Buff the surface gently until it feels smooth, not slick or wet to the touch. The board is ready for the kitchen once it feels dry, not oily, under a light touch.
Sticking to this routine keeps a board healthy for years, and it barely takes any real effort once it’s a habit. A few reminders make the whole process even smoother:
- Always start with a completely clean, dry board
- Use only food-safe oils, never cooking oils from the pantry
- Apply oil along the grain, not against it
- Give the oil plenty of time to soak in fully
- Wipe off extra oil so the surface doesn’t feel sticky
- Repeat the whole process every three to four weeks
Also Read: How to Clean a Sink Drain (Expert Tips)
What Oil Should You Use on a Cutting Board?
Not every oil belongs on a cutting board, and picking the wrong one causes more problems than it solves. Food-grade mineral oil sits at the top of most lists, mainly because it’s odorless, colorless, and never goes bad. Beeswax blends add a nice layer of extra protection, plus a soft shine that plain mineral oil doesn’t give. Coconut oil works too, but only the fractionated kind, since regular coconut oil can turn rancid over time.
Cooking oils like olive, vegetable, or canola oil seem convenient, but they’re actually a poor choice here. Those oils are meant to be eaten quickly, not sit on wood for weeks at a time. Left on a board, they turn sticky, smell off, and can even attract more bacteria than a dry board would. Walnut oil is another option, though it’s best skipped in kitchens with nut allergies around.
For anyone who wants a simple, no-fuss option, food-grade mineral oil really can’t be beat. It’s inexpensive, sold at most hardware and grocery stores, and doesn’t require any special storage. Board creams that blend mineral oil and beeswax offer a bit more shine and water resistance, if that’s the goal.
- Food-grade mineral oil, the most common and reliable pick
- Beeswax and mineral oil blends for extra shine and protection
- Fractionated coconut oil, which resists turning rancid
- Walnut oil, though it’s best avoided around nut allergies
- Skip olive oil, vegetable oil, and canola oil entirely
- Look for labels marked “food safe” or “food grade” before buying
How Often Should You Oil a Wooden Cutting Board?
Timing really depends on how often a board gets used, and how it’s washed between meals. A board used daily and washed with hot water often needs oil every one to two weeks. One used a few times a week can usually stretch to once a month without trouble. Watching the wood itself is more reliable than sticking to a strict calendar schedule.
Dry, pale, or rough patches are the clearest sign a board is overdue for oil. Running a hand across the surface tells a lot, since healthy wood feels smooth, not scratchy or dull. Water that beads up on a fresh board, instead of soaking in fast, means the seal is still doing its job well. Once water starts absorbing quickly again, that’s the wood asking for another coat.
Seasons matter too, since dry winter air pulls more moisture from wood than humid summer months do. Kitchens near a heater or stove may need oiling more often than a board stored somewhere cooler.
- Daily-use boards often need oil every one to two weeks
- Occasional-use boards can usually go about a month between coats
- Dry, dull, or rough wood is a clear sign it’s time
- Water soaking in fast means the seal has worn away
- Winter and heated kitchens may call for more frequent oiling
- When in doubt, a light coat rarely causes any harm
Can You Use Olive Oil on a Cutting Board?
Olive oil sounds like a natural choice, since it’s already sitting in most kitchens, but it’s not a good pick here. Cooking oils like olive oil are made to be used quickly, not to sit on wood for weeks. Over time, olive oil turns rancid, and that brings a sour, unpleasant smell right into the board itself. That smell can transfer to food later, which nobody wants after spending time preparing a meal.
Rancid oil also creates a sticky, tacky film that attracts more dust, crumbs, and bacteria than dry wood would. Cleaning that residue off takes real effort, often requiring a deeper scrub than a quick rinse. Choosing a proper food-safe finishing oil from the start saves that whole mess down the road. Mineral oil and beeswax blends stay stable far longer, without any of the spoiling risk olive oil carries.
Anyone who already used olive oil on a board doesn’t need to panic, though switching soon is smart. Washing the board well, letting it dry, then applying a proper food-grade oil resets things nicely.
- Olive oil turns rancid and smells sour over time
- Rancid residue can transfer unwanted flavors to food
- Sticky films attract more dust, crumbs, and bacteria
- Food-grade mineral oil stays stable for much longer
- Switching oils is easy, just clean and dry first
- Stick to labeled “food safe” oils built for wood
How Do You Know When a Cutting Board Needs Oil?
Wood has a way of showing its needs pretty clearly, once someone knows what signs to watch for. A dull, faded look across the surface is usually the first clue that oil is running low. Fresh, well-oiled wood tends to look a little darker and richer, almost like it’s glowing slightly. Once that richness fades and the wood looks pale or chalky, it’s asking for attention again.
Touch tells a lot too, since dry wood feels rough, almost like fine sandpaper under a fingertip. Running a hand across a healthy board should feel smooth and slightly silky, not scratchy or dry. Water is another simple test, splash a few drops on the surface and watch what happens next. Beading water means the seal is holding strong, while fast-soaking water means it’s time for a fresh coat.
Cracks or splinters starting to show mean things have gone a bit too far already. Catching dryness early, before cracks appear, keeps repairs simple and keeps the board lasting much longer.
- Dull or faded wood color signals it’s time to oil
- Rough, scratchy texture means moisture has dropped too low
- Water that soaks in fast shows the seal has worn off
- Water that beads up means the board is still protected
- Small cracks or splinters mean oiling is already overdue
- Checking monthly catches dryness before real damage sets in
Final Thoughts
I hope this makes caring for a wooden cutting board feel simple, not like a chore. A clean board, dried well, then oiled with something food-safe goes a long way. Stick to a regular routine, watch the wood for dryness, and it’ll last for years of good meals ahead.
| Oil Type | Food Safe | Notes |
|---|---|---|
| Mineral Oil | Yes | Odorless, affordable, and never goes rancid |
| Beeswax and Mineral Blend | Yes | Adds shine and extra water resistance |
| Fractionated Coconut Oil | Yes | Stays liquid, resists turning rancid |
| Walnut Oil | Yes, with caution | Skip if anyone has a nut allergy |
| Pure Tung Oil | Yes, once cured | Needs several coats and full drying time |
| Boiled Linseed Oil | No | Contains additives not meant for food contact |
| Olive Oil | No | Turns rancid and smells sour over time |
| Vegetable Oil | No | Goes sticky and spoils on wood surfaces |
| Grapeseed Oil | No | Also spoils and can turn rancid quickly |
| Board Cream | Yes | Blend of oil and wax for extra protection |
Frequently Asked Questions
Is Mineral Oil Safe for Wooden Cutting Boards?
Yes, food-grade mineral oil is one of the safest and most common choices for wooden boards. It’s odorless, colorless, and doesn’t spoil or turn rancid, which makes it a reliable long-term option for regular use.
Can You Use Coconut Oil on a Cutting Board?
Yes, but only the fractionated kind, since regular coconut oil can solidify or eventually turn rancid over time. Fractionated coconut oil stays liquid at room temperature and holds up far better on wood surfaces.
Are Wooden Cutting Boards Better Than Plastic Ones?
Both have strengths, but wooden boards tend to be gentler on knife edges and naturally resist some bacteria growth. Plastic boards are easier to sanitize in a dishwasher, so the better choice depends on personal habits and care routines.
Do Cutting Boards Need Oil Even if They Look Fine?
Yes, dryness often starts beneath the surface before it becomes visible on top. Oiling on a regular schedule, rather than waiting for visible damage, keeps the wood strong and prevents cracks from forming unnoticed.
Does Oiling a Cutting Board Stop It From Warping?
Oiling helps a lot, since it keeps moisture levels balanced on both sides of the board. Warping usually happens when one side dries or absorbs water faster than the other, so even care on both sides matters most.
Should You Oil a New Wooden Cutting Board Right Away?
Yes, new boards benefit from an initial oiling before their first real use in the kitchen. Several light coats over the first week or two help seal the wood and prepare it for daily wear.
Will Washing a Cutting Board in the Dishwasher Ruin It?
Yes, dishwashers use high heat and strong water pressure that can crack, warp, or split wooden boards badly. Hand washing with warm water and mild soap protects the wood and keeps oiling efforts from going to waste.
Can You Over-Oil a Wooden Cutting Board?
It’s rare, but applying oil too often without letting it soak in fully can leave a sticky, greasy film on top. Wiping off extra oil after each application prevents buildup and keeps the surface feeling clean, not slick.
