
As an Amazon Associate, I earn from qualifying purchases at no extra cost to you.
How to Replace a Faucet Cartridge (Easy Fix)

That cartridge job sounds tricky at first, but it breaks down into a few simple stages anyone can follow right at home with basic tools.
A dripping faucet drives everyone a little crazy, especially at two in the morning. Most of the time, the real problem sits inside a small part called the cartridge. Swap it out, and that drip stops for good. This guide walks through every step, so a wrench and ten minutes fix the whole mess.
You can fix a leaky faucet by shutting off the water, taking apart the handle, and pulling the old cartridge straight out. Match the new one to the same brand and model, since cartridges aren’t universal. Push it in, line up the notches, then put the handle back together. Turn the water on, test it, and watch for drips.
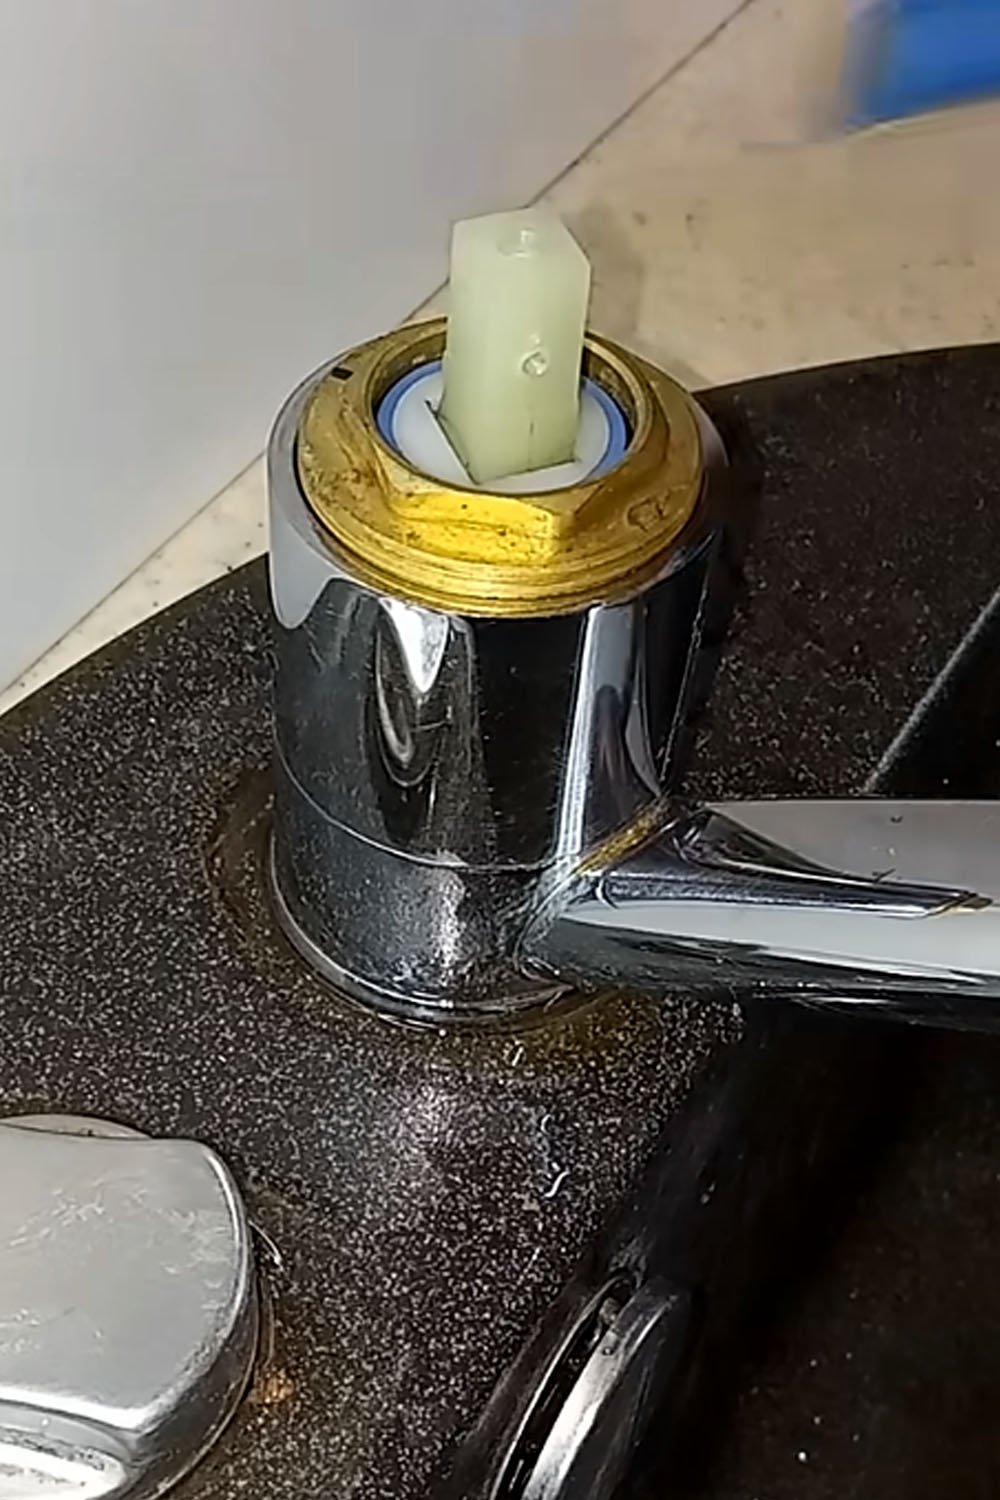
Why Does a Faucet Cartridge Wear Out?
A faucet works hundreds of times a day, and all that use slowly wears down the small moving parts inside the handle mechanism over time.
Mineral Buildup from Hard Water
Hard water carries minerals like calcium, and those minerals build up inside the cartridge over months. That buildup makes the handle stiff, or causes leaks around the base. Homes with well water see this problem more often, since mineral levels tend to run higher there.
Old Rubber Seals and O-Rings
Every cartridge has small rubber seals and O-rings tucked inside, and rubber dries out over time. Once it cracks or shrinks, water sneaks past it. That’s usually why a faucet drips slowly instead of stopping fully after you shut the handle off.
Years of Daily Handle Use
Turn a faucet handle enough times, and metal parts start to loosen inside the cartridge. Springs weaken, plastic pieces wear thin, and the whole thing gets shaky. Ten years of daily use is often enough to wear a cheap cartridge completely out.
Cheap Parts from the Factory
Not every cartridge gets made the same way, and cheaper ones use thinner plastic or weaker springs. These parts fail faster, sometimes within a year or two. Spending a little more on a solid brand name cartridge usually saves money later on.
High Water Pressure at Home
Water pressure that runs too high puts extra stress on every seal and spring inside the cartridge. Over time, that constant pressure pushes seals out of shape faster than normal. A pressure gauge from the hardware store checks this in minutes.
A Cracked or Warped Body
Sometimes the cartridge itself cracks, especially if it froze once or got twisted too hard during a repair. A warped body never seals right again, no matter how many new O-rings go inside it. Replacement becomes the only real fix.
Knowing why cartridges fail helps pick the right fix, and sometimes a cleaning solves it. Still, when a cartridge cracks or wears down, replacing it beats fighting the same drip every week.
- Check the faucet brand and model before buying a replacement cartridge
- Look for water spots or corrosion around the base
- Test water pressure if leaks keep coming back
- Feel for a stiff or wobbly handle when turning it
- Listen for squeaking sounds during normal use
- Ask a hardware store clerk to match the cartridge number
How to Replace a Faucet Cartridge Step by Step
That cartridge job sounds tricky at first, but it breaks down into a few simple stages anyone can follow right at home with basic tools.
Turn Off the Water Supply
Every faucet has small shutoff valves underneath the sink, usually two of them side by side. Turn both valves clockwise until they stop moving completely, and don’t force them if they feel stuck.
Open the faucet handle afterward, and let any water still sitting in the lines drain out completely. This little step keeps the work area dry, and it stops a surprise splash later on.
No shutoff valves under that sink? That happens in older homes sometimes. Turn off the main water valve for the whole house instead, just to stay safe while working on the faucet.
Remove the Faucet Handle
Look for a small cap on top of the handle, or a set screw hidden underneath it. Pop the cap off with a flat screwdriver, and the screw sits right there waiting.
Loosen that screw with an Allen wrench or a small screwdriver, then lift the handle straight up and off. It should come loose without much fighting, once the screw backs out fully.
Stuck handles happen a lot, especially on older faucets with mineral buildup. Wiggle it gently, or use a bit of penetrating oil around the base to loosen things up.
Take Out the Old Cartridge
With the handle gone, a retaining clip or nut usually holds the cartridge in place. Pliers work well here, or a small flathead screwdriver for clips that are tucked in tight.
Pull the cartridge straight up and out, using pliers if it feels stubborn. Some brands need a special cartridge puller tool, so check the handle style before forcing anything.
Take a photo of the old cartridge before tossing it, since that picture helps match the new part at the store. Note the brand name stamped somewhere on it too.
Pick the Correct Replacement Part
Brand and model matter a lot here, since a Moen cartridge won’t fit a Delta faucet, and the reverse is also true. Bring the old part to the hardware store, or bring a clear photo along instead.
Ceramic disc cartridges last longer than older rubber seal versions, so upgrading during a repair often makes sense. Check the packaging for the exact model number that matches.
Skip generic parts if possible, since off brand cartridges sometimes leak again within months. A little research online, using the faucet’s model number, saves a second trip later.
Install the New Cartridge
Line up the notches on the new cartridge with the slots inside the faucet body, since the fit only works one way. Push it in firmly until it seats fully.
Add the retaining clip or nut back on, and tighten it enough to hold everything snug. Not too tight though, since over tightening can crack the plastic housing easily.
Slide the handle back over the stem, then reattach the small screw underneath the cap. Snap the decorative cap back into place once that screw feels fully secure, and give the handle a gentle wiggle to check it.
Test for Leaks and Function
Turn the shutoff valves back on slowly, and watch the connections underneath the sink closely for any small drips or leaks starting to form right away, since a bad seal shows itself fast.
Run the faucet through hot and cold settings, checking that the handle moves smoothly without sticking or squeaking anywhere along the way it turns, from full open to closed.
Give it a few minutes, then check again for slow drips. A cartridge installed correctly should stop every single drip completely, right away, with no more wobbling or noise.
That’s the whole process, start to finish. Most people finish in under half an hour, tools included. Keep the old cartridge as a backup reference for next time you need it.
- Keep a bucket handy for water that drips during the swap
- Buy a spare set of O-rings just in case
- Use plumber’s grease on new seals for a smoother fit
- Take pictures of each step before removing parts
- Turn water on slowly to check for leaks first
- Save the receipt in case the cartridge fails early
How Long Does a Faucet Cartridge Last?
Most cartridges last anywhere from five to ten years, depending on water quality and how often the faucet gets used. Homes with hard water tend to see shorter lifespans, since mineral deposits build up faster inside the moving parts.
Ceramic disc cartridges usually outlast the older rubber and spring style versions by a good margin. That’s because ceramic doesn’t wear down the same way rubber does over time, even under constant daily use in a busy kitchen.
Signs of a dying cartridge show up slowly at first, then all at once. A slight drip turns into a steady one, and the handle starts feeling loose or wobbly whenever someone turns it on.
Catching those early signs saves money down the road, since a cheap cartridge swap beats a full faucet replacement any day. Keep an ear out for squeaks, and an eye out for water spots under the sink.
- Hard water shortens cartridge life by causing mineral buildup fast
- Ceramic disc cartridges often last longer than rubber seal types
- A slight drip today can turn into a steady leak soon
- Loose or wobbly handles often signal a worn out cartridge
- Regular cleaning of the aerator can extend cartridge life some
- Replacing a cartridge early saves money compared to a new faucet
Do You Need Special Tools to Replace a Cartridge?
Most faucet repairs only need a few basic tools, things already sitting in a kitchen drawer or garage toolbox. A flathead screwdriver, an Allen wrench, and a pair of pliers cover the basics for nearly every faucet brand out there.
Some brands do call for a specific cartridge puller tool, especially Moen and Delta models with cartridges that sit deep inside the faucet body. These tools cost very little at any hardware store, and they save a lot of frustration.
Plumber’s tape and a small towel help too, even though they’re not required for the repair itself. Tape wraps around threads for a tighter seal, while the towel catches drips and keeps things dry.
Skip the fancy tool kits sold online unless doing plumbing work often, since a basic set handles almost every cartridge swap just fine. Borrowing a puller tool from a hardware store works well too.
- A flathead screwdriver handles most handle cap removal jobs
- An Allen wrench loosens most hidden set screws quickly
- Needle nose pliers grip stubborn retaining clips with ease
- A cartridge puller tool helps with tight Moen or Delta models
- Plumber’s tape seals threaded connections a little tighter
- A small towel keeps the area dry during the swap
Can a Faucet Cartridge Be Cleaned Instead of Replaced?
Sometimes a cartridge just needs a good cleaning, especially when mineral deposits are the whole problem. Soaking it in white vinegar for a few hours often breaks loose the buildup clogging up the tiny water passages inside.
Scrub gently with an old toothbrush after soaking, paying close attention to the small holes and grooves where minerals like to hide. Rinse everything under warm water before putting the cartridge back into the faucet body.
Cleaning works best on newer cartridges with only mild buildup, not on ones that are cracked, warped, or worn down from years of daily use. A cleaned cartridge with damaged seals will still leak no matter how spotless it looks.
When in doubt, replacement beats cleaning every time, since a new cartridge costs very little and removes all guesswork. Save cleaning for cartridges under a year or two old that just look a bit crusty.
- White vinegar soaks loosen mineral deposits inside old cartridges
- An old toothbrush reaches tiny grooves that trap buildup
- Cracked or warped cartridges never seal right even after cleaning
- Cleaning works best as a quick fix, not a permanent one
- Replace cartridges older than five years instead of cleaning them
- A vinegar soak overnight handles heavy, stubborn mineral buildup best
Should You Replace the Whole Faucet Instead of the Cartridge?
Replacing just the cartridge almost always makes more sense financially, since a new cartridge costs a small fraction of a whole faucet. Most drips and leaks trace back to that one worn part, not the entire fixture itself.
A full faucet replacement makes sense when the body itself cracks, corrodes, or the finish wears away past the point of fixing. Old faucets from decades ago sometimes lack replacement cartridges entirely, since those exact parts stopped being made.
Check if a hardware store still carries a matching cartridge before deciding anything, since availability changes the whole decision. A quick search using the faucet’s brand and model number usually answers this question within minutes.
Budget matters here too, since a cartridge swap runs far cheaper than hiring a plumber for a full faucet installation. Save the bigger replacement for faucets that are outdated, ugly, or falling apart beyond a simple fix.
- A new cartridge costs far less than a whole new faucet
- Cracked or corroded faucet bodies usually need full replacement
- Check cartridge availability before buying an old or rare faucet model
- Outdated faucets with worn finishes may be worth upgrading entirely
- A plumber’s labor cost matters more with full faucet installs
- Save full replacement for faucets that are truly falling apart
Final Thoughts
I hope this makes fixing that annoying drip feel simple, not scary. A faucet cartridge swap costs little, takes less than an hour, and saves a bunch of money compared to calling a plumber. Grab the right tools, match the cartridge carefully, and that steady drip should stop for good.
| Ceramic disc | Moen, Delta, Kohler | 8 to 15 years |
| Rubber seal | Older Delta, Price Pfister | 3 to 7 years |
| Ball valve | Delta single handle | 5 to 10 years |
| Compression | Older two handle faucets | 2 to 5 years |
| Cartridge with O-rings | Moen, American Standard | 5 to 8 years |
| Pressure balance | Shower and tub faucets | 6 to 10 years |
| Universal replacement | Various generic brands | 2 to 4 years |
| Thermostatic cartridge | High end shower faucets | 8 to 12 years |
| Diverter cartridge | Kitchen pull down faucets | 4 to 6 years |
| Cold and hot cartridge | Two handle bathroom faucets | 5 to 9 years |
Frequently Asked Questions
Is It Hard to Replace a Faucet Cartridge?
Not really, most homeowners finish the job in under an hour using basic tools like pliers, a screwdriver, and sometimes an Allen wrench for the handle screw underneath.
Can You Replace a Cartridge without Turning off the Water?
No, skip that step and risk a flood under the sink or a real mess in the kitchen. Always shut off the water supply valves first, then drain the lines before starting.
Are All Faucet Cartridges the Same Size?
No, cartridges vary a lot between brands and even between different models from the same brand, so matching the exact part number matters more than guessing by eye.
Do You Need a Plumber to Replace a Cartridge?
Most people handle this repair themselves without calling anyone, since it just takes basic hand tools and about thirty minutes of patient, careful work at the sink.
Does a New Cartridge Fix Low Water Pressure?
Sometimes, since a clogged or worn cartridge can restrict water flow, but low pressure often comes from a clogged aerator, or an issue with the home’s main water line instead.
Should You Replace Both Hot and Cold Cartridges Together?
Not always required, but replacing both at once saves a second repair down the road, since the other cartridge usually wears out around the same time anyway.
Will a Faucet Leak Forever without a New Cartridge?
Pretty much, yes, since a worn seal only gets worse with time and use, and tightening the handle harder just wears down the remaining parts even faster.
Is a Universal Cartridge a Good Replacement Option?
Universal cartridges work in a pinch, but brand specific parts almost always seal better and last much longer, so stick with the exact match whenever possible.
